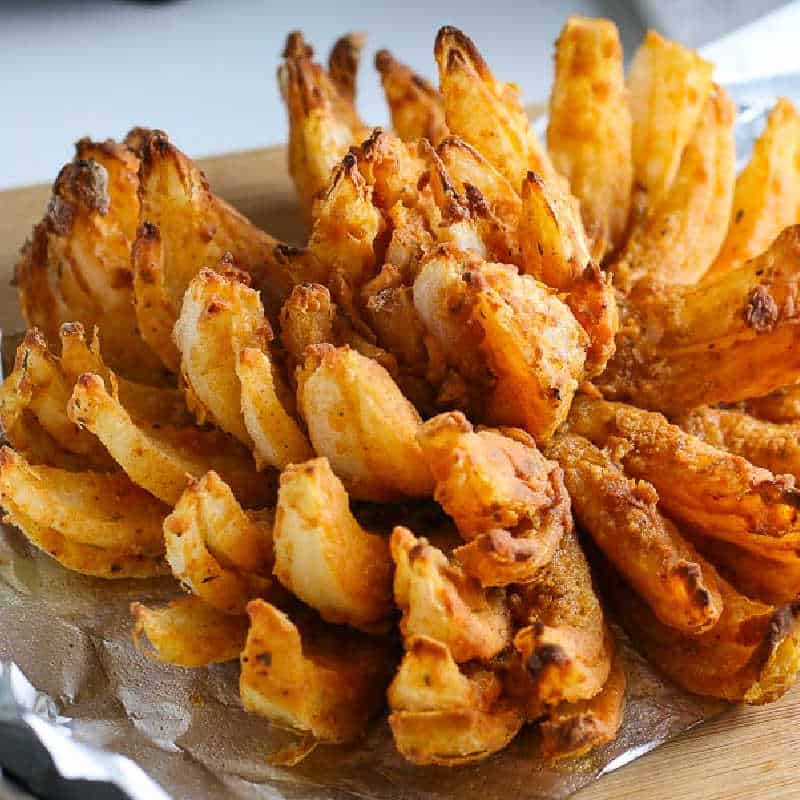
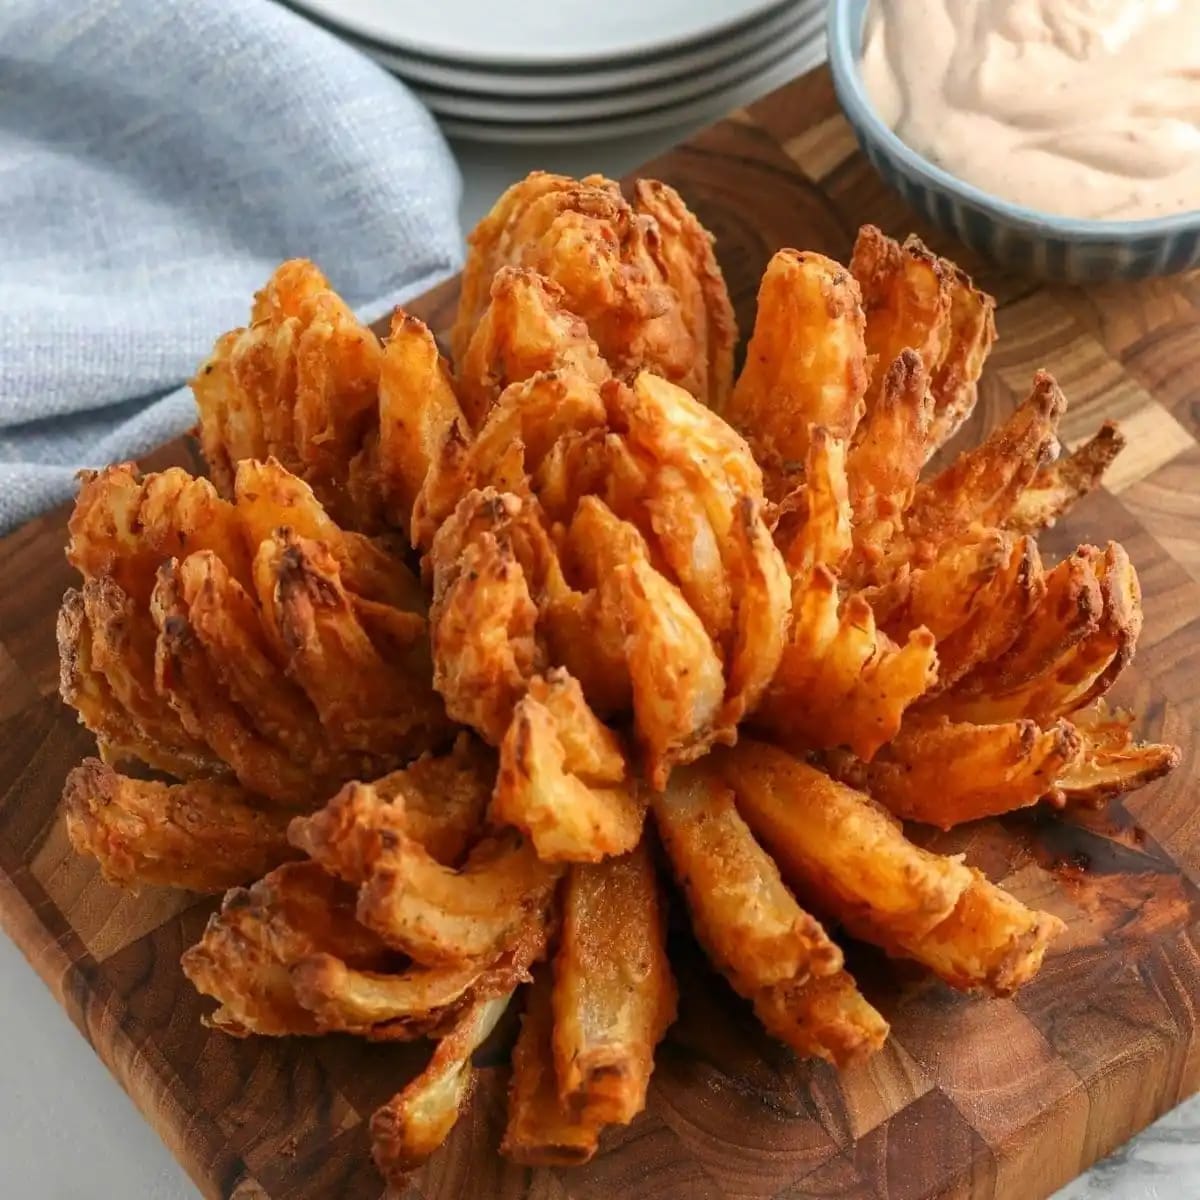
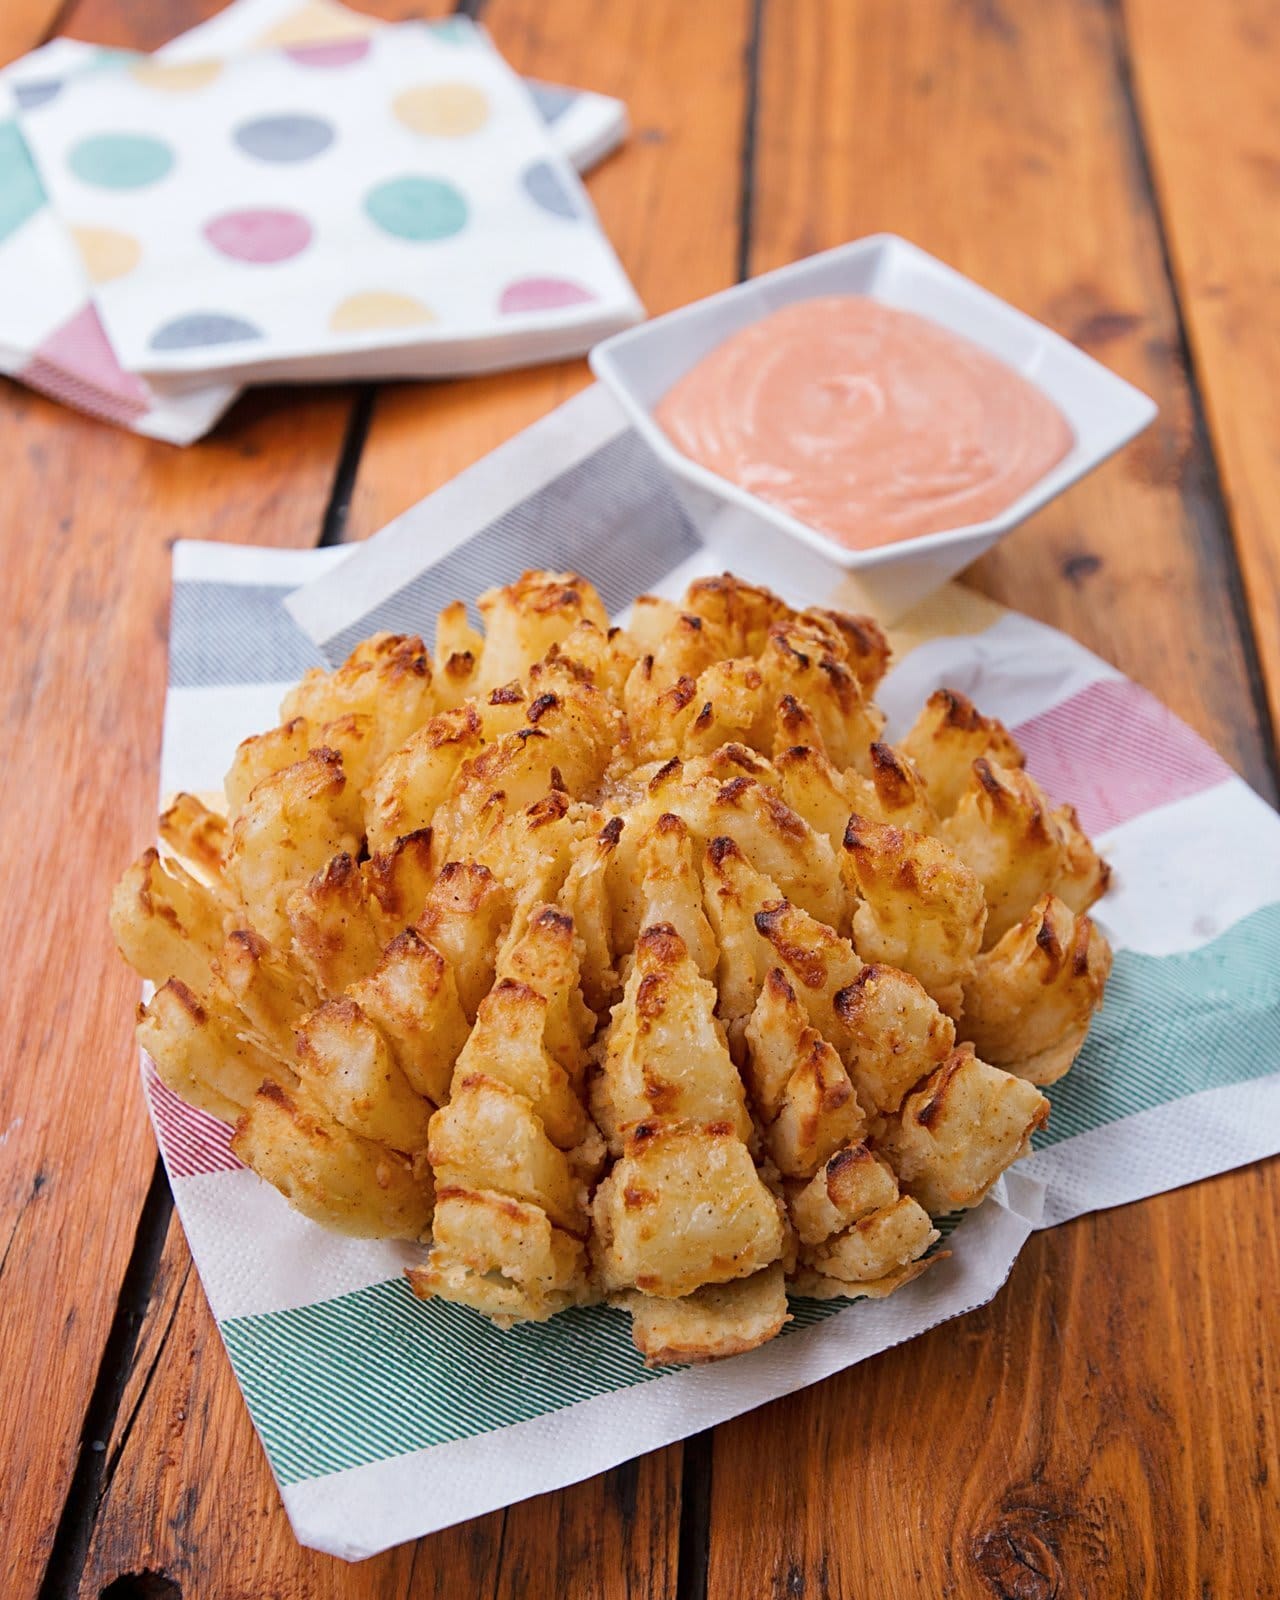
Air Fryer Blooming Onion
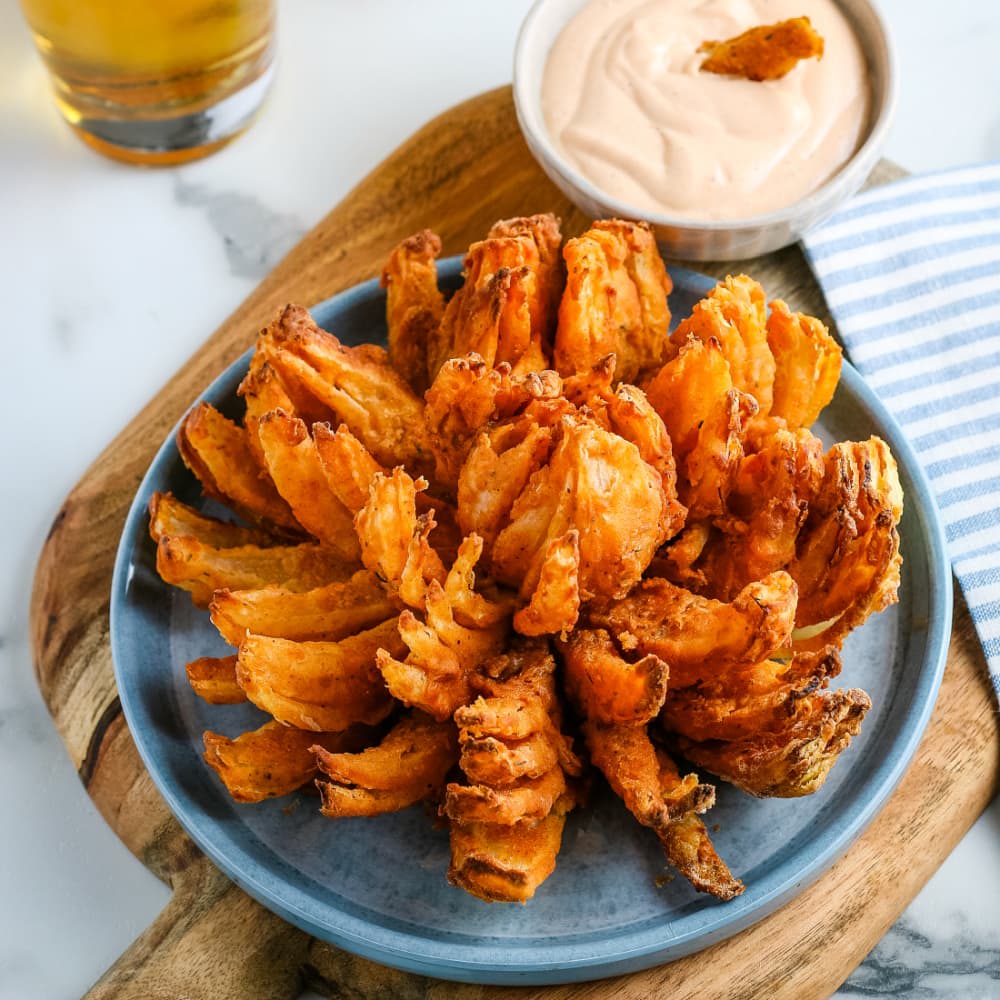
Get ready for restaurant-quality indulgence without leaving your kitchen! This air fryer blooming onion delivers that eye-popping “wow” factor with a fraction of the oil you’d get from deep frying. Crispy, golden petals that pull apart to reveal tender, sweet onion inside – it’s the ultimate shareable appetizer that’s guaranteed to steal the show.
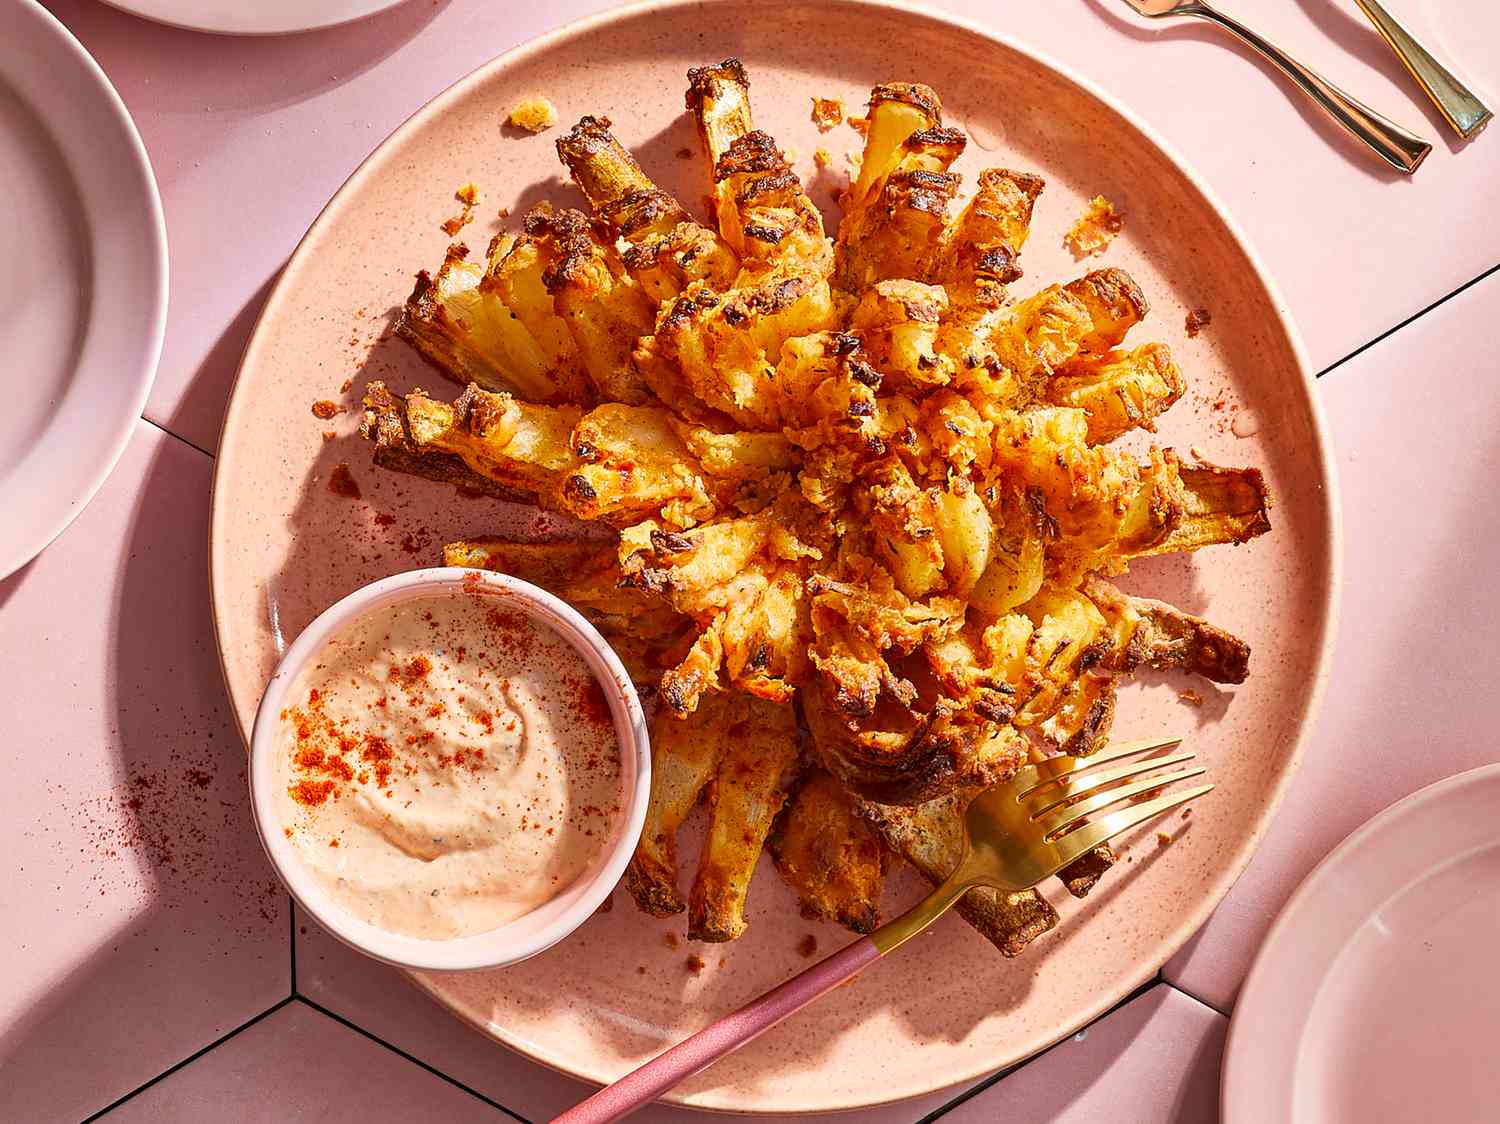
The magic is in that perfect seasoning blend – paprika, cayenne, cumin, and herbs create layers of flavor that transform a simple onion into something extraordinary. And thanks to the air fryer, you get that satisfying crunch without the greasy aftermath. Best part? The dramatic presentation makes everyone think you spent hours in the kitchen, when it’s actually surprisingly simple to create.
Ingredients
- 1 large sweet onion (Vidalia works perfectly)
- 2½ cups all-purpose flour
- 1 tablespoon paprika
- 1 teaspoon cayenne pepper
- ½ teaspoon ground cumin
- ½ teaspoon dried thyme
- ½ teaspoon dried oregano
- 2 large eggs
- 1 cup milk
- 1 cup water
- Salt and pepper to taste
- Oil in a spray bottle (vegetable or avocado oil works best)
For the dipping sauce:
- ½ cup mayonnaise
- 2 tablespoons ketchup
- 2 tablespoons horseradish
- ¼ teaspoon paprika
- ¼ teaspoon salt
- ⅛ teaspoon oregano
- ⅛ teaspoon black pepper
Steps
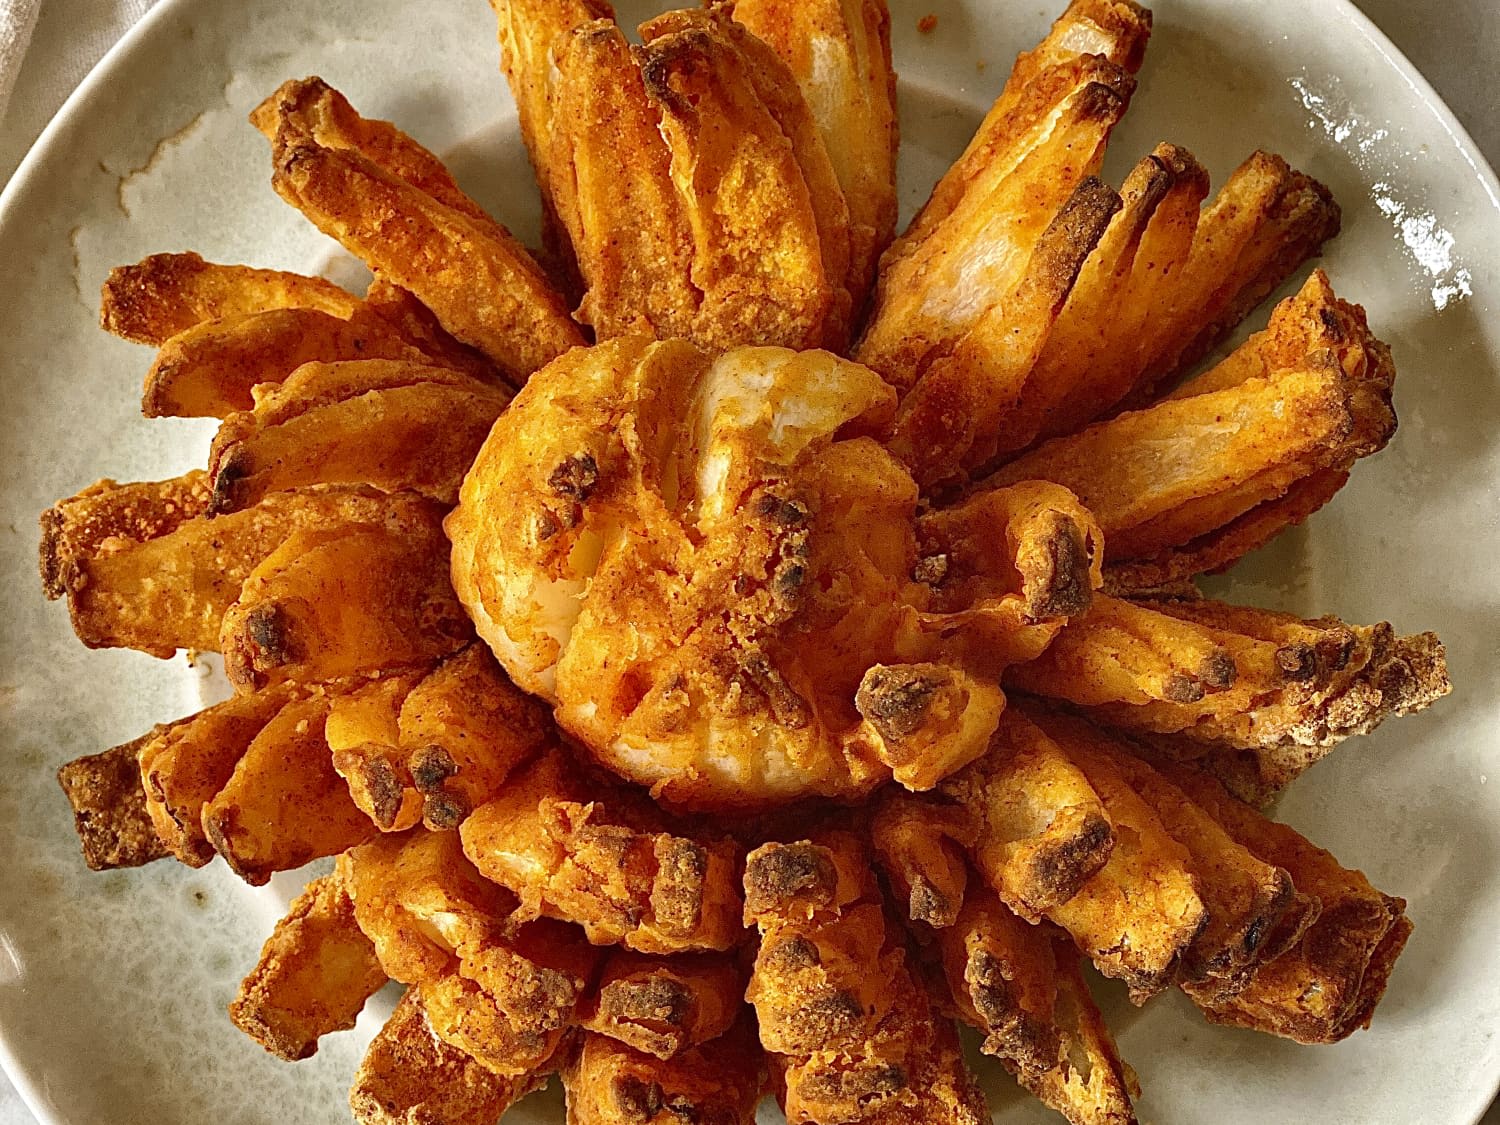
- Start by preparing the onion. Cut off ½ inch from the top of the onion, then peel the outer skin completely. The flat cut top will be the base of your “bloom.”
- Place the onion cut-side down on a cutting board. Starting ½ inch from the root end (leaving the root intact), make a downward cut all the way through to the cutting board. This first cut is crucial – it needs to go all the way down without cutting through the root.
- Make 3 more evenly spaced cuts around the onion (creating quarters). Then make 3 additional cuts between each section until you have 16 evenly spaced cuts total. The precision here ensures your onion will bloom evenly.
- Turn the onion over (cut side up) and set aside for 5 minutes to allow the petals to naturally begin separating. This resting period is essential for a good bloom.
- Before breading, gently separate the outer petals with your fingers, working carefully to avoid breaking them. If some sections aren’t separating well, make the cuts a bit deeper, being careful not to cut through the root.
- In a large bowl, whisk together the 2½ cups flour, 1 tablespoon paprika, 1 teaspoon cayenne, ½ teaspoon cumin, ½ teaspoon thyme, ½ teaspoon oregano, and ½ teaspoon each salt and pepper until evenly combined. In a separate medium deep bowl, thoroughly whisk the 2 eggs, 1 cup milk, and 1 cup water until smooth.
- Place the onion in a clean bowl, cut-side up, and spoon the flour mixture over it. Use a large spoon to coat the onion thoroughly with the flour mixture, especially between the onion petals. Turn the onion over and gently tap off excess flour. Save the remaining flour mixture.
- Transfer the floured onion to the egg mixture, spooning the liquid between the petals to ensure complete coverage. Let excess liquid drip off for about 30 seconds.
- Return the onion to the reserved flour mixture and repeat the coating process, making sure to get flour between all petals. Gently tap off excess flour – too much loose flour can create a messy finished product.
- Place the breaded onion in the refrigerator for 10-15 minutes. This helps the coating adhere better during cooking.
- Meanwhile, preheat your air fryer to 350°F (175°C) for 10 minutes. A properly preheated air fryer is essential for even cooking and browning.
- Remove the onion from the refrigerator and spray generously with oil from a spray bottle. Be thorough but not excessive – you want a light, even coating on all surfaces.
- Create a sling from a sheet of aluminum foil (about 10×12 inches) by folding it in half and creasing it. Place the onion cut-side up on the sling, then transfer the onion and sling together into the preheated fryer basket.
- Cook for 25 minutes total, spraying the onion with oil 2-3 times during cooking (around the 8-minute and 16-minute marks). Pay special attention to any spots with visible flour and spray them directly.
- The onion is done when it’s deep golden brown and crispy on the outside. If some areas need more color after 25 minutes, spray those sections and cook for an additional 2-3 minutes.
- Carefully remove the onion using the aluminum foil sling (it will be very hot!) and season immediately with a pinch of salt and pepper while still hot.
- Serve immediately with the blooming onion dip. For the best experience, place the onion in the center of a plate with the dip in a small bowl alongside.
Smart Swaps
- Use gluten-free flour blend (1:1 ratio) instead of all-purpose flour for a gluten-free version
- Substitute almond milk for regular milk to make it dairy-free (same amount)
- Try smoked paprika instead of regular paprika for a deeper, smokier flavor
- Use sweet onion varieties like Vidalia or Walla Walla for the mildest, sweetest result
Make It Diabetes-Friendly
- Replace 1 cup of all-purpose flour with 1 cup almond flour to reduce carbs by approximately 18g per serving
- Use unsweetened almond milk instead of regular milk to save about 6g of carbs per serving
- Add ½ teaspoon xanthan gum to the flour mixture to improve texture when using alternative flours
- Serve with a yogurt-based dip using plain Greek yogurt instead of mayonnaise to reduce fat content while adding protein
- Portion control is key – share with more people and enjoy a smaller serving to reduce carb intake
Pro Tips
- Make sure to choose an onion that fits comfortably in your air fryer with at least 1 inch of space around it
- Keep a spray bottle filled with oil specifically for air frying – never use aerosol cooking sprays as they can damage the air fryer coating
- The onion will continue to open up during cooking, so don’t force the petals too far apart before cooking
- For extra crispiness, try a double-coat: flour → egg → flour → refrigerate → egg → flour again
- If your onion browns too quickly on top, cover it loosely with foil for the last 5-10 minutes of cooking