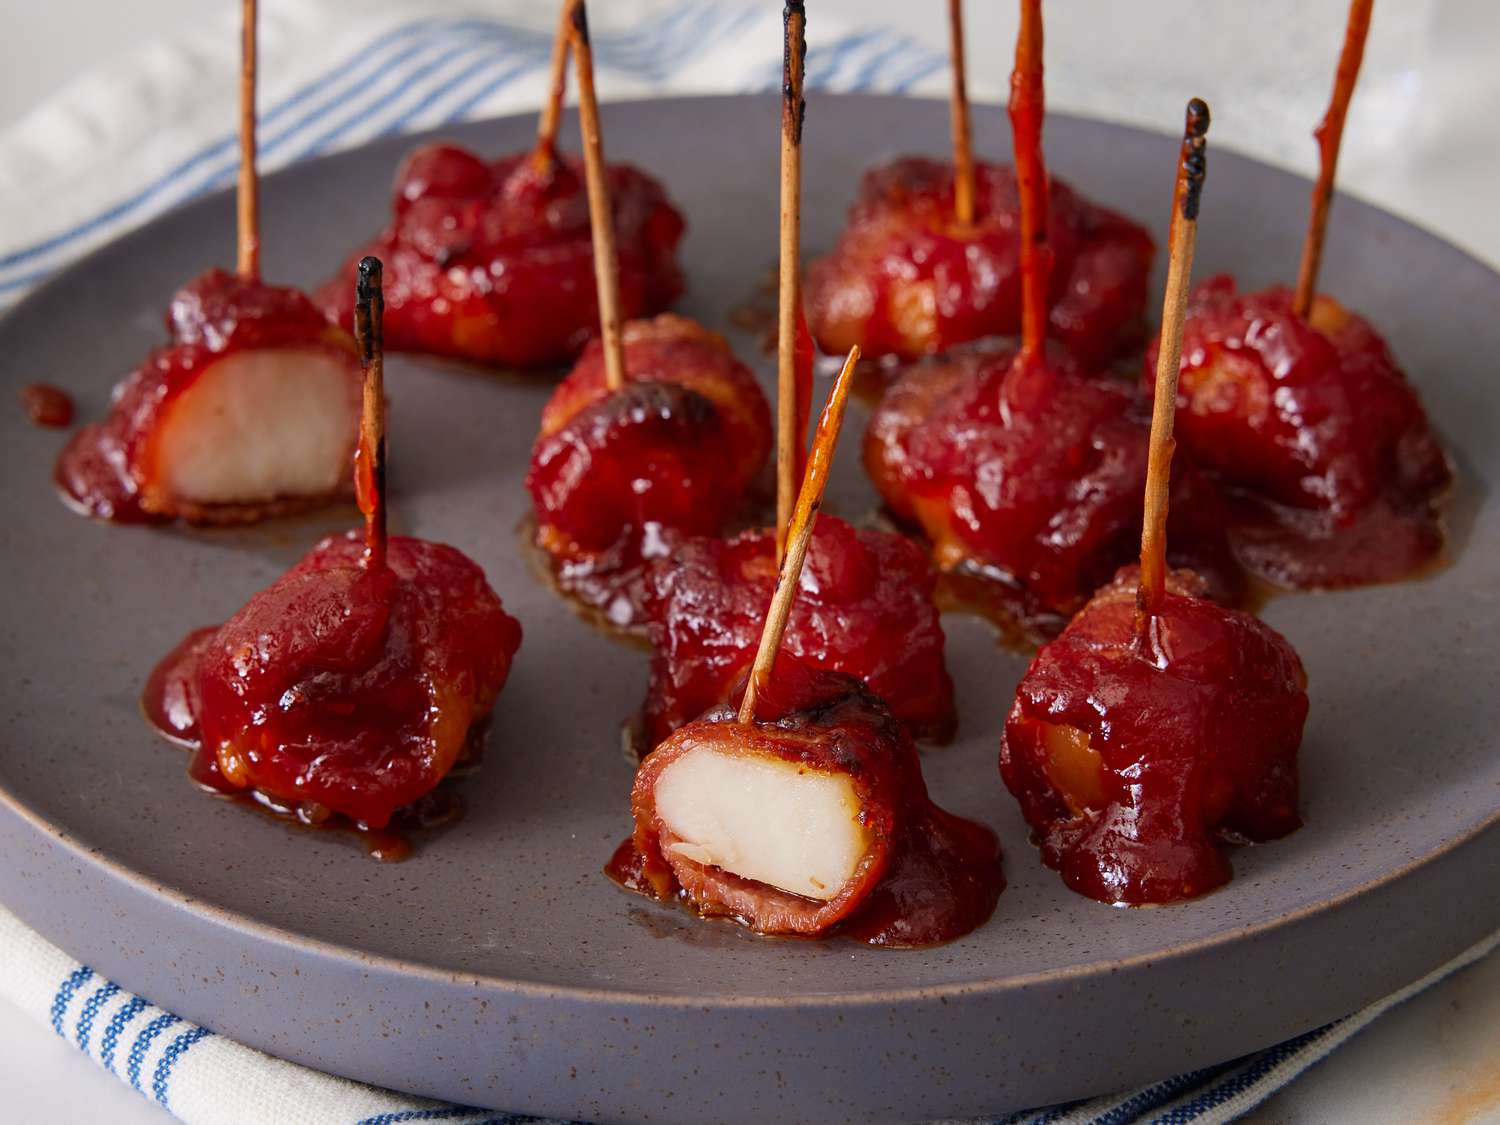
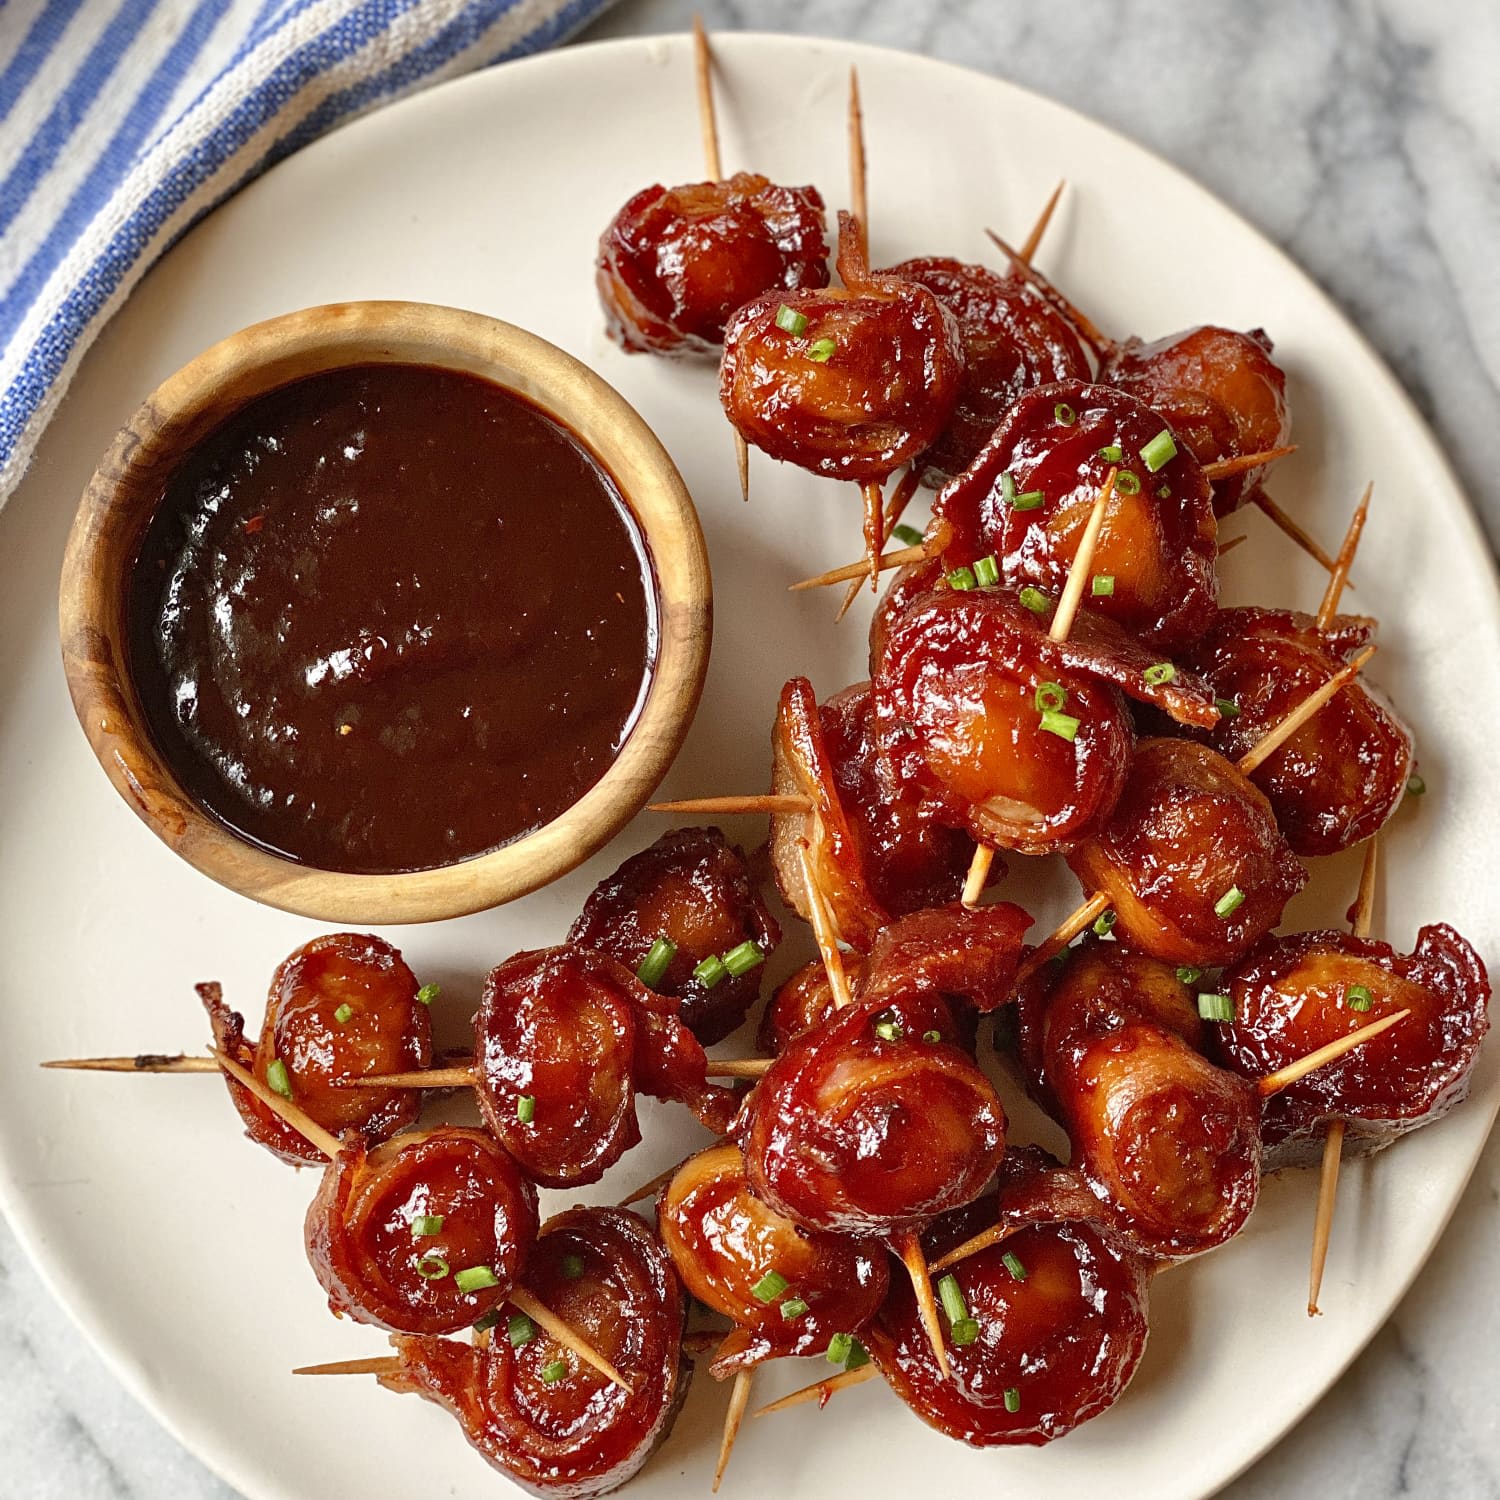
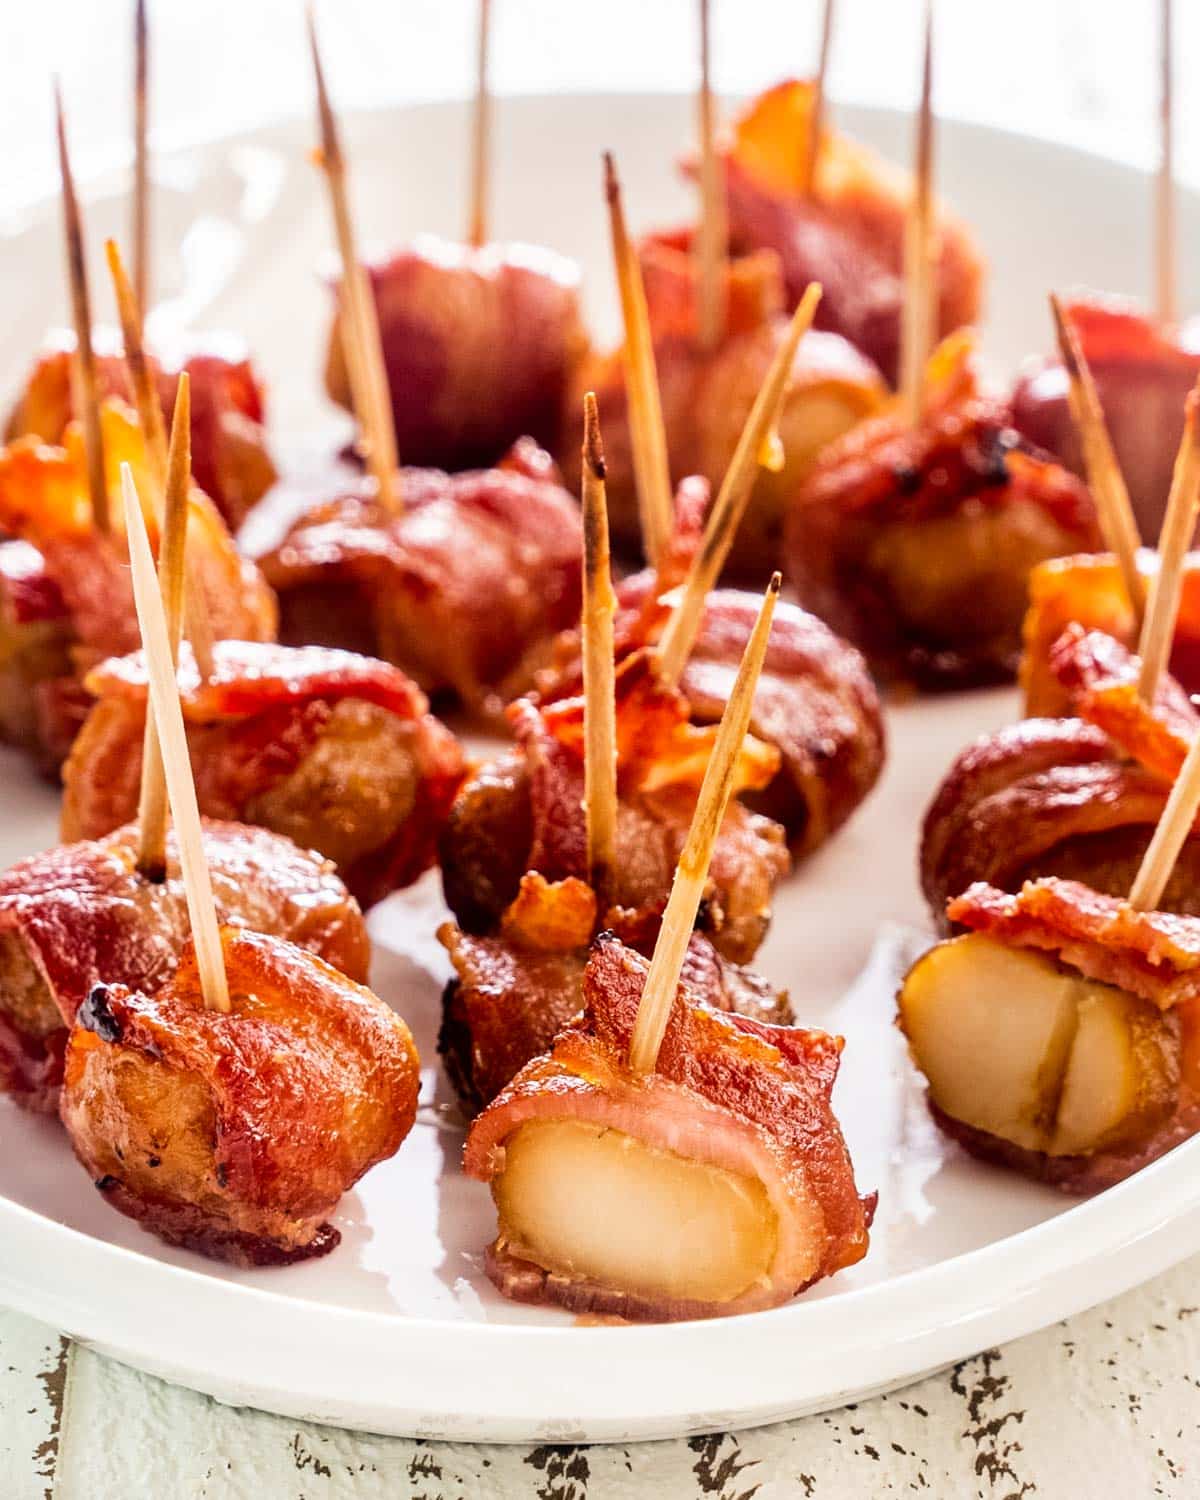
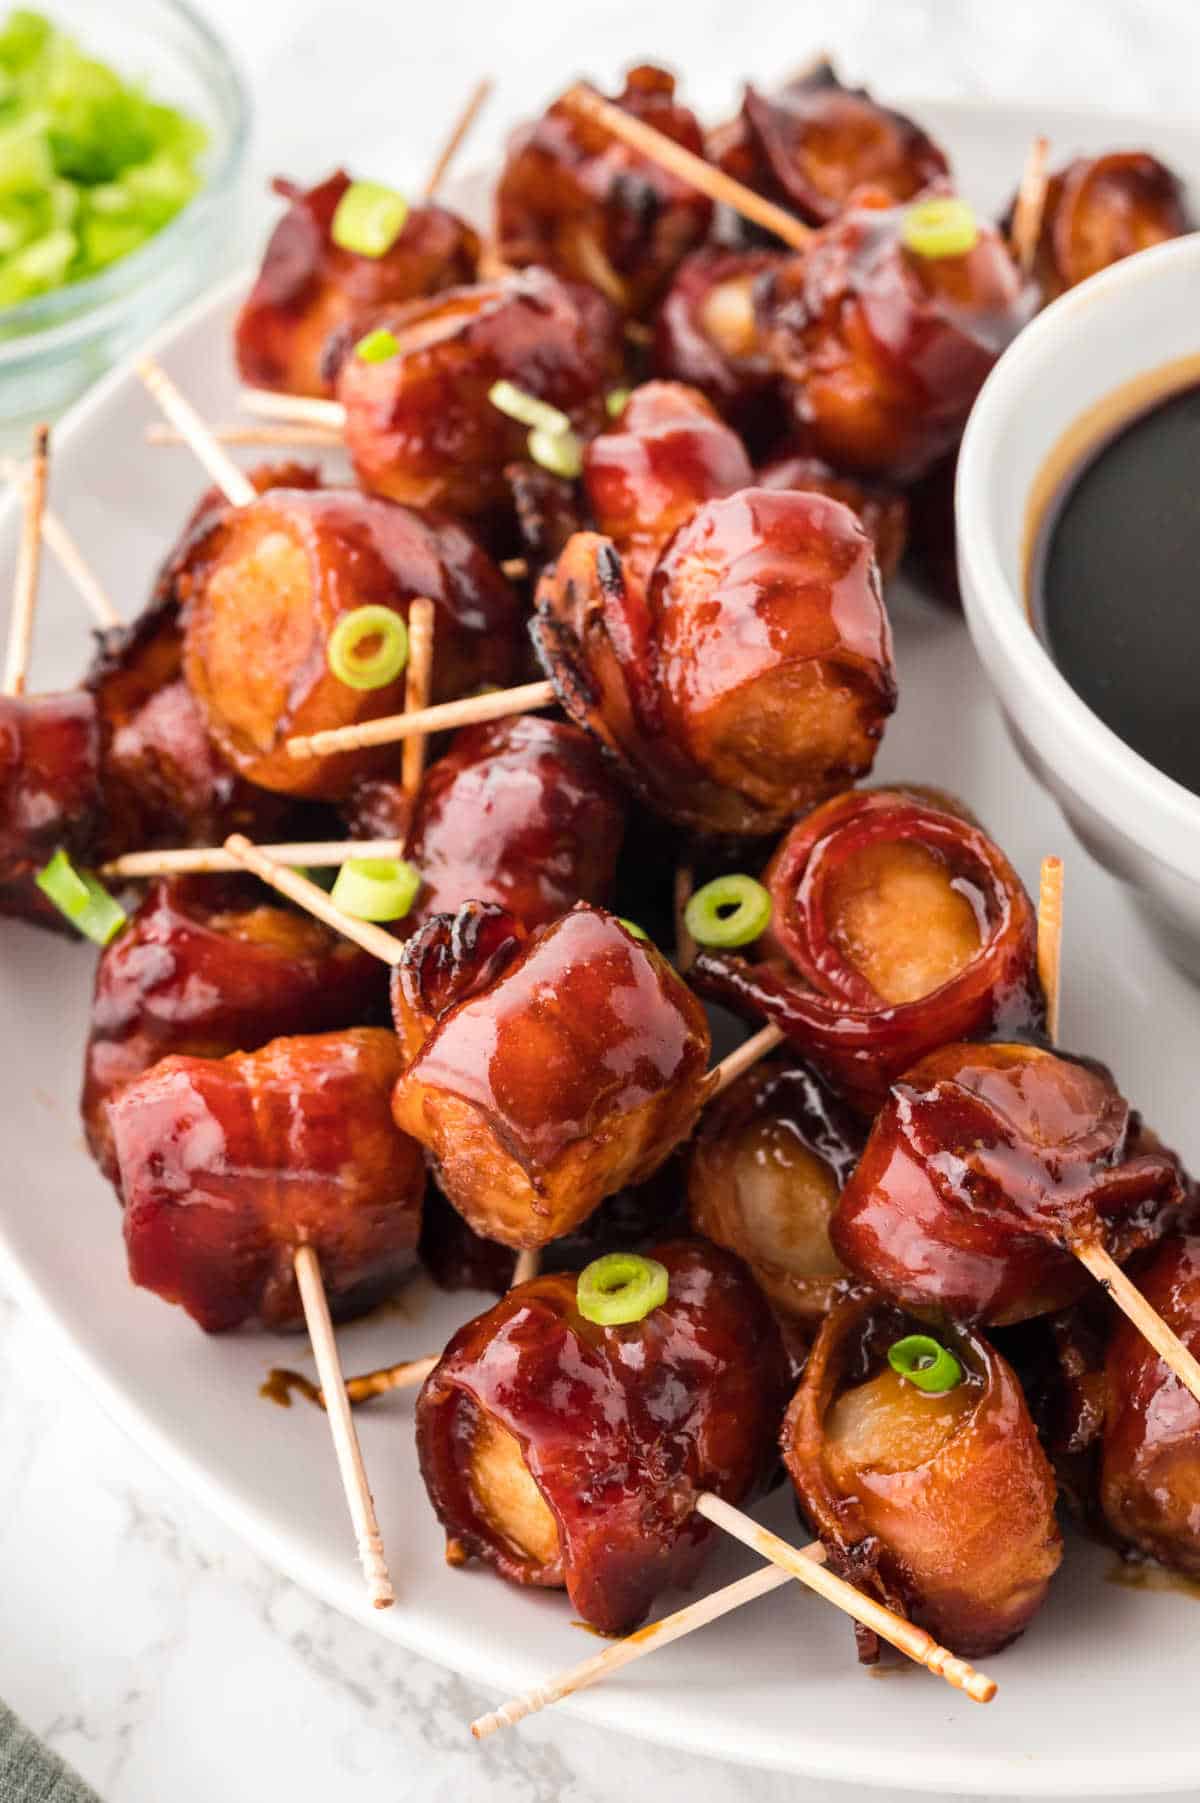
Bacon-Wrapped Water Chestnuts
Meet your new party MVP!
These bacon-wrapped water chestnuts are that perfect appetizer that disappears faster than you can say “I made more.”
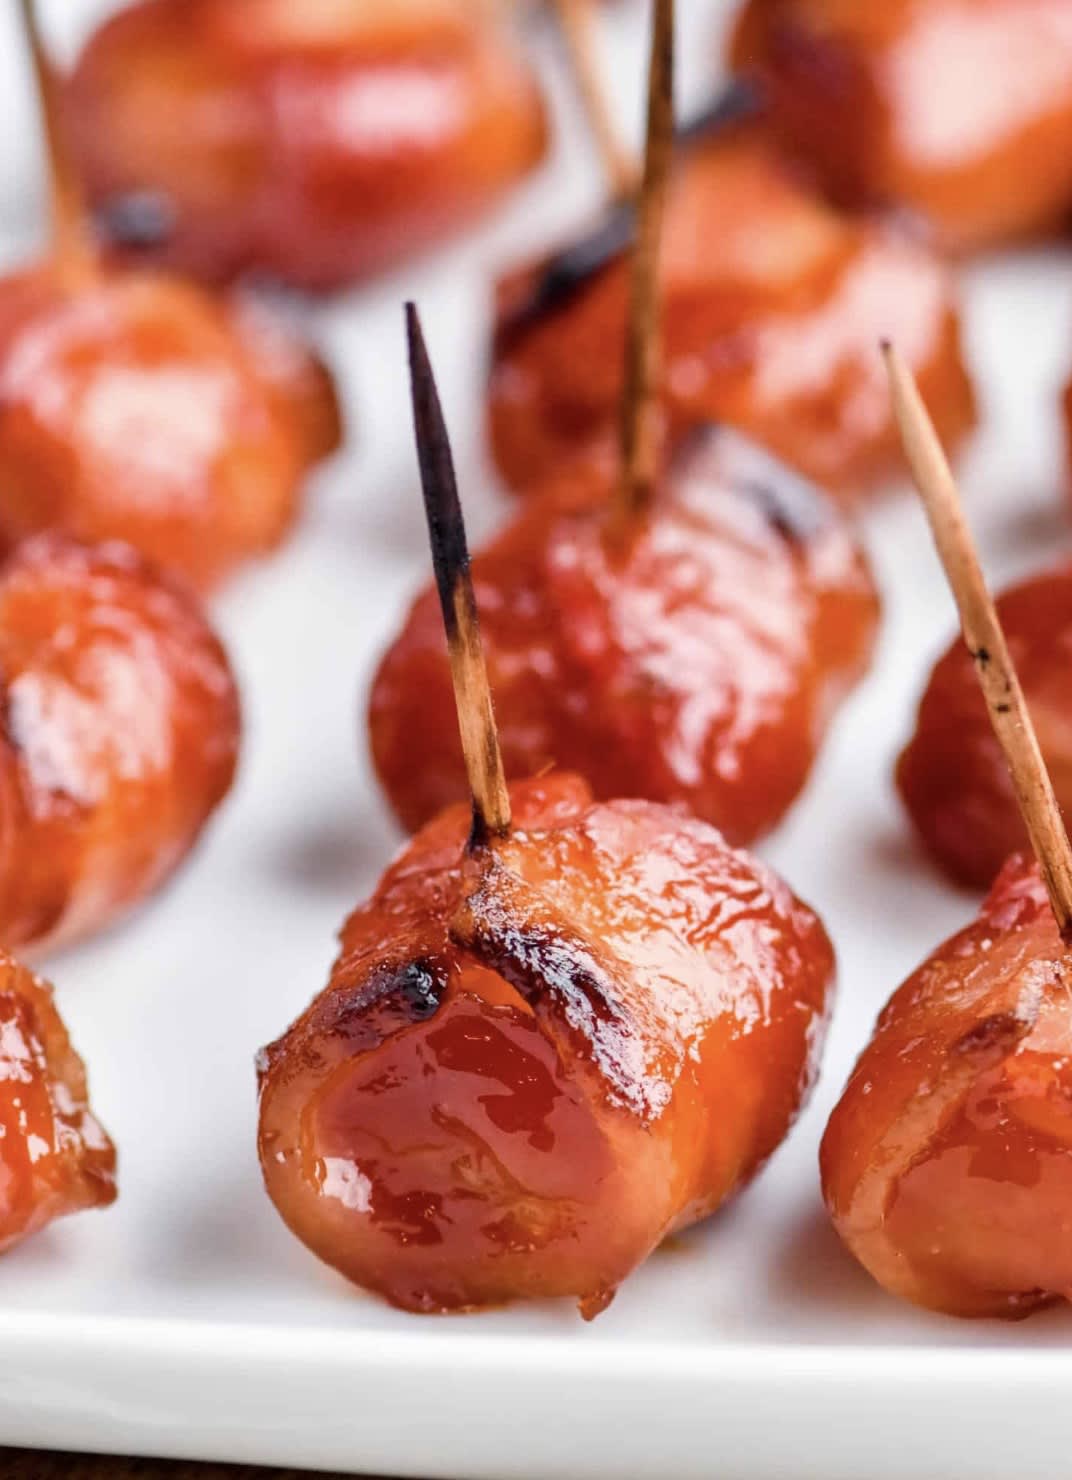
The irresistible combination of crispy, salty bacon wrapped around crunchy water chestnuts and glazed with a sweet-savory sauce creates bite-sized flavor bombs that’ll have everyone hovering near the appetizer table.
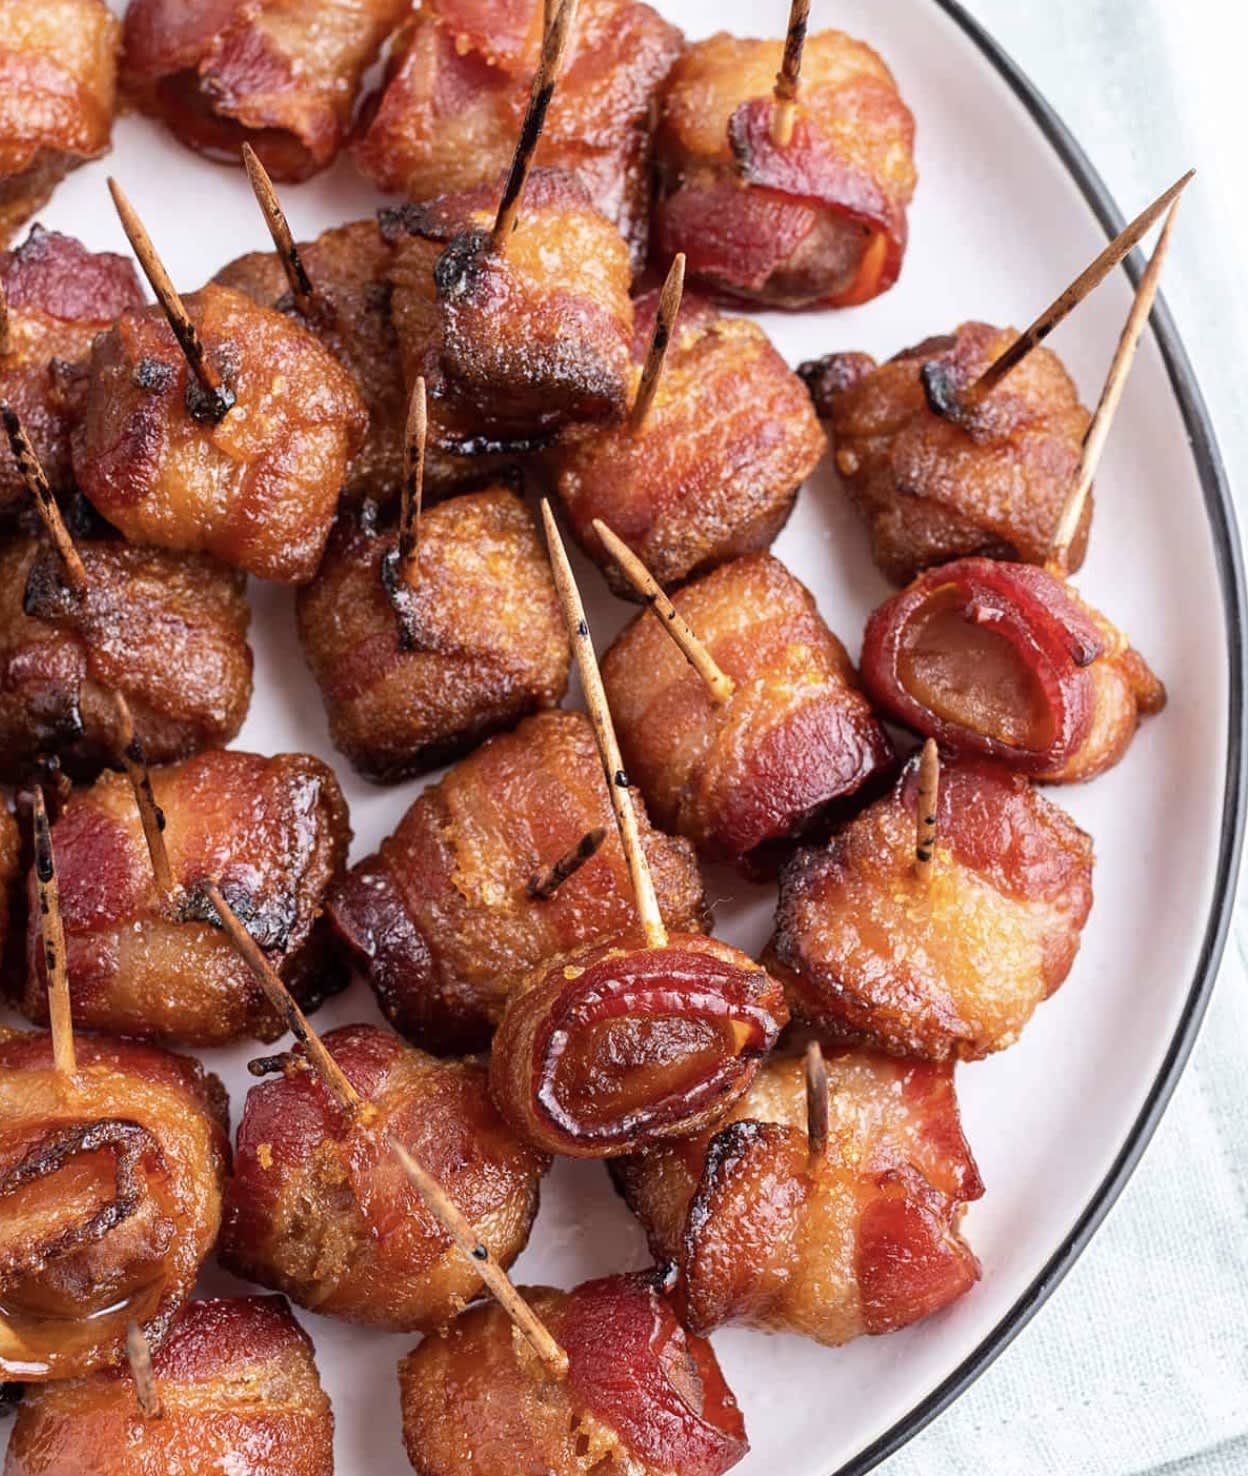
What makes these little beauties so addictive is the textural contrast—that satisfying crunch when you bite through the caramelized bacon into the refreshing water chestnut center.
The glaze develops this gorgeous sticky-sweet coating that caramelizes in the oven, creating the perfect balance of sweet, salty, and umami flavors. Trust me, you’ll want to double the recipe because these vanish in minutes!
Ingredients
- 2 packages bacon (16oz/375g packages)
- 2 cans whole water chestnuts (8oz/227g cans, drained)
- 1 cup brown sugar (dark or light)
- 2 tbsp Worcestershire sauce
- 1 cup soy sauce
- 1 cup ketchup
- ½ tsp garlic powder
Steps
- Preheat oven to 375°F (190°C). Make sure your oven is fully preheated before adding the bacon to ensure even cooking and proper rendering of the fat.
- Cut bacon slices in half crosswise. This creates the perfect size for wrapping around the water chestnuts without excess overlap. Wrap each slice of bacon around a whole water chestnut and secure with a toothpick, making sure to pierce all the way through so it doesn’t come undone during baking. Place them in a 9×13 inch baking pan, leaving a small space between each piece to allow for even cooking.
- Bake for 10 minutes until the bacon begins to render its fat but isn’t yet crispy. You want it partially cooked at this stage, not fully done. Carefully remove the pan from the oven and drain the accumulated grease from the pan. This prevents the final dish from becoming too greasy and helps the sauce adhere better.
- While the bacon is in its initial bake, prepare the sauce by stirring together 1 cup brown sugar, 2 tbsp Worcestershire sauce, 1 cup soy sauce, 1 cup ketchup, and ½ tsp garlic powder in a medium bowl until well combined. The sauce should have a smooth consistency without any sugar lumps.
- Pour the prepared sauce evenly over the partially cooked bacon-wrapped water chestnuts, making sure each piece gets coated. The sauce may seem abundant, but it will reduce and thicken during baking.
- Return the pan to the oven and bake for an additional 30 minutes until the bacon is crispy and the sauce has thickened to a glossy glaze. The edges should be caramelized, and the sauce should be bubbling around the chestnuts. Serve hot, as they’re at their most delicious straight from the oven.
Smart Swaps
- Use turkey bacon instead of regular bacon for a lighter option (though cooking time may decrease to 25 minutes total)
- Substitute coconut aminos for soy sauce (1:1 ratio) for a gluten-free, lower sodium alternative
- Try maple syrup instead of brown sugar (use ¾ cup) for a different flavor profile
- Add ¼ tsp cayenne pepper to the sauce for a spicy kick
Make It Diabetes-Friendly
- Replace brown sugar with ½ cup Swerve Brown Sugar Substitute plus 2 tbsp molasses to maintain flavor while reducing carbs by approximately 12g per serving
- Use reduced-sodium soy sauce and cut amount to ¾ cup to lower sodium content
- Substitute sugar-free ketchup (1:1 ratio) to further reduce carb count by about 4g per serving
- Serve with cucumber slices instead of crackers to provide a low-carb vehicle for enjoying these bites
- Limit portion size to 3-4 pieces per serving to keep carbohydrate intake controlled
Pro Tips
- For extra flavor, marinate the water chestnuts in 2 tbsp Worcestershire sauce for 30 minutes before wrapping
- Use center-cut bacon for less fat and more consistent cooking
- Line your baking pan with foil for easier cleanup—the sauce gets sticky!
- These can be assembled up to 24 hours in advance and refrigerated before the first baking step
- For a party, keep them warm in a slow cooker on the LOW setting for up to 2 hours