Banana Pudding Cups
This recipe is basically your shortcut to becoming the dessert hero at every gathering without breaking a sweat or your budget.
Picture this: creamy, dreamy banana pudding that tastes like childhood memories but looks sophisticated enough for your fanciest dinner party.
The best part is watching people’s faces when they take that first spoonful and realize you’ve just delivered pure comfort food bliss in individual serving cups.

We’re talking silky smooth pudding made from scratch, layered with crispy vanilla wafers and fresh banana slices that actually stay fresh and beautiful.
This is the kind of dessert that makes people lean back in their chairs and ask for the recipe, even though they’re still eating it.
Trust me, once you master this technique, you’ll have a go-to dessert that works for everything from casual family dinners to impressive entertaining.
Ingredients
For the Banana Pudding
- 4 tablespoons cornstarch – the secret to that perfect thick texture
- 1½ cups milk, divided – whole milk works best for richness
- 2 ripe bananas – look for yellow with just a few brown spots
- 2 egg yolks – these create the luxurious custard base
- ¼ cup maple syrup – natural sweetener that complements banana flavor
- ⅛ teaspoon salt – enhances all the flavors
For Assembly
- Vanilla wafers, crushed – store-bought or homemade work perfectly
- Fresh banana, sliced – use just before serving to prevent browning
- Whipped cream – for that final indulgent touch
Instructions
Prepare the Cornstarch Slurry
- 1 In a small bowl, whisk together the 4 tablespoons cornstarch with 3 tablespoons of the milk until completely smooth and no lumps remain. This slurry prevents the cornstarch from clumping when added to the hot milk later. Set this mixture aside – it’s your thickening agent that will transform thin milk into luxurious pudding.
Create the Banana Base
- 2 In a high-speed blender, combine the 2 ripe bananas and ¼ cup maple syrup, blending on high speed until completely smooth and creamy, about 30-45 seconds. The mixture should be silky with no banana chunks visible.
- 3 Add the 2 egg yolks to the banana mixture and blend on low speed until just combined and the mixture appears thick and uniform. Don’t over-blend at this stage – you want to incorporate the yolks without creating too much air. Set this banana-egg mixture aside.
Heat the Milk and Temper
- 4 Pour the remaining milk into a medium, heavy-bottomed saucepan and bring to a gentle simmer over medium-low heat, stirring occasionally. You’ll see small bubbles forming around the edges – this should take about 3-4 minutes. A heavy-bottomed pot prevents scorching and ensures even heating.
- 5 Once the milk is simmering, carefully measure out ⅓ cup of the hot milk and slowly pour it into the banana-egg mixture in the blender. Blend on low speed for 10-15 seconds to combine. This tempering process gradually raises the temperature of the eggs without scrambling them.
Combine and Thicken
- 6 Pour the warmed banana-egg mixture back into the saucepan with the remaining hot milk, whisking constantly to prevent any lumps from forming. Add the prepared cornstarch slurry and the ⅛ teaspoon salt, whisking vigorously to incorporate.
- 7 Continue cooking over low heat, stirring constantly with a whisk or wooden spoon, until the pudding thickens to a consistency that coats the back of a spoon, about 5-7 minutes. The mixture should be thick enough to hold its shape when dropped from a spoon but still pourable.
Chill and Set
- 8 Pour the finished pudding into a clean bowl and immediately press plastic wrap directly onto the surface of the pudding, ensuring no air pockets remain. This prevents a skin from forming on top. Refrigerate for at least 2 hours or until completely chilled and set.
Assemble the Cups
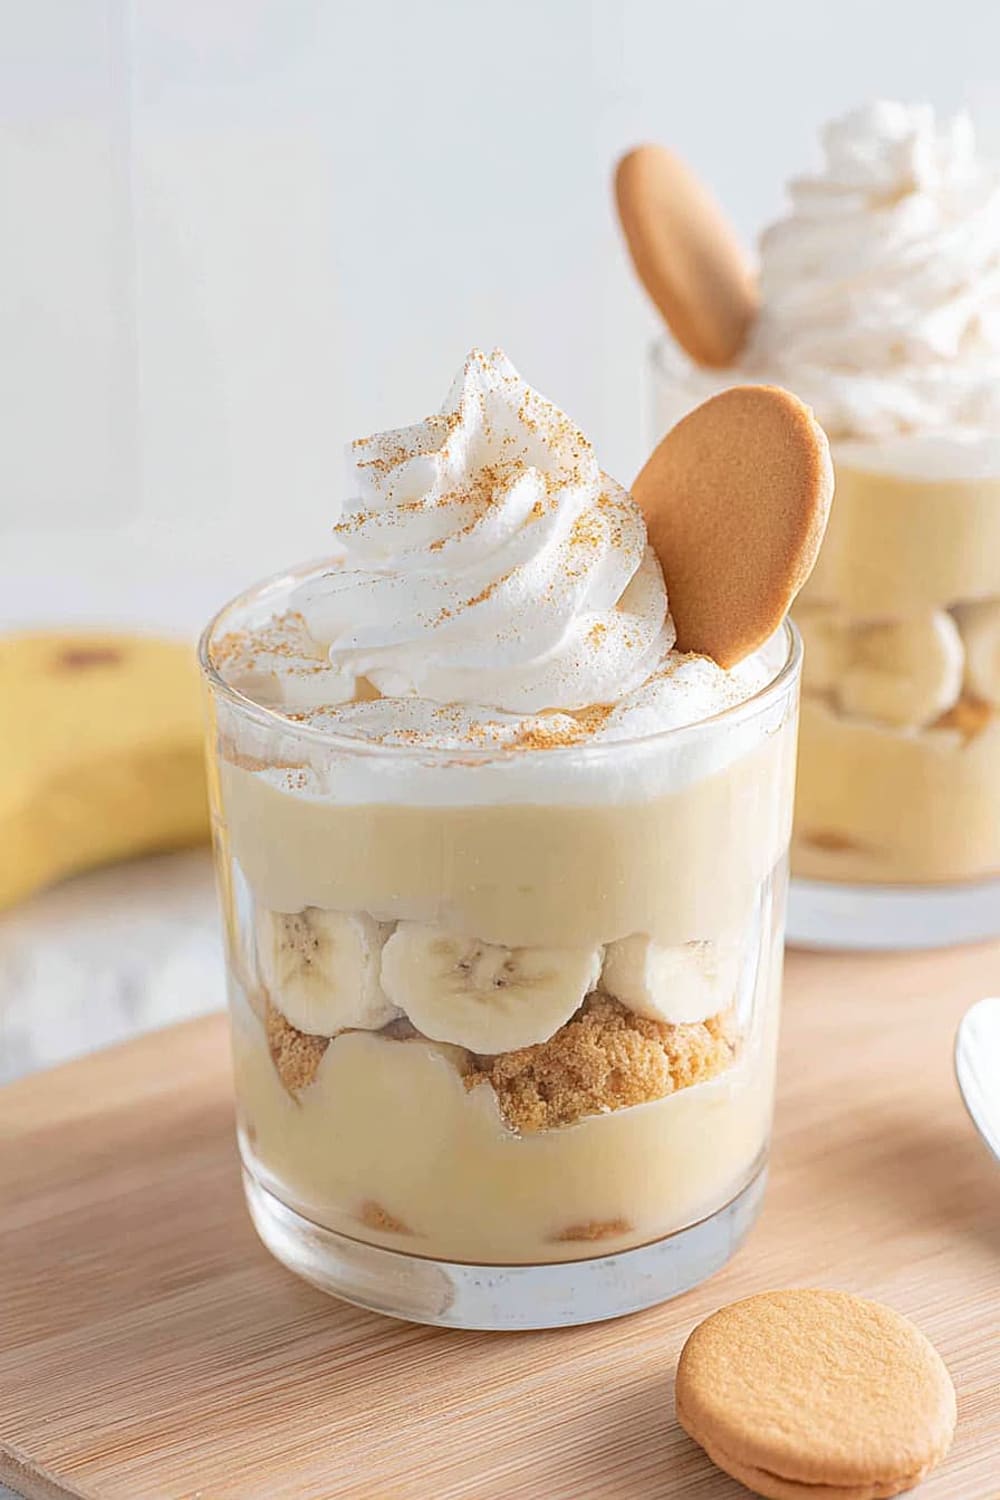
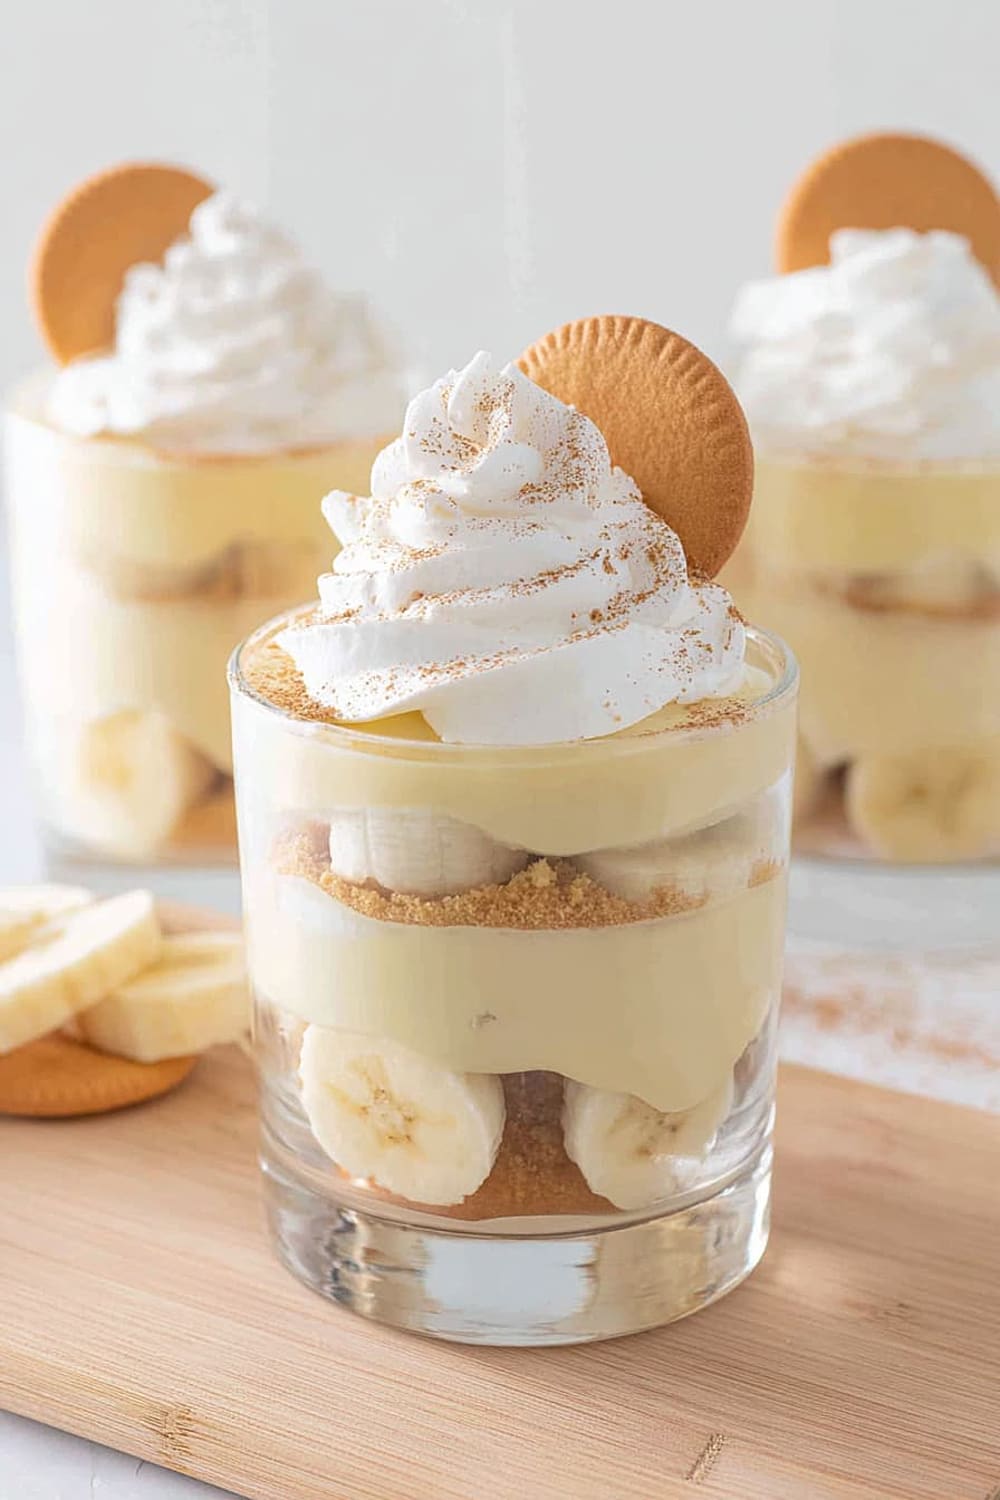
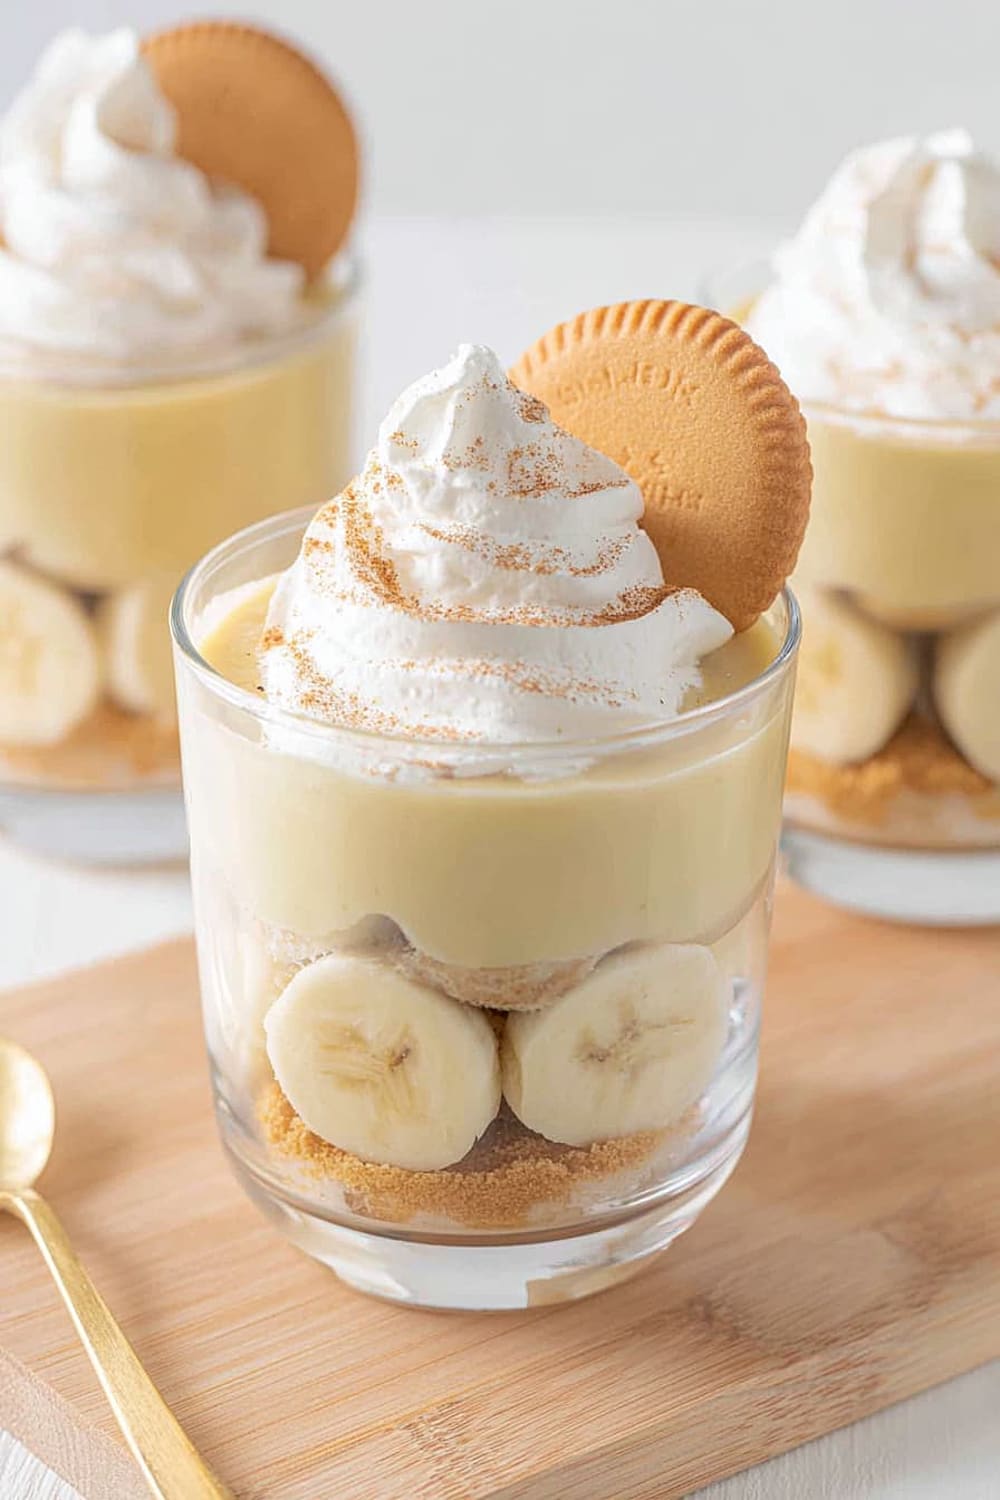
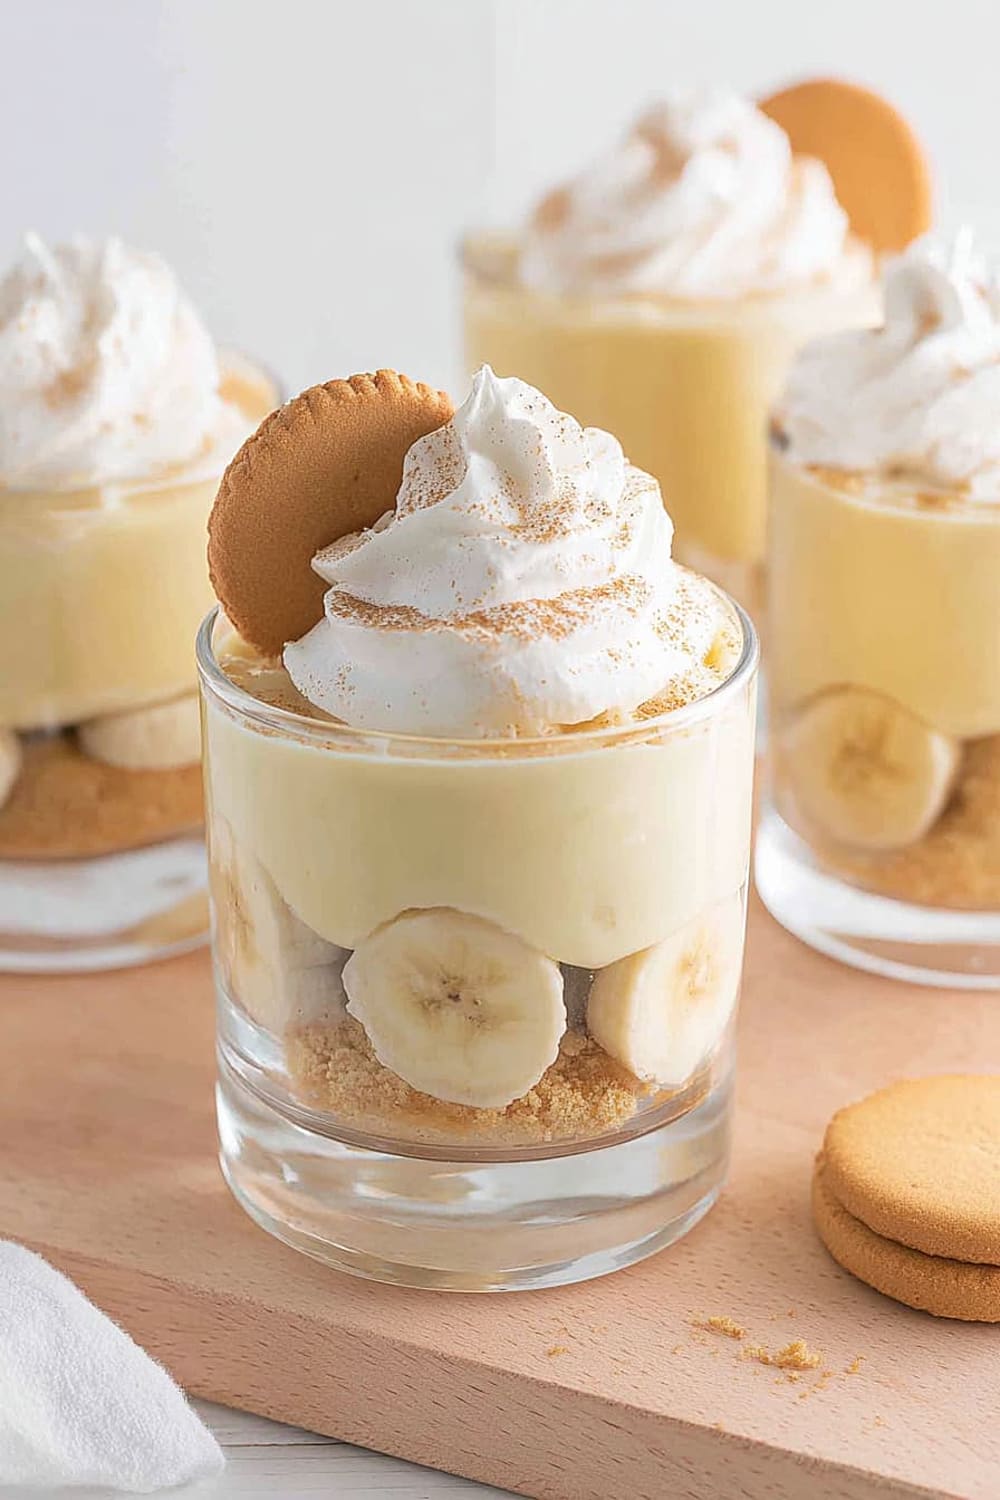
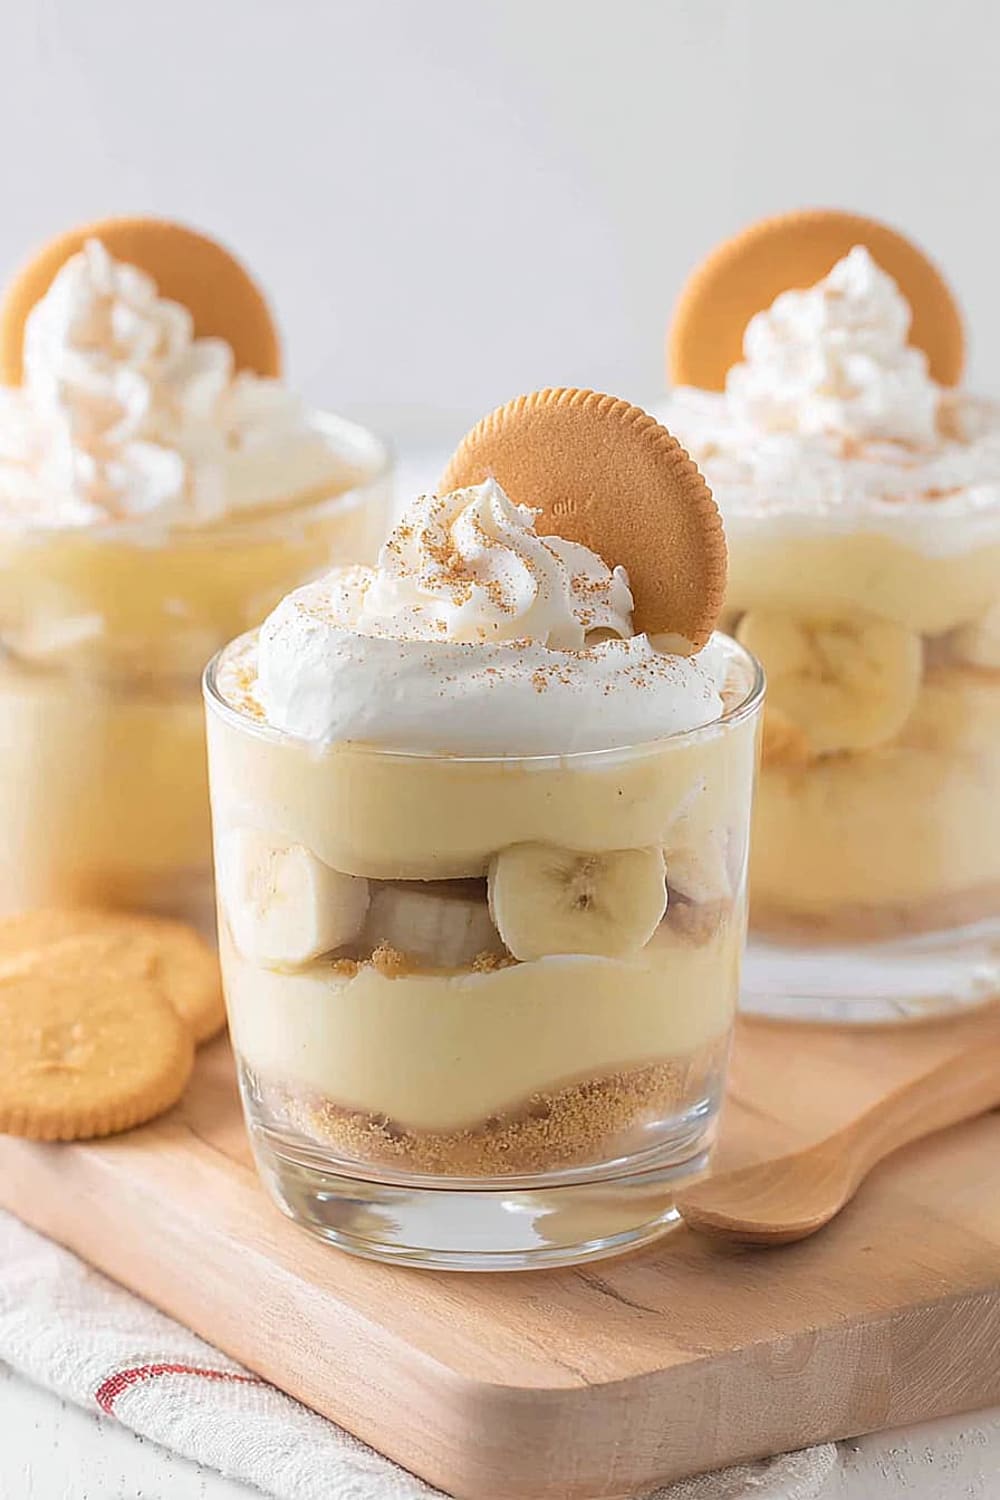
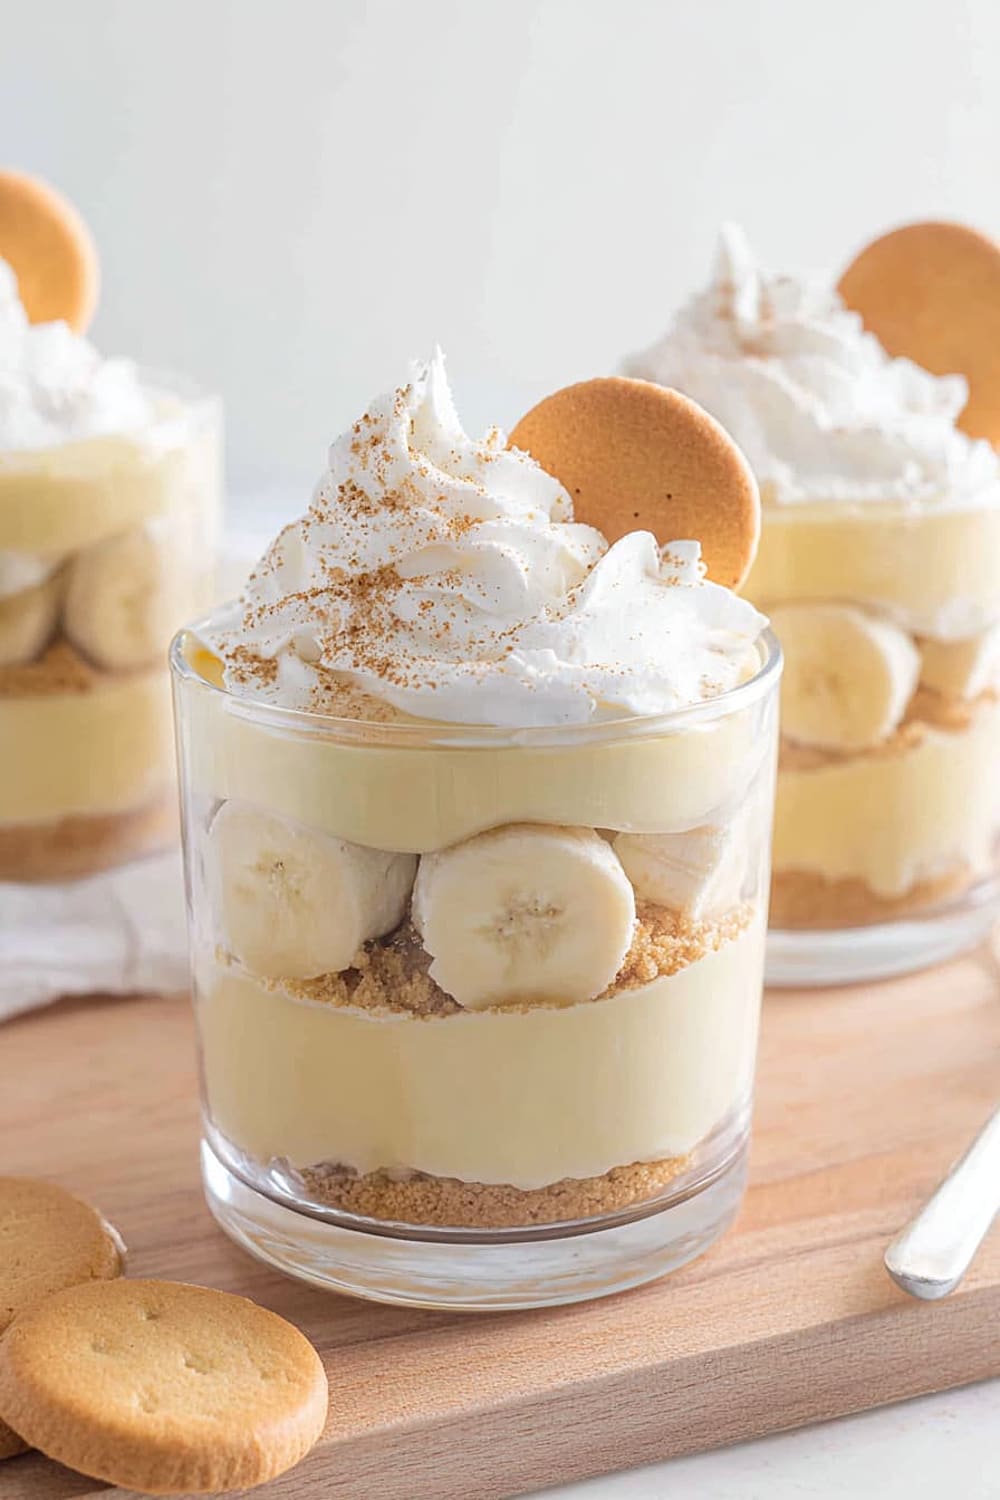
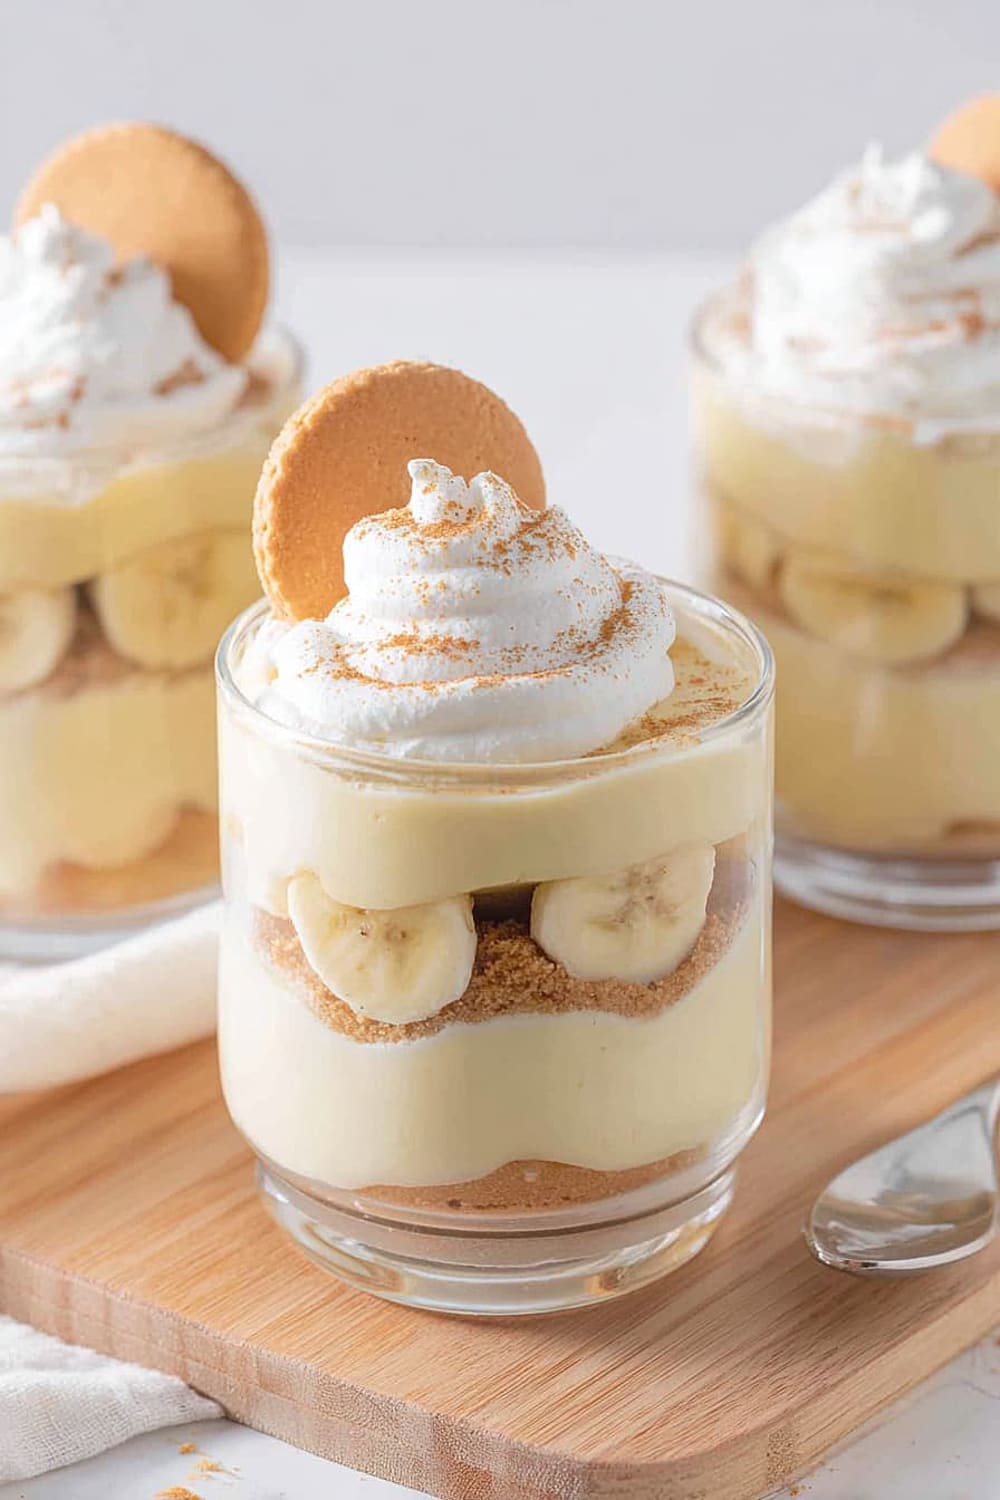
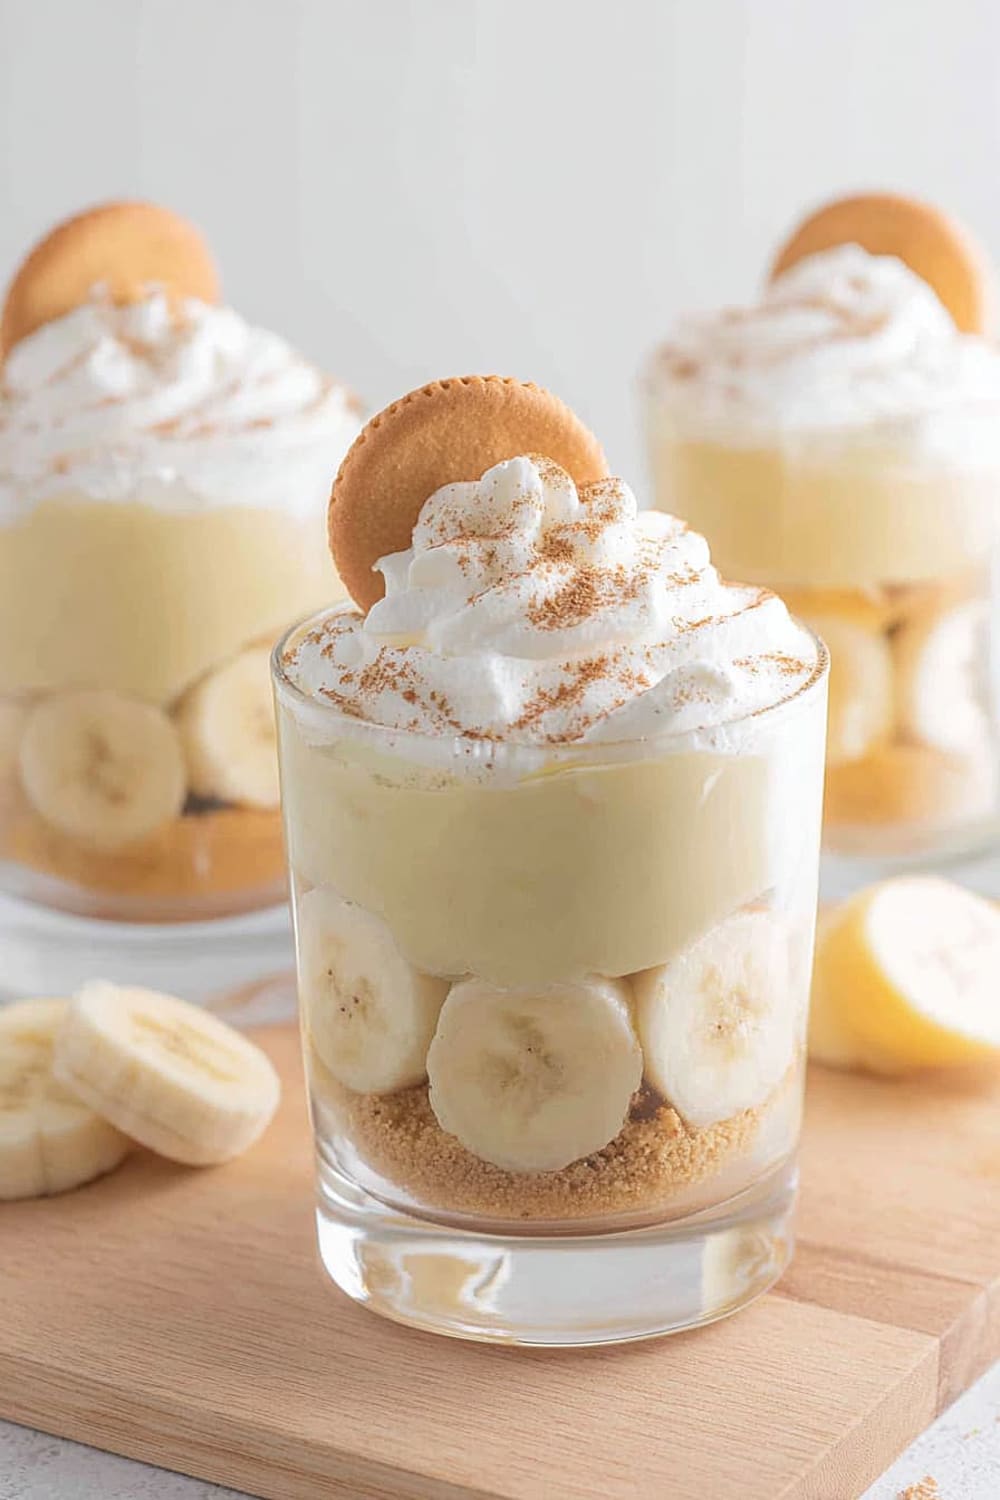
- 9 When ready to serve, layer the chilled banana pudding in individual serving cups or glasses. Start with a layer of crushed vanilla wafers, add a generous spoonful of pudding, then fresh banana slices, and repeat. Top with a dollop of whipped cream and a final sprinkle of crushed wafers for texture contrast.
Recommended Equipment and Kitchen Tools
Essential Tools (for best results)
- Heavy-bottomed saucepan – prevents scorching and ensures even heat distribution during the crucial thickening process
- High-speed blender – creates the smoothest banana base without any lumps or chunks
- Whisk – essential for preventing lumps when combining the cornstarch slurry and tempering the eggs
- Fine-mesh strainer – optional but helpful for ensuring ultra-smooth pudding texture
Helpful Upgrades
- Digital instant-read thermometer – helps monitor milk temperature to prevent overheating (aim for 180°F/82°C)
- Silicone spatula – perfect for scraping every bit of pudding from the pan and blender
- Glass measuring cups – makes it easier to see liquid levels when dividing the milk
- Individual serving glasses – elevates presentation and makes portion control effortless
Nice-to-Have Options
- Kitchen scale – for more precise measurements, especially when scaling the recipe up or down
- Immersion blender – can substitute for regular blender if needed, though texture may be slightly less smooth
- Plastic wrap dispenser – makes covering the pudding surface much easier and more effective
Recipe Variations and Dietary Modifications
Gluten-Free Adaptation
- Replace vanilla wafers with gluten-free cookies or crushed gluten-free graham crackers
- Ensure your cornstarch is certified gluten-free (most are, but check labels)
- Consider using almond flour cookies for added protein and flavor depth
Dairy-Free Modifications
- Substitute full-fat coconut milk or cashew milk for regular milk – use the same measurements
- Replace whipped cream with coconut whipped cream or dairy-free alternative
- The texture will be slightly different but equally delicious with a subtle coconut undertone
Vegan Modifications
- Replace egg yolks with 2 tablespoons of cornstarch mixed with 2 tablespoons of the plant milk
- Use coconut milk for richness and dairy-free whipped topping
- Ensure vanilla wafers are vegan or substitute with vegan cookies
Sugar-Free Version
- Replace maple syrup with sugar-free maple syrup or stevia equivalent
- Use sugar-free vanilla wafers or make your own with almond flour
- The pudding will be slightly less sweet, allowing the natural banana flavor to shine
Flavor Variations
- Chocolate Banana: Add 2 tablespoons cocoa powder to the banana mixture
- Peanut Butter Banana: Swirl in 2 tablespoons natural peanut butter while cooking
- Tropical Twist: Add 1 teaspoon coconut extract and toasted coconut flakes
- Spiced Version: Include ¼ teaspoon cinnamon and a pinch of nutmeg
Nutritional Information and Health Benefits
Key Nutritional Highlights
Each serving provides approximately 220-250 calories with a balanced mix of carbohydrates, healthy fats, and protein. The egg yolks contribute high-quality protein and essential amino acids, while the milk provides calcium and vitamin D. The natural sugars from bananas and maple syrup offer sustained energy without the crash associated with refined sugars.
Health Benefits of Main Ingredients
Bananas are nutritional powerhouses, providing potassium for heart health and muscle function, vitamin B6 for brain health, and dietary fiber for digestive wellness. The natural pectin in bananas also helps with blood sugar regulation. Egg yolks contain choline, essential for brain development and function, plus lutein and zeaxanthin for eye health. Milk provides complete protein, calcium for bone health, and riboflavin for energy metabolism. Maple syrup, while still a sweetener, contains antioxidants and minerals like manganese and zinc that refined sugar lacks.
Dietary Considerations
This recipe contains dairy and eggs, making it unsuitable for those with these allergies without modifications. The natural sugars make it appropriate for those avoiding refined sugars, and the portion-controlled serving size helps with mindful eating. The combination of protein, fat, and carbohydrates provides balanced nutrition that can satisfy sweet cravings while offering actual nutritional value.
Smart Swaps and Ingredient Substitutions
Common Substitutions:
- Cornstarch → Arrowroot powder or tapioca starch (use same amount, but arrowroot creates a glossier finish)
- Maple syrup → Honey, agave nectar, or ⅓ cup coconut sugar dissolved in 2 tablespoons warm water
- Whole milk → 2% milk works fine, or use 1¼ cups milk plus ¼ cup heavy cream for extra richness
- Egg yolks → 2 tablespoons additional cornstarch mixed with 2 tablespoons milk (for egg-free version)
Budget-Friendly Swaps:
- Vanilla wafers → Crushed graham crackers or homemade cookies
- Fresh whipped cream → Whipped topping from a container (though fresh tastes better)
- Maple syrup → 3 tablespoons brown sugar dissolved in 1 tablespoon water
Pantry Emergency Substitutions:
- Fresh bananas → ½ cup banana puree or mashed frozen bananas (thawed)
- Vanilla wafers → Any crispy cookie, crushed – gingersnaps add interesting spice
- Heavy cream for whipping → Canned coconut cream (chilled overnight) whips beautifully
Pro Tips for Substitutions:
- When using different sweeteners, taste and adjust – some are sweeter than others
- Store leftover egg whites in the freezer for future meringues or egg white omelets
- Homemade vanilla wafers can be made ahead and stored in airtight containers for up to one week
Make It Diabetes-Friendly
Sugar Substitutions:
- Replace ¼ cup maple syrup with 2-3 tablespoons sugar-free maple syrup or 1-2 teaspoons liquid stevia
- Use 2 tablespoons erythritol or monk fruit sweetener dissolved in 2 tablespoons warm water
- The natural sweetness of ripe bananas reduces the need for additional sweeteners significantly
Carb Modifications:
- Replace vanilla wafers with crushed nuts (almonds or pecans) for crunch with minimal carbs
- Use sugar-free cookies or make almond flour cookies as a lower-carb alternative
- Reduce portion sizes slightly and serve in smaller cups to naturally limit carb intake
Portion & Timing Tips:
- Serve ½ cup portions instead of larger servings – the rich flavor is satisfying in smaller amounts
- Estimated 15-20 grams carbs per modified serving (compared to 35-40 grams in original)
- Pair with a small handful of nuts or a piece of cheese to help stabilize blood sugar
- Best enjoyed as part of a balanced meal rather than on an empty stomach
Total Carb Reduction: Modified version contains approximately 40-50% fewer carbohydrates than the original recipe while maintaining the creamy, satisfying texture and banana flavor.
Perfect Pairing Suggestions
Beverage Pairings
Coffee is the classic companion – the slight bitterness perfectly balances the sweet creaminess of the pudding. Try it with a medium roast or cold brew for optimal flavor contrast. For wine lovers, a light Moscato or Riesling complements the banana flavors beautifully, while a cream sherry creates an elegant dessert course. Non-alcoholic options include chai tea, vanilla-flavored almond milk, or sparkling water with a splash of lemon to cleanse the palate.
Meal Integration Ideas
This dessert shines after lighter meals – think grilled fish with vegetables, fresh salads, or Mediterranean-style dishes. The creamy richness provides a satisfying contrast to lean proteins and fresh vegetables. For brunch settings, serve alongside fresh fruit salad and light pastries. The individual cup format makes it perfect for buffet-style entertaining or potluck gatherings.
Seasonal Serving Suggestions
Summer calls for extra fresh fruit – add berries or peach slices for seasonal flair. Fall presentations benefit from a sprinkle of cinnamon or toasted nuts. Winter gatherings can feature warm spices like nutmeg or cardamom. Spring celebrations pair beautifully with edible flowers or fresh mint garnishes.
Complete Menu Ideas
For casual entertaining: grilled chicken, roasted vegetables, and these pudding cups for dessert. Formal dinner parties: serve after seafood courses or light pasta dishes. Family gatherings: perfect ending to barbecue meals or holiday dinners where you want something comforting but not overly heavy.
Pro Tips and Troubleshooting
Professional Techniques
Always temper your egg mixture gradually – rushing this step leads to scrambled eggs in your pudding. Strain the finished pudding through a fine-mesh sieve if you notice any lumps, and press plastic wrap directly onto the surface to prevent skin formation. For restaurant-quality presentation, use a piping bag to create elegant layers in clear glasses.
Common Mistakes and Solutions
If your pudding turns lumpy, it’s usually from adding the cornstarch too quickly or not tempering the eggs properly. Strain immediately and whisk vigorously. Too thin? Cook a bit longer while stirring constantly. Too thick? Whisk in a tablespoon of milk at a time until you reach desired consistency. Grainy texture typically means the eggs cooked too quickly – next time, use lower heat and constant stirring.
Storage and Make-Ahead Strategies
Assembled cups stay fresh for up to 3 days refrigerated, but add fresh banana slices just before serving to prevent browning. The pudding base can be made up to 4 days ahead and stored separately. For best texture, assemble cups no more than 4 hours before serving. Freeze individual portions for up to 1 month, though texture will be slightly different after thawing.
Scaling and Presentation Tips
This recipe doubles or triples easily for larger gatherings. For elegant presentation, use clear glasses to show off the beautiful layers, or serve in vintage teacups for a charming touch. Garnish with a single vanilla wafer standing upright, a sprinkle of cinnamon, or a few fresh berries for color contrast.
These banana pudding cups represent the perfect marriage of nostalgic comfort food and modern convenience, delivering that classic Southern dessert experience in an elegant, portion-controlled format that’s guaranteed to impress. Whether you’re hosting a dinner party or simply treating your family to something special, this recipe proves that homemade doesn’t have to mean complicated – just delicious.