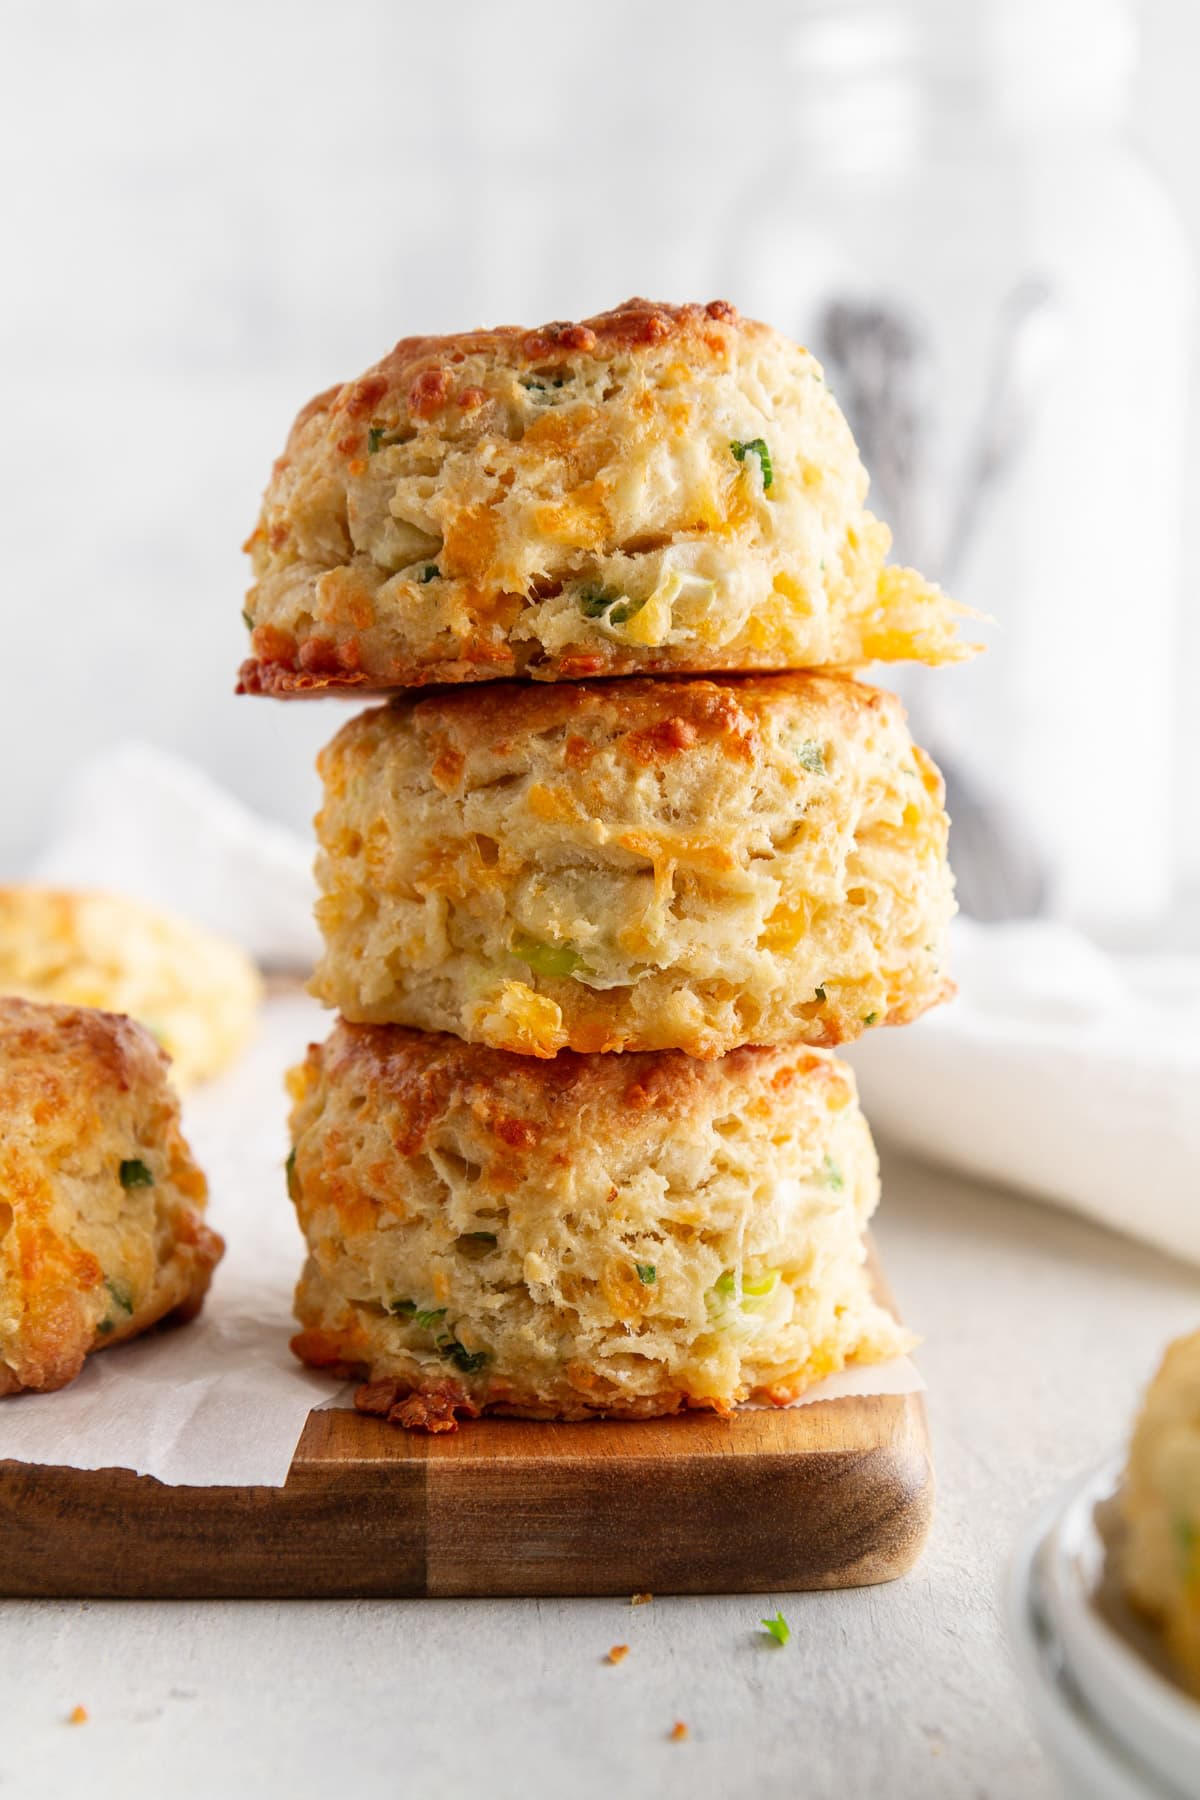
Cheddar Scallion Biscuits
Get ready for biscuit nirvana!
These Cheddar Scallion Biscuits are what happens when buttery, flaky layers meet sharp cheddar and the bright zip of fresh scallions.
They’re crisp on the outside, tender on the inside, and guaranteed to disappear faster than you can say “pass the butter.”
The secret to these heavenly biscuits is the nearly-frozen butter that creates those irresistible flaky pockets as it melts in the hot oven.
Each bite delivers a perfect balance of savory cheese, subtle garlic, and fresh scallions that’ll make you wonder why you ever settled for plain biscuits.
They’re spectacular alongside soups and stews, but honestly? They’re good enough to be the star of the meal.

Ingredients
For the biscuits:
- 6 tablespoons unsalted butter, chopped, nearly frozen
- 2 cups all-purpose flour, plus more for dusting
- 1 tablespoon baking powder
- ¼ teaspoon baking soda
- 1 teaspoon salt
- ¼ teaspoon garlic powder
- 1 cup cheddar cheese, shredded
- ⅓ cup thin-sliced scallions (about 3 small scallions)
- 1 cup low-fat buttermilk
For the topping:
- 1 egg, beaten for egg wash
Steps
- Preheat your oven to 425°F (220°C). If your butter is completely frozen, let it thaw briefly for about 5-10 minutes – you want it very cold but just soft enough to grate. Cold butter is the key to flaky layers, as it creates steam pockets while baking.
- In a large bowl, thoroughly whisk together the 2 cups flour, 1 tablespoon baking powder, ¼ teaspoon baking soda, 1 teaspoon salt, and ¼ teaspoon garlic powder until evenly distributed. Uneven distribution of leavening agents can cause biscuits to rise unevenly.
- Using the largest holes on a box grater, grate the 6 tablespoons of nearly-frozen butter directly into the flour mixture. This technique creates thin shreds of butter that distribute more evenly than chunks. Use your fingertips (not your whole hands, which are warmer) to quickly toss the butter into the flour until all butter shreds are just coated. Work quickly to keep the butter cold.
- Add the 1 cup shredded cheddar and ⅓ cup sliced scallions to the flour-butter mixture. Toss gently with your fingertips to distribute evenly. Overmixing at this stage can warm the butter and develop gluten, resulting in tough biscuits.
- Pour in ¾ cup of the buttermilk and stir with a wooden spoon or rubber spatula using gentle folding motions just until the dough begins to come together. If dry flour remains at the bottom of the bowl, add the remaining buttermilk 1 tablespoon at a time until all flour is moistened. The perfect dough should hold together without being crumbly, but should not be wet or sticky. Overworking the dough will result in tough biscuits.
- Turn the dough out onto a well-floured surface. With floured hands, very gently pat (don’t roll) the dough into a ½-inch thick rectangle. Using the letter-fold technique: fold the bottom third of the dough up and the top third down over it (like folding a business letter). This creates layers in your biscuits.
- Gently pat the dough again into a ½-inch thick rectangle and repeat the letter fold. Do this folding process one final time, then pat the dough out to a 1-inch thickness. The dough should feel light and somewhat layered at this point.
- Using a floured 2½-inch biscuit cutter, cut the dough into rounds with a straight down-and-up motion. Never twist the cutter, as this seals the edges and prevents proper rising. For highest rise, cut straight down and pull straight up. If you don’t have a biscuit cutter, a sharp knife can be used to cut squares.
- Gather any scraps, gently pat them together to a 1-inch thickness, and cut additional biscuits. These “second-round” biscuits won’t rise quite as high as the first cuts but will still be delicious.
- Place the biscuit rounds on a baking sheet or in a cast-iron skillet with their sides just barely touching. This arrangement helps them rise higher (sides support each other) while still allowing edges to crisp. Brush the tops with beaten egg wash for a golden, shiny finish.
- Bake in the preheated oven for 13-15 minutes until the tops are golden brown and the internal temperature reaches about 200°F (93°C). Look for visible layers on the sides and a slight separation where the biscuits touch – this indicates they’re done.
- Remove from the oven and allow to cool for 5 minutes before serving. These biscuits are best enjoyed warm, when the cheese is still slightly gooey and the outside is crisp.

Smart Swaps
- Use whole wheat flour for half the all-purpose flour to add fiber and nutty flavor
- Substitute extra-sharp cheddar for regular cheddar for more intense cheese flavor
- Replace buttermilk with ¾ cup plain yogurt + ¼ cup milk if you don’t have buttermilk on hand
- Try chives or green onion tops instead of scallions for a milder onion flavor
- Add ½ teaspoon dried herbs like thyme or rosemary for an herby variation
Make It Diabetes-Friendly
- Replace all-purpose flour with 1½ cups almond flour + ½ cup coconut flour to reduce carbs by approximately 65% (reduces from about 24g to 8g per biscuit)
- Use ¾ cup full-fat Greek yogurt + ¼ cup water instead of buttermilk to lower the lactose content
- Add 1 tablespoon ground flaxseed to the dry ingredients to increase fiber, which helps slow glucose absorption
- Make smaller biscuits (using a 1½-inch cutter) to reduce portion size while still enjoying the full flavor
- Pair with protein-rich foods to reduce overall glycemic impact of the meal
Pro Tips
- Freeze your grater before grating the butter for even colder butter shreds
- For extra-tall biscuits, chill the cut dough for 15 minutes in the refrigerator before baking
- Use a low-protein all-purpose flour (like White Lily) if available for more tender results
- For the best cheese flavor, grate your own cheddar rather than using pre-shredded (which contains anti-caking agents)
- Serve immediately or reheat leftovers in a 300°F (150°C) oven for 5-7 minutes to restore their crisp exterior