Depression Era Water Pie Recipe
This pie is basically magic disguised as Depression-era frugality, transforming the most basic pantry staples into something that tastes like you actually know what you’re doing in the kitchen.
Fair warning: people are going to ask for your “secret family recipe” and you’ll have to explain that your great achievement involves pouring water into a pie crust and somehow not messing it up.
The genius of this recipe lies in its beautiful simplicity – while everyone else is stress-shopping for exotic ingredients, you’re creating dessert magic with items you probably already have sitting around.
What starts as a watery, questionable-looking mess transforms into a custard-like filling that’ll have you questioning everything you thought you knew about baking physics.
This is the kind of recipe that makes you feel like a pioneer woman, except instead of churning butter by hand, you’re just trying not to spill water everywhere while carrying it to the oven.
Born from necessity during tough times, this humble pie proves that the best comfort food doesn’t need to break the bank or require a culinary degree to master.
Ingredients
For the pie
- 1 deep dish 9-inch pie crust, unbaked (store-bought or homemade)
- 1 1/2 cups water, room temperature
- 4 tablespoons all-purpose flour
- 1 cup granulated sugar
- 1 /2 teaspoon salt
- 2 teaspoons vanilla extract, pure preferred
- 5 tablespoons butter, sliced into small pats
Instructions
Preparation
- 1 Preheat your oven to 400°F (204°C) and position the rack in the center. Place your 9-inch deep dish pie crust on a rimmed baking sheet – this catches any potential spills and makes transferring easier.
- 2 Carefully pour the 1 1/2 cups water directly into the unbaked pie crust. Pour slowly and steadily to avoid splashing, and don’t worry if this looks completely wrong – that’s exactly how it should look at this stage.
Creating the filling mixture
- 3 In a small mixing bowl, whisk together the 4 tablespoons flour, 1 cup granulated sugar, and 1/2 teaspoon salt until completely combined. Using a wire whisk ensures no lumps remain in your dry mixture.
- 4 Sprinkle the flour-sugar mixture evenly over the water in the pie crust, but resist the urge to stir. The key here is even distribution – you want the mixture to cover the entire surface of the water like a blanket.
Final assembly
- 5 Drizzle the 2 teaspoons vanilla extract over the entire surface of the pie, then evenly distribute the 5 tablespoons of sliced butter pats across the top. The butter should be cut into pieces roughly the size of a nickel for optimal melting.
Baking process
- 6 Bake for 30 minutes at 400°F (204°C), then reduce the temperature to 375°F (190°C) and continue baking for an additional 30 minutes. If the crust edges begin browning too quickly, cover them with strips of aluminum foil.
- 7 The pie will look watery and unset when you remove it – this is completely normal. Allow it to cool to room temperature for at least 2 hours, then refrigerate for 4-6 hours or overnight until completely chilled and set before slicing.
Recommended Equipment and Kitchen Tools
Essential Tools (for best results)
- Deep dish pie pan – A 9-inch ceramic or glass pan works best for even heat distribution and prevents soggy bottoms
- Rimmed baking sheet – Catches any overflow and makes oven transfers much safer when dealing with liquid filling
- Wire whisk – Ensures your dry ingredients combine smoothly without lumps that could create texture issues
- Liquid measuring cup – Accurate water measurement is crucial for proper custard formation during baking
Helpful Upgrades
- Kitchen scale – For precise flour measurements, especially if you’re at high altitude where accuracy matters more
- Silicone spatula – Perfect for evenly distributing the flour mixture without disturbing the water layer beneath
- Instant-read thermometer – The filling should reach 160°F (71°C) internally when properly set
Nice-to-Have Options
- Pie weights – If making your own crust, these prevent shrinkage during blind baking
- Pastry brush – Useful for applying egg wash to crust edges for extra golden color
- Glass pie dish – Allows you to monitor bottom crust browning and filling consistency
Recipe Variations and Dietary Modifications
Gluten-Free Adaptation
- Replace all-purpose flour with 4 tablespoons almond flour or 3 tablespoons cornstarch for thickening
- Use a gluten-free pie crust made with rice flour or almond flour blend
- Expect a slightly different texture – almond flour creates a nuttier flavor while cornstarch yields a cleaner taste
- Add an extra 10 minutes to cooling time as alternative thickeners may take longer to fully set
Dairy-Free Modifications
- Substitute 5 tablespoons vegan butter or coconut oil (solid, not melted) for regular butter
- Coconut oil adds subtle tropical notes while vegan butter maintains the traditional flavor profile
- Ensure your pie crust is made with vegetable shortening rather than lard or butter
Flavor Variations
- Lemon Water Pie: Add 2 tablespoons fresh lemon juice and 1 teaspoon lemon zest with the vanilla
- Coconut Version: Replace 1/2 cup water with coconut milk and add 1/2 cup shredded coconut
- Spiced Variation: Include 1/2 teaspoon cinnamon and 1/4 teaspoon nutmeg in the flour mixture
- Chocolate Twist: Add 2 tablespoons cocoa powder to the flour mixture and increase sugar by 2 tablespoons
Presentation Options
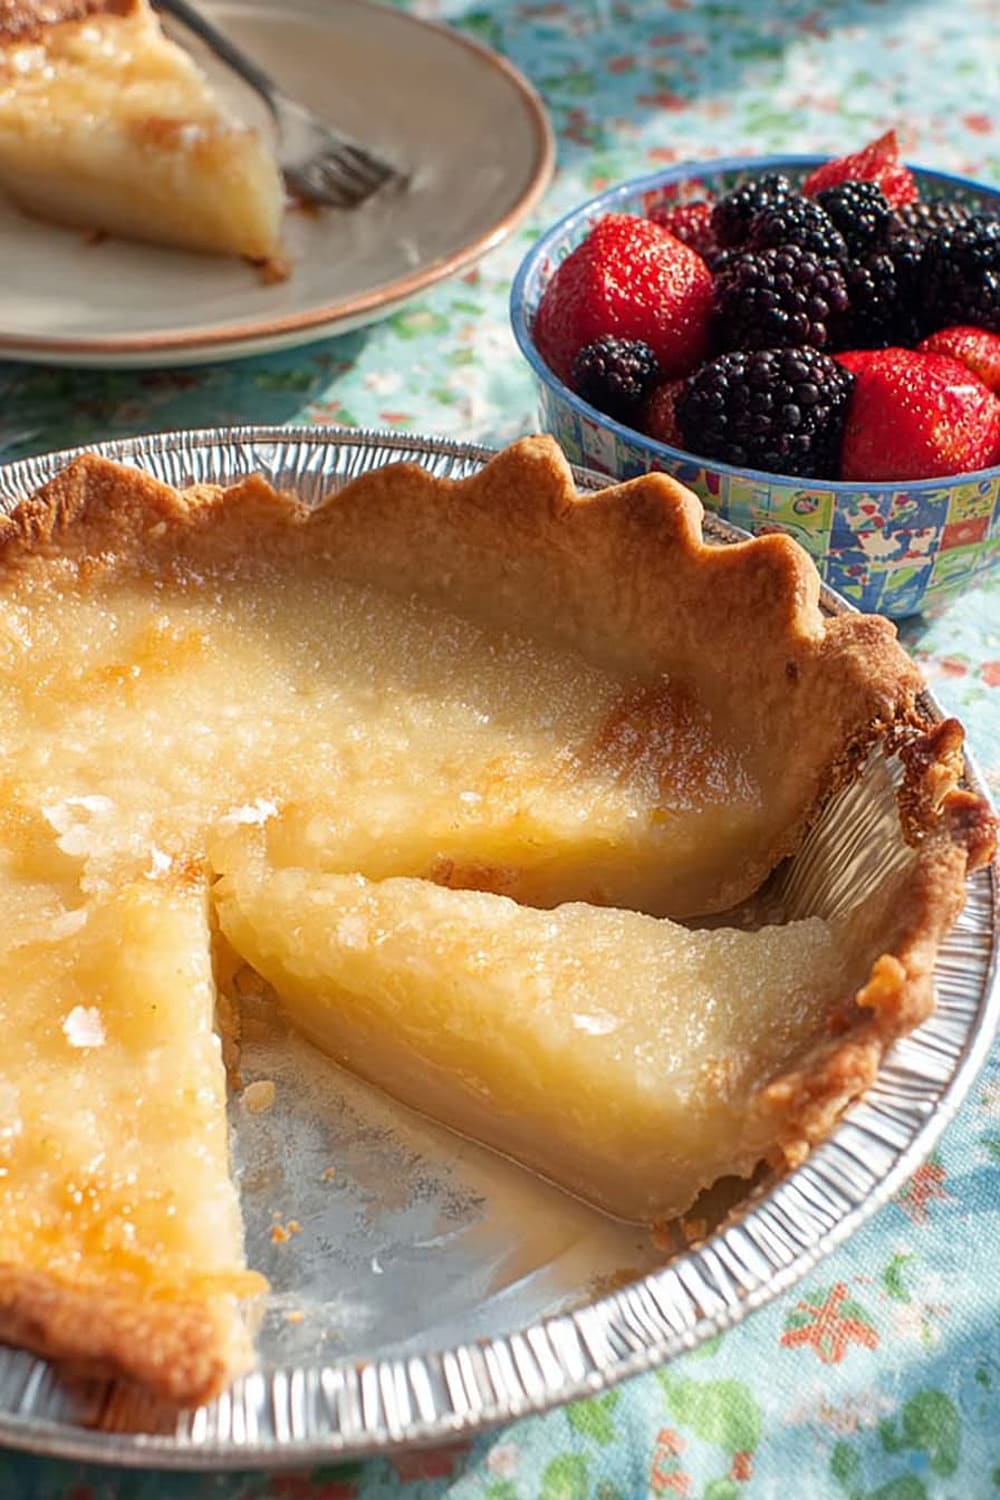
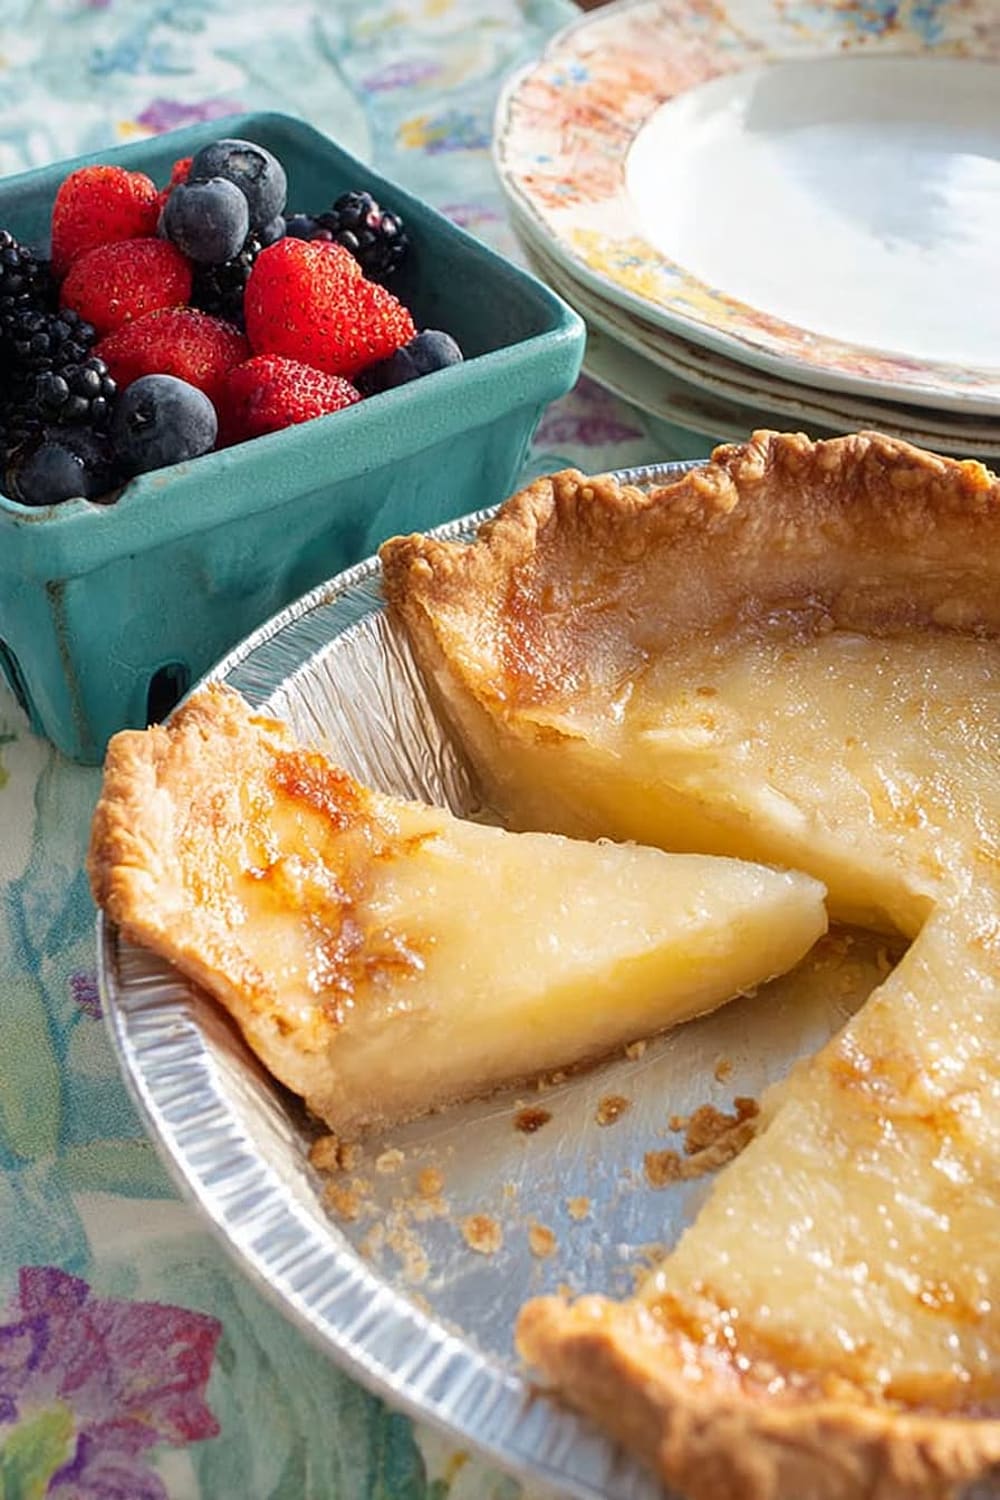
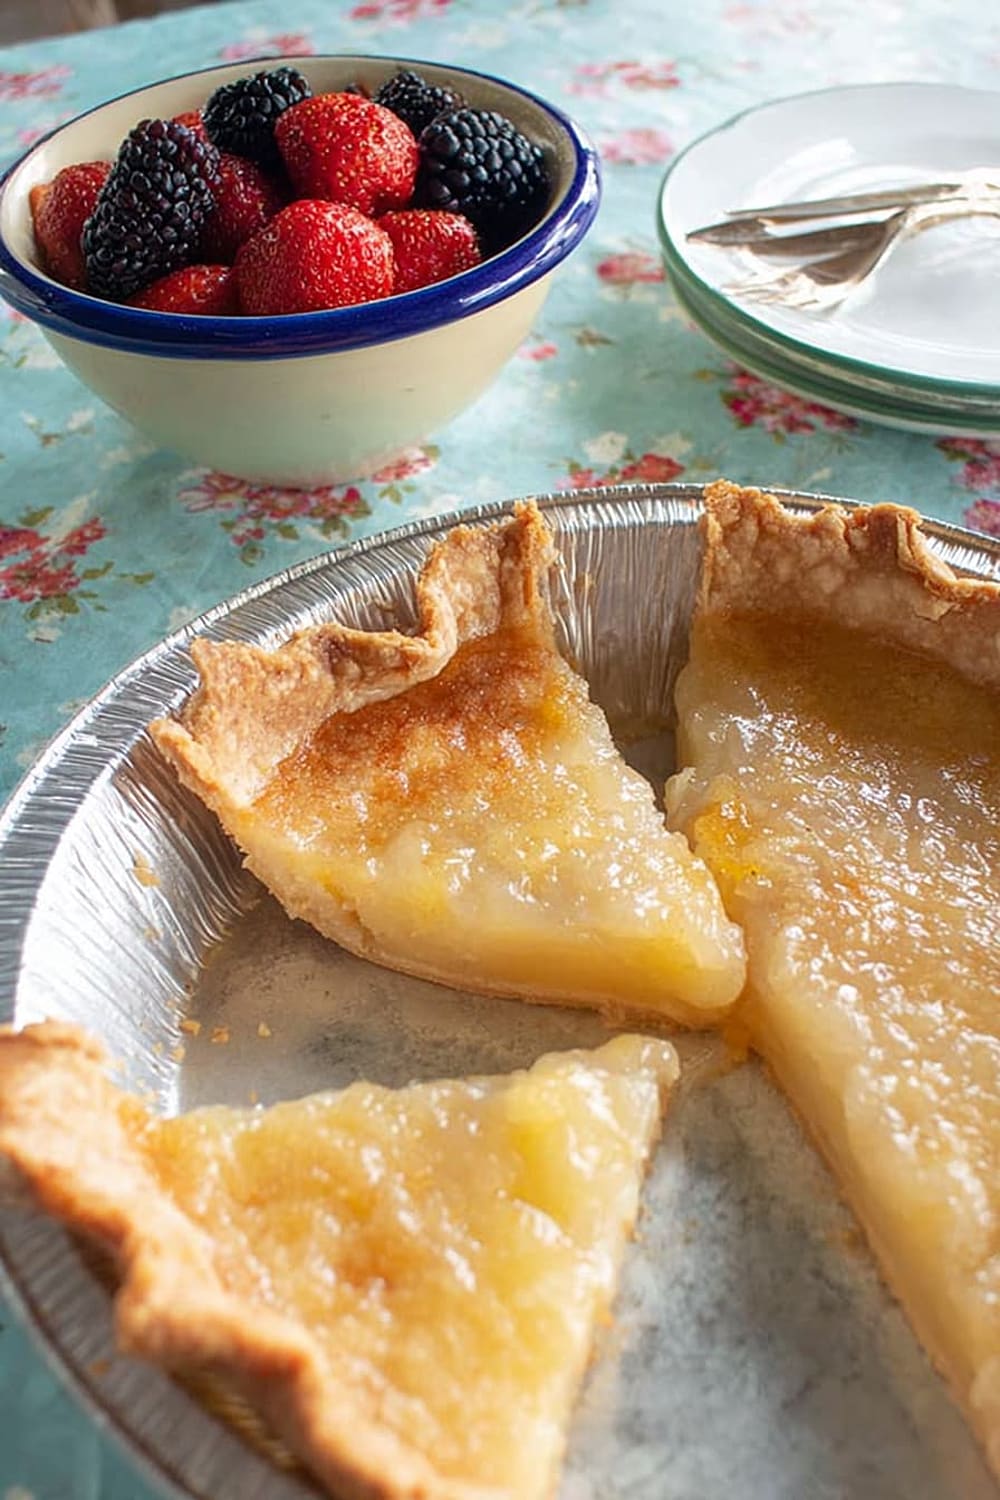
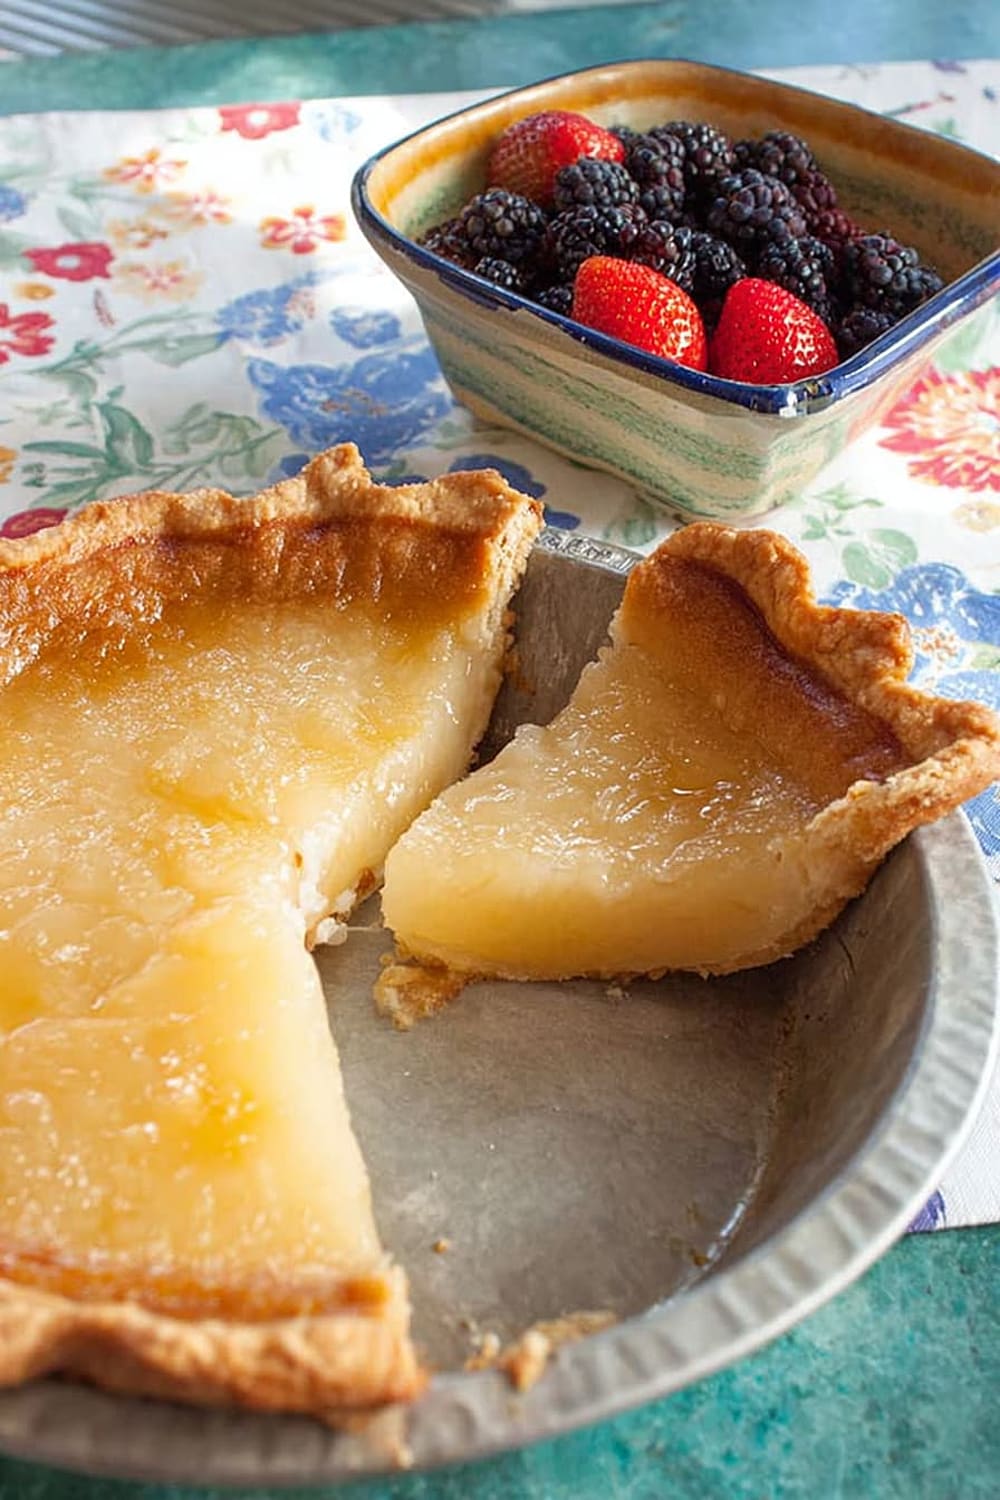
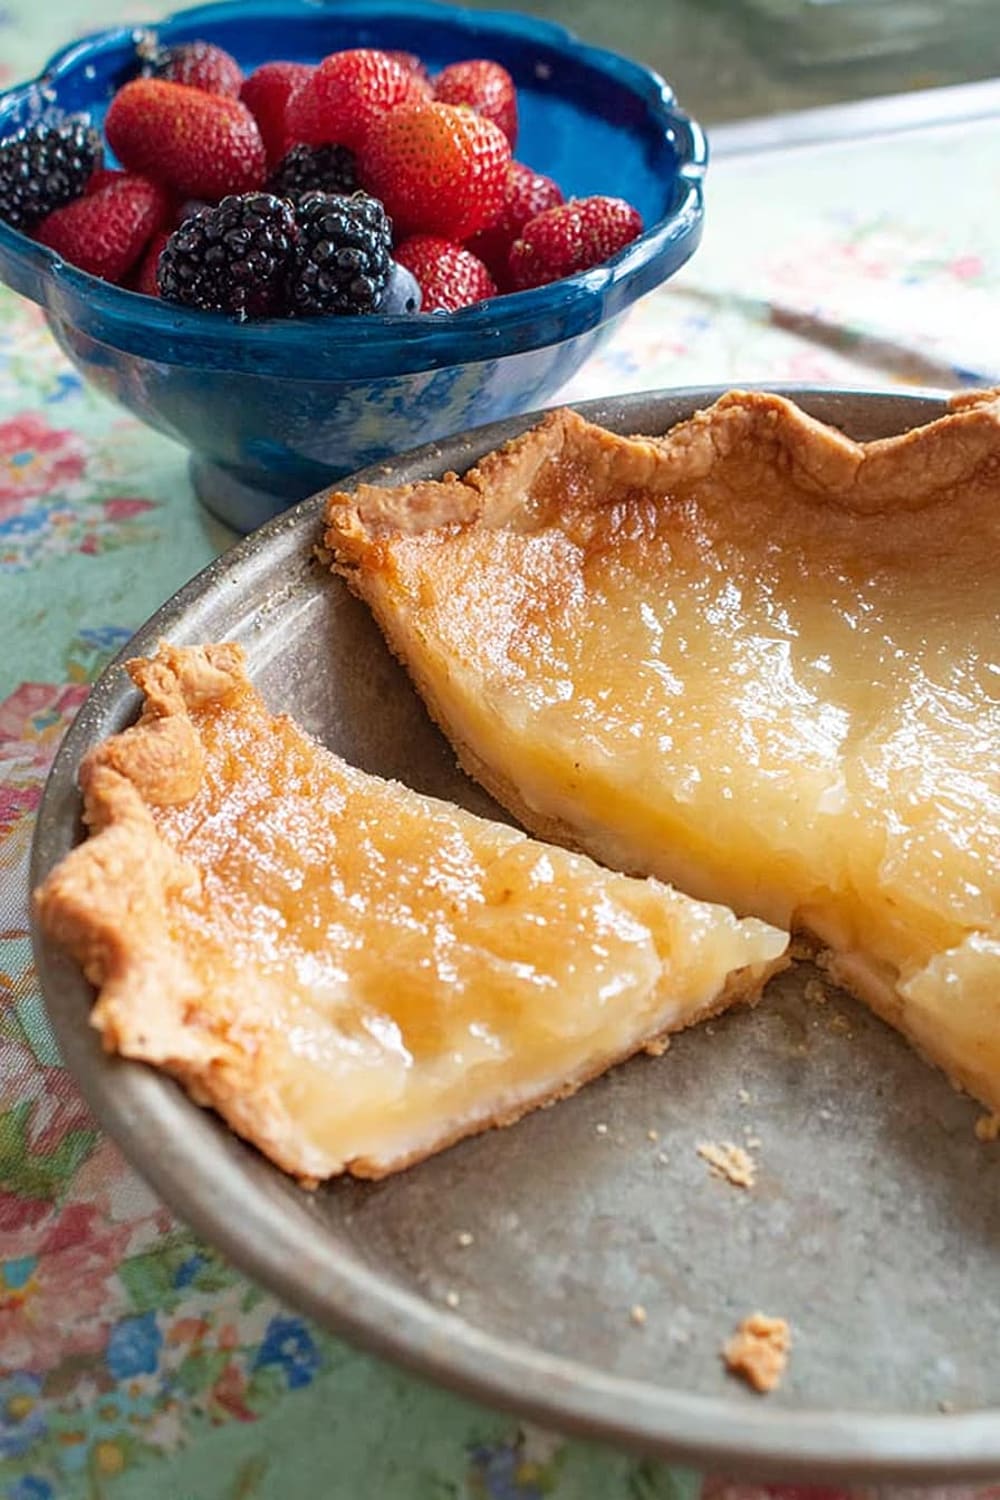
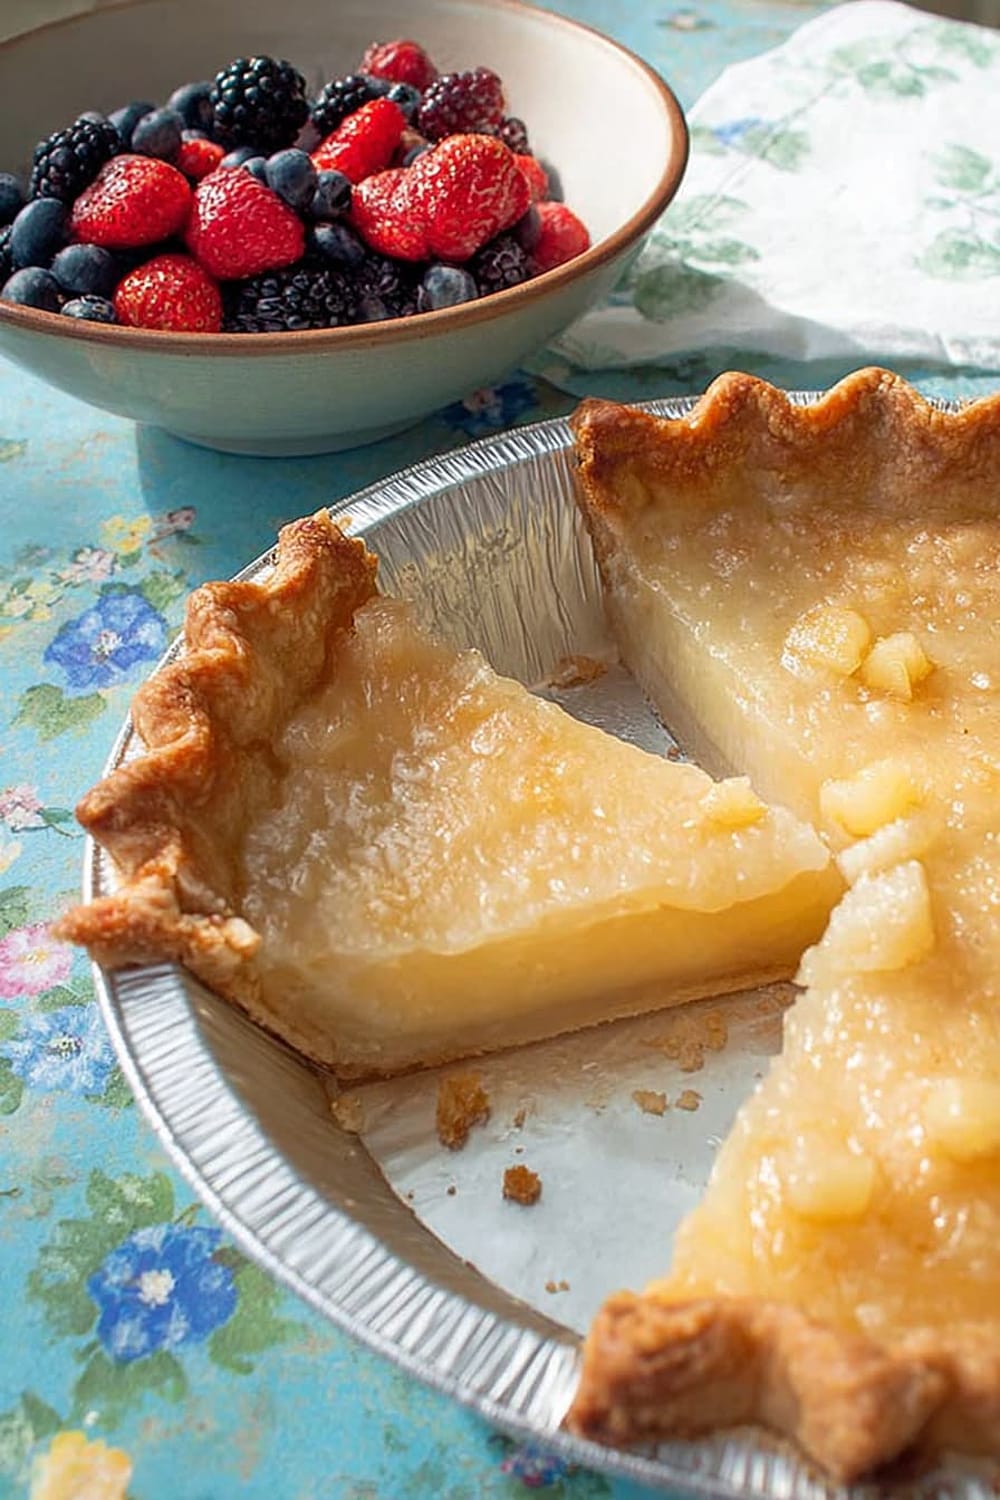
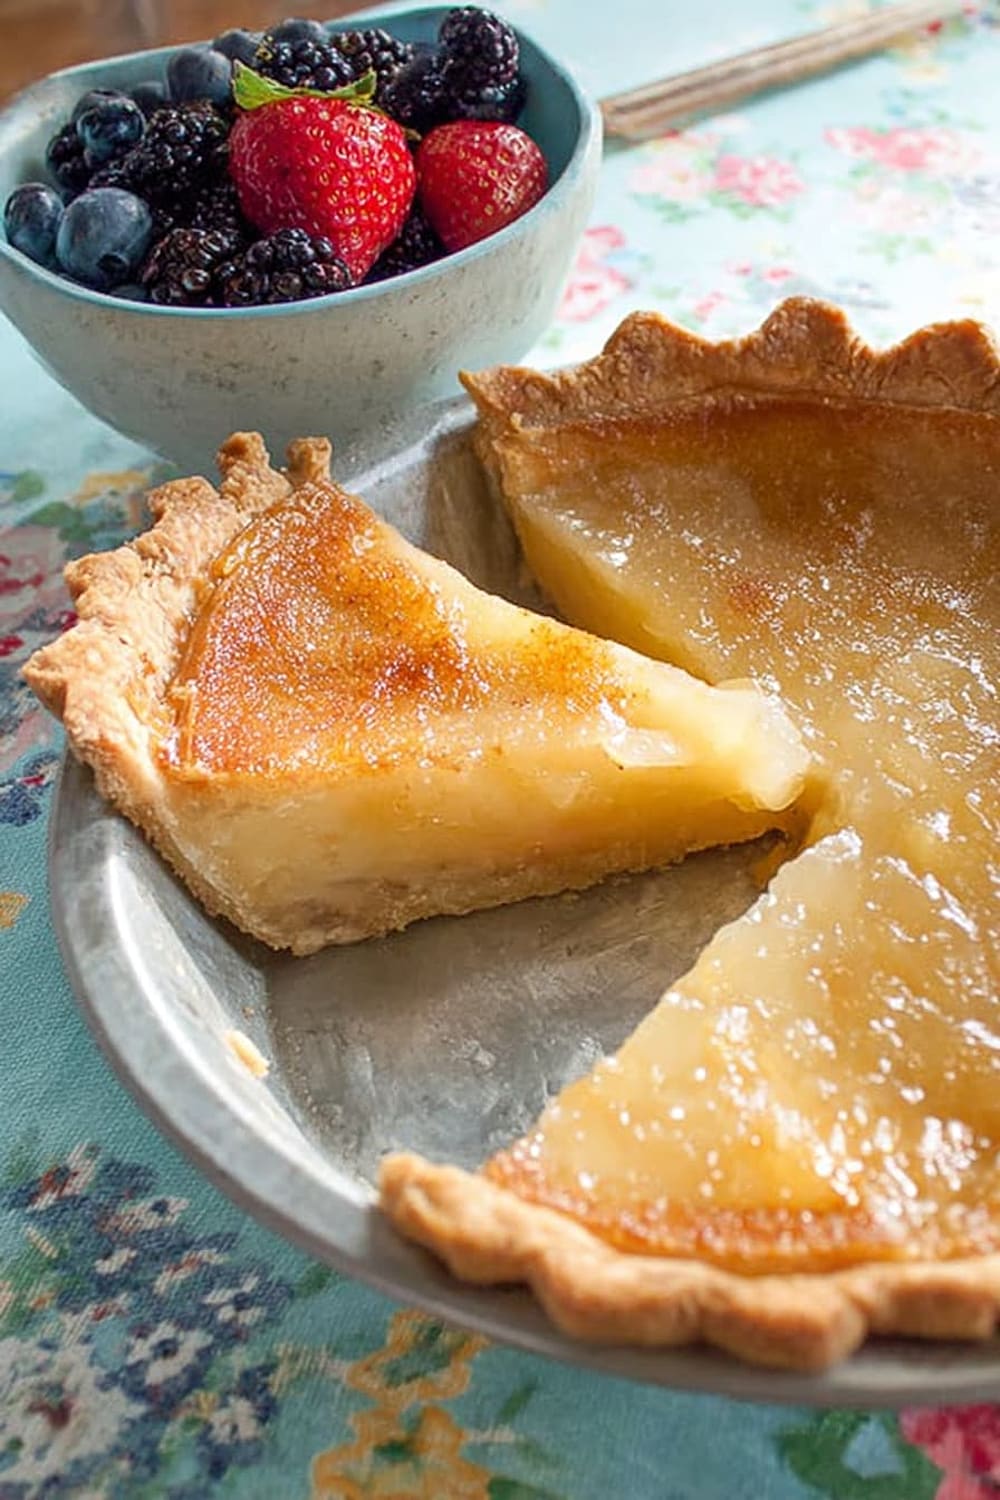
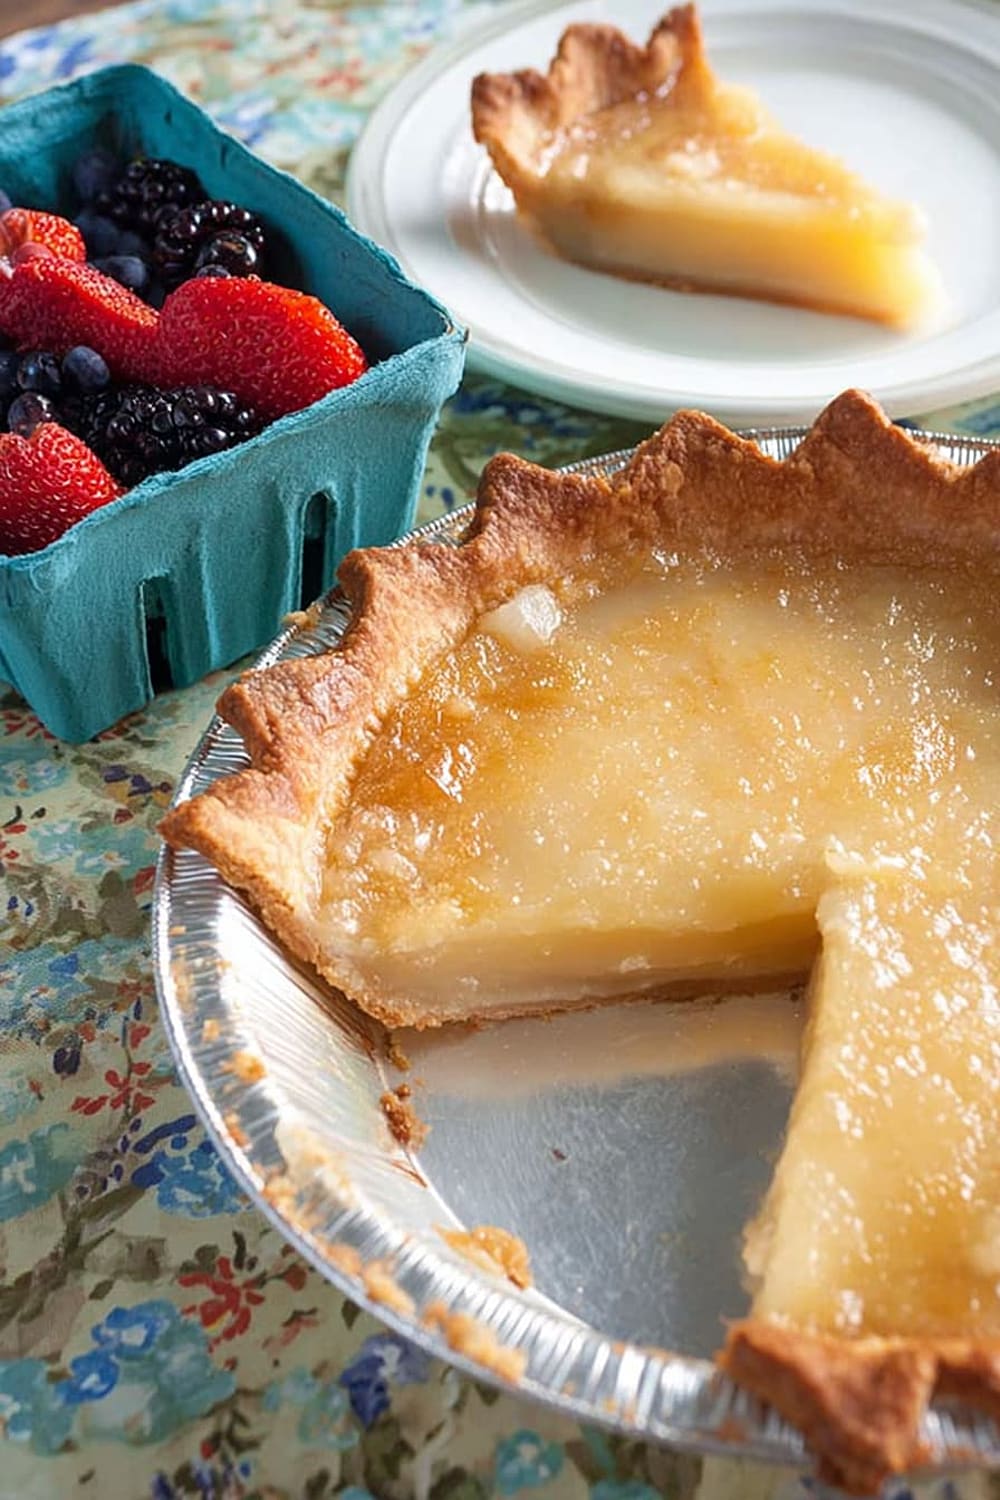
- Top with fresh whipped cream and seasonal berries for elegant serving
- Dust with powdered sugar through a fine-mesh sieve before serving
- Serve with vanilla ice cream for temperature contrast
Nutritional Information and Health Benefits
Key Nutritional Highlights
Each serving contains approximately 285 calories with the majority coming from the granulated sugar and pie crust. The filling provides 38 grams of carbohydrates, 12 grams of fat from the butter and crust, and 3 grams of protein. Despite its simple ingredients, this pie delivers quick energy from natural sugars and some calcium from the flour fortification.
Health Benefits of Main Ingredients
The vanilla extract contains vanillin, a compound with antioxidant properties that may help reduce inflammation. Butter provides fat-soluble vitamins A, D, E, and K, essential for nutrient absorption and hormone production. The all-purpose flour is typically enriched with B vitamins, including folate and thiamine, which support energy metabolism and nervous system function. While not a health food, the simple ingredient list means you know exactly what you’re consuming without hidden preservatives or artificial additives.
Dietary Considerations
This recipe contains gluten from wheat flour and dairy from butter, making it unsuitable for those with celiac disease or lactose intolerance without modifications. The high sugar content makes it a treat best enjoyed in moderation. One serving provides about 15% of daily recommended carbohydrates for most adults. The minimal processing of ingredients means fewer additives compared to commercial desserts.
Smart Swaps and Ingredient Substitutions
Common Substitutions:
- All-purpose flour → 3 tablespoons cornstarch or 4 tablespoons tapioca starch (creates smoother texture)
- Granulated sugar → 3/4 cup coconut sugar or 1 cup packed brown sugar (adds molasses notes)
- Vanilla extract → 1 teaspoon almond extract or 2 teaspoons rum extract (use less as these are stronger)
- Butter → 5 tablespoons coconut oil (solid) or vegetable shortening (maintains richness)
Budget-Friendly Swaps:
- Pure vanilla extract → 2 teaspoons imitation vanilla (costs significantly less with minimal flavor difference)
- Store-bought pie crust → homemade crust using basic flour, shortening, and salt (saves about 40% on cost)
- Salted butter → unsalted butter plus extra 1/4 teaspoon salt (often cheaper per pound)
Pantry Emergency Substitutions:
- No vanilla extract → 1 teaspoon maple syrup or 1/2 teaspoon cinnamon for flavor depth
- No pie crust → graham cracker crust made from crushed crackers and melted butter
- No granulated sugar → 1 cup powdered sugar (reduce flour to 3 tablespoons to compensate for cornstarch content)
Pro Tips for Substitutions:
- Store vanilla extract in a cool, dark place for maximum potency and longevity
- When using liquid substitutes for vanilla, reduce water by equivalent amount to maintain proper consistency
- Freeze butter for 15 minutes before slicing for cleaner cuts and more even distribution
Make It Diabetes-Friendly
Sugar Substitutions:
- Replace 1 cup granulated sugar with 1/2 cup erythritol or 1/3 cup stevia blend (reduces carbs by approximately 75%)
- Monk fruit sweetener works exceptionally well in custard-style desserts – use 1/3 cup for equivalent sweetness
- Xylitol can substitute 1:1 for sugar but may cause digestive upset in some individuals
- Expect slightly different texture as sugar alcohols don’t caramelize the same way as regular sugar
Carb Reduction Modifications:
- Use almond flour pie crust instead of traditional wheat crust (reduces carbs by 60% per slice)
- Replace 4 tablespoons all-purpose flour with 3 tablespoons coconut flour or 2 tablespoons psyllium husk powder
- Consider making mini pies in muffin tins for built-in portion control
- Coconut flour absorbs more liquid, so expect a slightly firmer set
Portion & Timing Tips:
- Cut into 10 slices instead of 8 to reduce carb load per serving (approximately 18g carbs per slice with modifications)
- Pair with 2 tablespoons unsweetened whipped cream and 1/4 cup fresh berries for added fiber and protein
- Serve after a protein-rich meal to minimize blood sugar spikes
- Total Carb Reduction: Modified version contains approximately 22g carbs per slice versus 38g in original
Perfect Pairing Suggestions
Beverage Pairings
Coffee pairs beautifully with this custard-like pie, especially a medium roast that won’t overpower the delicate vanilla notes. Black tea with a splash of milk complements the creamy texture, while chamomile tea creates a soothing combination perfect for evening dessert. For wine lovers, a late-harvest Riesling or Moscato echoes the sweetness without competing, and bourbon or dark rum in small sips enhances the vanilla flavors for adult gatherings.
Side Dish Recommendations
Fresh berries – strawberries, blueberries, or blackberries – provide bright acidity that cuts through the pie’s richness while adding natural vitamins. Lightly sweetened whipped cream offers textural contrast and temperature variation when the pie is served chilled. Toasted nuts like pecans or almonds add satisfying crunch and healthy fats. A small scoop of vanilla bean ice cream creates an indulgent parfait-style presentation that’s perfect for special occasions.
Complete Meal Ideas
This pie shines as the finale to comfort food dinners – think pot roast, fried chicken, or hearty stews where its simplicity provides sweet relief after savory richness. For holiday meals, it offers nostalgic charm alongside traditional favorites. Summer barbecues benefit from its make-ahead convenience and refreshing chilled temperature. Potluck gatherings appreciate its crowd-pleasing nature and easy transport.
Occasion Suggestions
Perfect for historical-themed dinners, church socials, family reunions, and any time you want to share a conversation starter about Depression-era ingenuity and resourcefulness.
Pro Tips and Troubleshooting
Professional Techniques
The secret to perfect Water Pie lies in temperature control and patience. Always use room temperature water rather than cold – this helps the ingredients integrate more smoothly during baking. Pre-bake your crust for 8-10 minutes if it tends to get soggy, then add the filling to a warm (not hot) crust. Distribute butter pats evenly by imagining your pie divided into 8 sections and placing one pat in each area for consistent richness throughout.
Common Mistake Prevention
Never stir the filling once assembled – the magic happens through gentle heat distribution, not mixing. Don’t open the oven door during the first 45 minutes of baking, as temperature fluctuations prevent proper setting. Avoid overbaking – the filling should still jiggle slightly in the center when done, as it continues cooking from residual heat. Cool completely before refrigerating to prevent condensation that creates a soggy crust.
Storage and Make-Ahead Strategies
This pie actually improves overnight as flavors meld and texture fully develops. Wrap tightly in plastic wrap and refrigerate for up to 5 days. Freeze whole pie for up to 3 months – thaw overnight in refrigerator before serving. For best results, make 1-2 days ahead of serving to allow proper setting time.
Recipe Scaling
Double recipe works perfectly in a 10-inch deep dish pan – increase baking time by 10-15 minutes. For individual servings, use 6-ounce ramekins with 1/4 cup water each and reduce baking time to 25-30 minutes total.
The beauty of Depression Era Water Pie lies not just in its incredible simplicity, but in its reminder that sometimes the most memorable dishes come from the most humble beginnings. This recipe transforms basic pantry staples into something genuinely special, proving that you don’t need expensive ingredients or complicated techniques to create dessert magic that’ll have everyone asking for seconds.