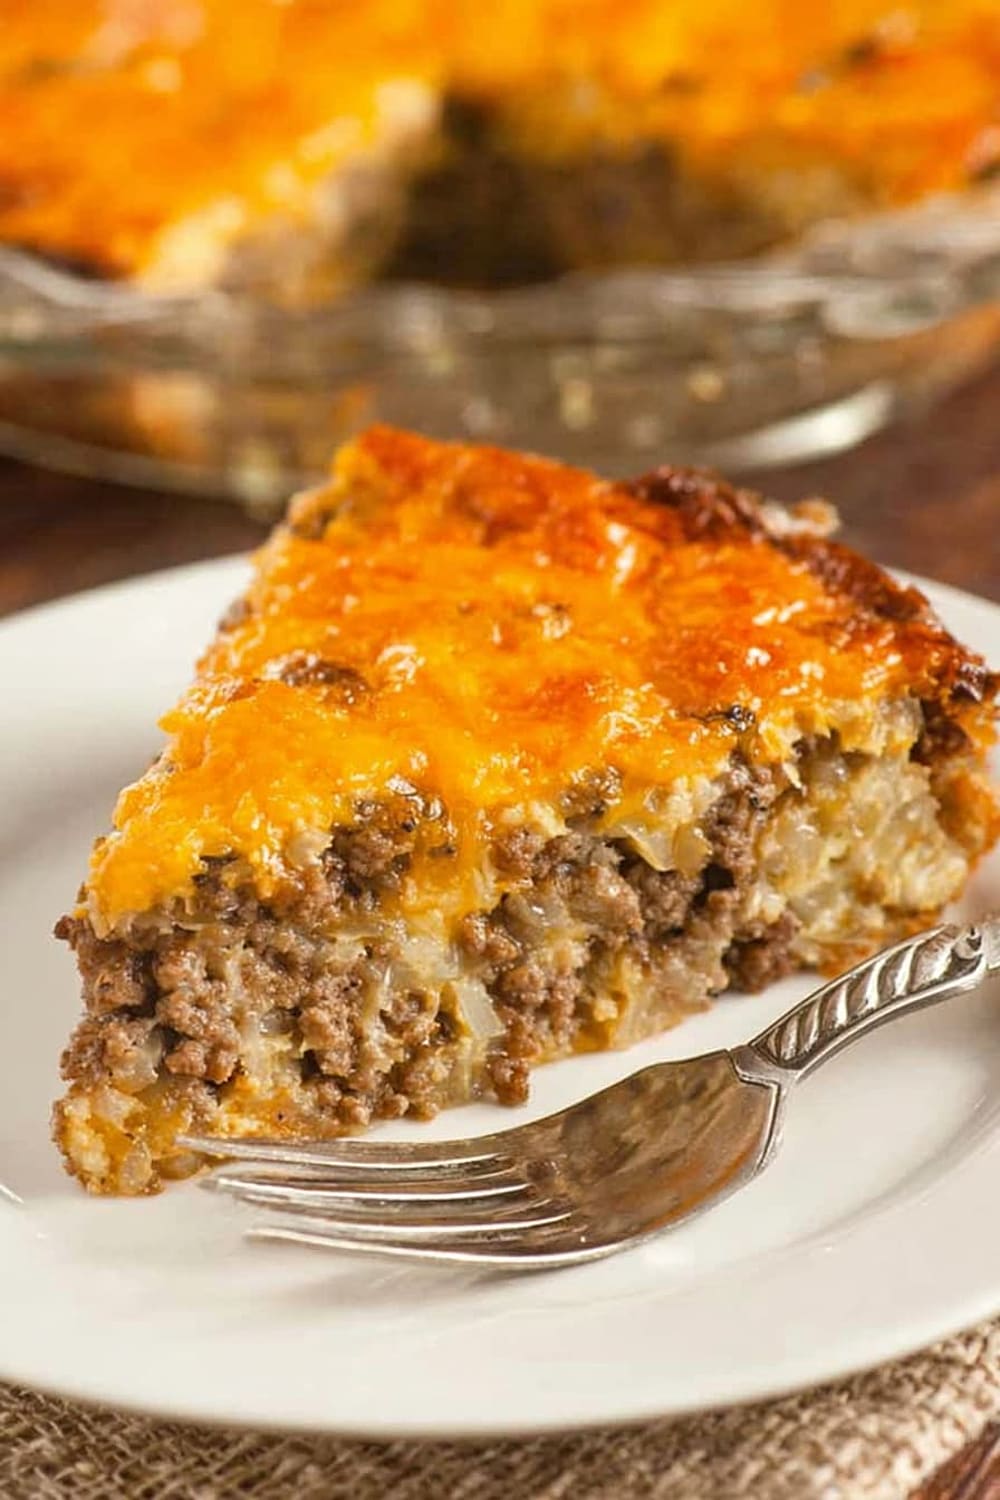
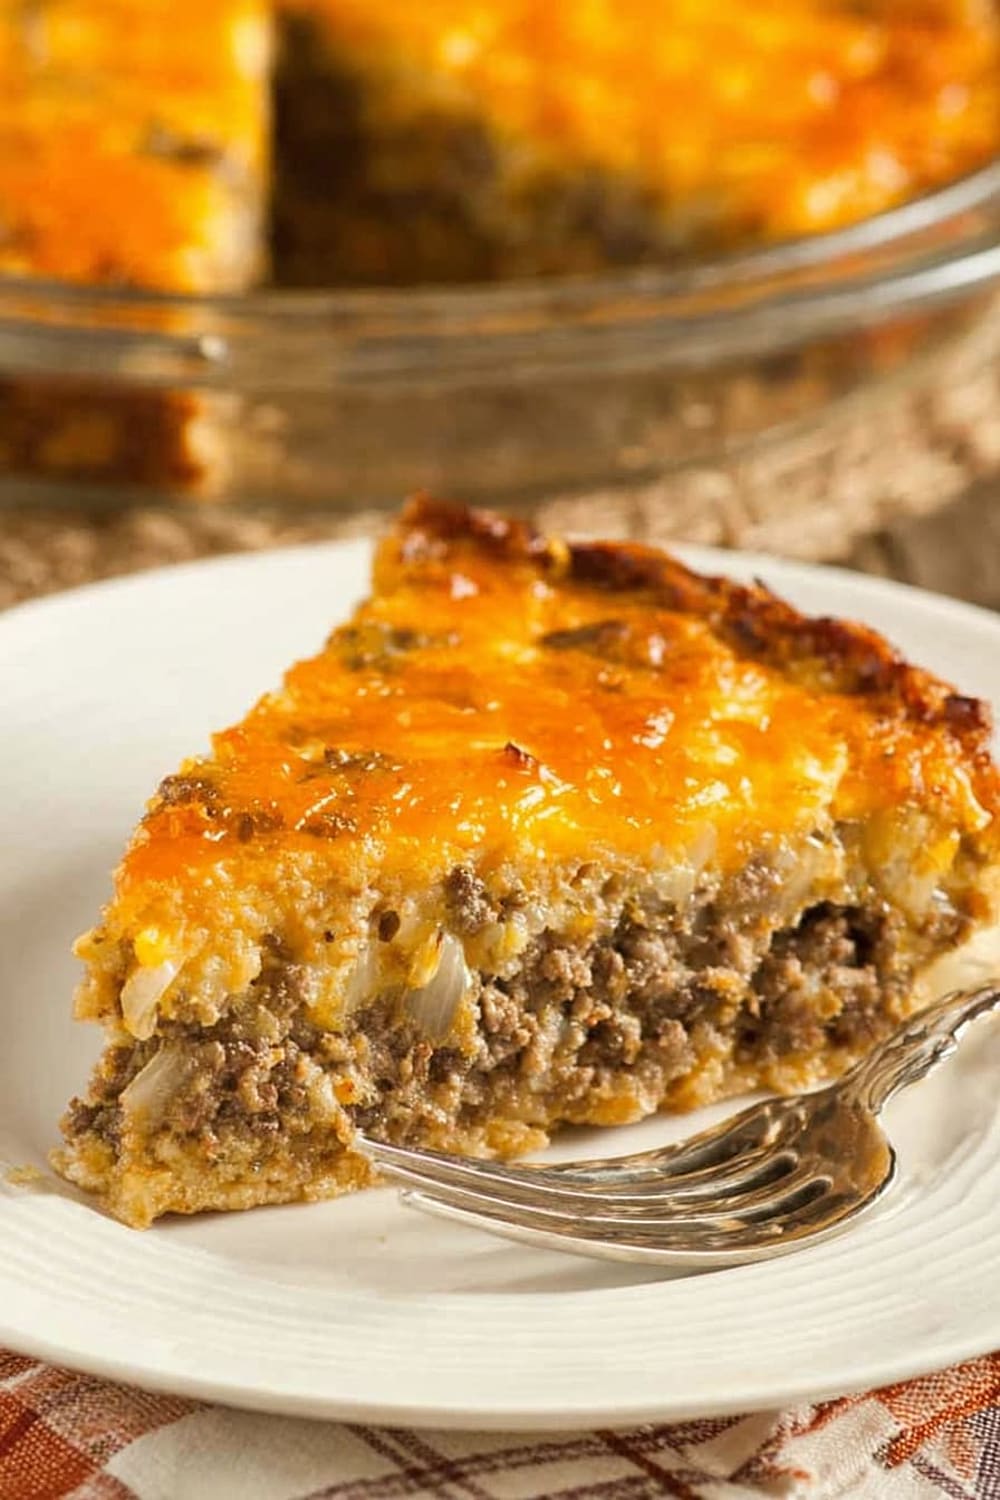
Easy Cheeseburger Pie Recipe
This cheeseburger pie is basically comfort food’s greatest hits album wrapped up in one glorious, cheesy package that’ll have your family fighting over the last slice.
Picture all the flavors of your favorite burger – juicy ground beef, sweet onions, and melted cheddar cheese – magically transforming into a sliceable pie that somehow tastes even better than the original.
The genius of this recipe lies in its simplicity: while it looks like you spent hours crafting something fancy, you’re really just browning some beef, whisking together a few ingredients, and letting your oven do the heavy lifting.
That Bisquick batter creates its own golden crust as it bakes, settling beneath the beef and cheese while forming a beautiful top layer that’s part quiche, part comfort food masterpiece.
Within 35 minutes, you’ll have a complete meal that’s impressive enough for company but easy enough for a Tuesday night when you’re running on fumes and good intentions.
Fair warning: this recipe has a tendency to become the answer to “what should we have for dinner?” more often than you might expect, and honestly, that’s not a bad problem to have.

Ingredients
For the Meat Layer
- 1 lb lean ground beef (80/20 blend works perfectly)
- 1 cup sweet onion, chopped (Vidalia or yellow onion)
For the Cheese Layer
- 1 cup cheddar cheese, shredded (sharp cheddar recommended)
For the Batter
- 1 cup milk (whole milk for best results)
- 2 tbsp onion soup mix (one packet)
- ½ cup Bisquick (original baking mix)
- 2 large eggs (room temperature preferred)
Instructions
Preparation
- 1 Preheat your oven to 400°F (200°C) and lightly grease a 9-inch pie pan with butter or cooking spray. This prevents sticking and ensures easy serving later.
- 2 Heat a large cast iron skillet or non-stick pan over medium-high heat. Add the ground beef and chopped onion to the skillet, breaking up the meat with a wooden spoon or spatula as it cooks.
Cooking the Base
- 3 Cook the beef and onion mixture for 8-10 minutes, stirring frequently, until the beef is completely browned and the onions are softened and translucent. The meat should have no pink remaining, and you’ll hear the sizzling sound diminish as moisture evaporates.
- 4 Drain the excess grease thoroughly by tilting the pan and spooning out the fat, or pour the mixture into a colander briefly. This step is crucial for preventing a greasy final dish.
- 5 Spread the cooked beef and onion mixture evenly in your prepared 9-inch pie pan, pressing it down gently with the back of a spoon to create an even layer that reaches the edges.
Assembly
- 6 Sprinkle the shredded cheddar cheese evenly over the meat layer, ensuring coverage reaches all the way to the edges. The cheese will melt and create a delicious barrier between the meat and batter.
- 7 In a medium mixing bowl, combine the milk, onion soup mix, Bisquick, and eggs. Using a whisk or immersion blender, beat the mixture for 1-2 minutes until completely smooth with no lumps of Bisquick remaining.
Baking
- 8 Pour the batter mixture slowly and evenly over the cheese and meat in the pie plate. The batter will seem thin, but it will magically form its own crust as it bakes, settling to the bottom and rising to create a golden top.
- 9 Bake for 25 minutes until the top is golden brown and a knife inserted in the center comes out clean. The edges should be set and slightly pulling away from the sides of the pan.
- 10 Let the pie cool for 5-10 minutes before serving. This resting time allows the layers to set properly and makes slicing much easier and neater.
Recommended Equipment and Kitchen Tools
Recommended Equipment and Kitchen Tools
These tools will make your cheeseburger pie experience smoother, but don’t worry if you don’t have everything – this recipe is forgiving and adaptable to whatever you’ve got in your kitchen.
Essential Tools (for best results)
- Large cast iron skillet or non-stick pan – Perfect for browning the beef evenly and developing great flavor through proper heat distribution
- 9-inch pie pan – Glass or ceramic works beautifully and allows you to see the golden crust forming
- Medium mixing bowl – For whisking together that magical batter that creates its own crust
- Wire whisk – Ensures your batter is completely smooth without any Bisquick lumps
Helpful Upgrades
- Immersion blender – Makes the batter incredibly smooth and saves on cleanup compared to a regular blender
- Digital kitchen scale – For precise measurements if you want to double or triple the recipe
- Silicone spatula – Perfect for scraping every bit of batter from the bowl and spreading the meat mixture evenly
Nice-to-Have Options
- Instant-read thermometer – Ensures your ground beef reaches the safe internal temperature of 160°F (71°C)
- Fine-mesh strainer – Helpful for draining grease if you don’t have a colander
- Bench scraper – Makes transferring chopped onions from cutting board to pan effortless
Recipe Variations and Dietary Modifications
Gluten-Free Adaptation
- Replace ½ cup Bisquick with ⅓ cup gluten-free flour blend plus 1 tsp baking powder and ¼ tsp salt
- The texture will be slightly more dense but equally delicious
- Consider adding 1 tbsp cornstarch for extra binding power
- Baking time may increase by 3-5 minutes
Dairy-Free Modifications
- Substitute unsweetened almond milk or oat milk for regular milk in equal amounts
- Replace cheddar cheese with dairy-free cheddar shreds (Violife or Daiya work well)
- The batter may be slightly thinner but will still form a proper crust
Low-Carb Version
- Replace Bisquick with ¼ cup almond flour plus 2 additional eggs
- Use ground turkey instead of beef to reduce overall calories
- Add extra cheese to compensate for reduced batter structure
- Reduces carbs by approximately 8g per serving
Flavor Variations
- Mexican-style: Add 1 tsp cumin, 1 tsp chili powder, and use Mexican cheese blend
- BBQ version: Mix 2 tbsp BBQ sauce into the cooked beef before layering
- Mushroom lover’s: Sauté 1 cup sliced mushrooms with the onions
- Spicy kick: Add diced jalapeños and use pepper jack cheese
Nutritional Information and Health Benefits
Key Nutritional Highlights
This hearty cheeseburger pie delivers approximately 320 calories per serving with a solid balance of protein, carbohydrates, and fats. Each serving provides roughly 22g protein from the lean ground beef, eggs, and cheese, making it a satisfying meal that helps maintain muscle mass and keeps you feeling full longer.
Health Benefits of Main Ingredients
The lean ground beef serves as an excellent source of complete protein, iron, and vitamin B12, essential for energy production and healthy red blood cell formation. Eggs contribute high-quality protein along with choline for brain health and selenium for immune function. Cheddar cheese provides calcium for bone health and phosphorus for cellular energy production. The sweet onions offer quercetin, a powerful antioxidant with anti-inflammatory properties, plus prebiotic fiber that supports digestive health.
Dietary Considerations
This recipe contains gluten (from Bisquick), dairy (cheese and milk), and eggs, making it unsuitable for those with these specific allergies. However, it naturally fits into low-carb and high-protein dietary patterns. Each serving provides approximately 12g carbohydrates, making it moderate for those watching carb intake. The dish offers good satiety value due to its protein and fat content, helping prevent overeating later in the day.
Smart Swaps and Ingredient Substitutions
Common Substitutions:
- Ground beef → Ground turkey, chicken, or plant-based ground meat (adjust cooking time as needed)
- Sweet onion → Yellow onion, white onion, or shallots in equal amounts
- Cheddar cheese → Swiss, Monterey Jack, or Gruyere for different flavor profiles
- Whole milk → 2% milk, buttermilk, or heavy cream (cream will make it richer)
Budget-Friendly Swaps:
- Lean ground beef → Ground beef with higher fat content (just drain thoroughly)
- Fresh onion → 2 tbsp dried minced onion rehydrated in warm water
- Name-brand cheese → Store-brand shredded cheese works perfectly
- Bisquick → Homemade mix: ⅓ cup flour + 1 tsp baking powder + ¼ tsp salt
Pantry Emergency Substitutions:
- Onion soup mix → 1 tbsp onion powder + 1 tsp garlic powder + ½ tsp salt
- Fresh eggs → ⅓ cup liquid egg substitute or 2 tbsp ground flaxseed + 6 tbsp water
- Milk → Equal parts water and powdered milk or canned evaporated milk diluted with water
Pro Tips for Substitutions:
- Store extra onion soup mix packets in airtight containers for up to 2 years
- When using higher-fat ground meat, drain twice to prevent greasiness
- Room temperature ingredients blend more easily and create smoother batters
Make It Diabetes-Friendly
Carb Reduction Strategies:
- Replace Bisquick with ¼ cup almond flour + 1 tsp baking powder to reduce carbs by approximately 8g per serving
- Use ground turkey (93/7 lean) instead of beef to lower overall calories and saturated fat
- Reduce portion size to ⅙ of the pie instead of standard serving for better blood sugar control
Enhanced Fiber and Protein:
- Add ½ cup finely chopped bell peppers or mushrooms to the meat mixture for extra fiber without significant carb increase
- Include 1 tbsp ground flaxseed in the batter for additional fiber and omega-3 fatty acids
- Use sharp cheddar instead of mild to get more flavor satisfaction from smaller amounts
Blood Sugar Management Tips:
- Serve with a large green salad to increase fiber and slow glucose absorption
- Pair with steamed broccoli or green beans for additional nutrients and fiber
- Consider eating protein first (a few bites of the meat layer) before the rest to help moderate blood sugar spikes
Modified Nutritional Profile:
- Original recipe: ~12g carbs per serving
- Diabetes-friendly version: ~6g carbs per serving
- Added benefits: Higher fiber, increased protein density, better satiety factor
Perfect Pairing Suggestions
Beverage Pairings
A medium-bodied red wine like Merlot or Cabernet Sauvignon complements the rich, savory flavors beautifully, while craft beer enthusiasts will love this with a brown ale or amber lager. For non-alcoholic options, iced tea with lemon cuts through the richness perfectly, and sparkling water with lime provides a refreshing palate cleanser between bites.
Side Dish Recommendations
This hearty pie pairs wonderfully with crisp coleslaw that adds crunch and acidity to balance the rich cheese and beef. Roasted Brussels sprouts with bacon bits echo the savory theme while adding nutritious greens. Garlic mashed cauliflower provides comfort food vibes with fewer carbs, and honey-glazed carrots bring a touch of sweetness that complements the onions beautifully.
Complete Meal Ideas
Start with a simple mixed green salad with balsamic vinaigrette to prep the palate, then serve the cheeseburger pie as your main attraction. Roasted seasonal vegetables like zucchini, bell peppers, and cherry tomatoes make excellent accompaniments. For dessert, keep it light with fresh berries or vanilla ice cream to cleanse the palate after this rich, satisfying meal.
Occasion Suggestions
This recipe shines at casual family dinners, potluck gatherings, and game day parties where comfort food is king. It’s perfect for busy weeknight meals when you want something special without the fuss, and weekend brunches where the egg component makes it feel appropriate any time of day.
Pro Tips and Troubleshooting
Professional Techniques
Always let your ground beef come to room temperature for about 15 minutes before cooking – it browns more evenly and develops better flavor. When whisking the batter, use a figure-eight motion rather than circular stirring to incorporate air and create a lighter texture. Tap the pie pan gently on the counter after adding the batter to release any air bubbles that might create uneven texture.
Common Mistake Prevention
The biggest error is not draining the beef thoroughly – excess grease will make your pie soggy and unappetizing. Don’t overmix the batter once you add the liquid ingredients; a few small lumps are better than a tough, dense crust. Resist opening the oven door during the first 20 minutes of baking, as temperature fluctuations can prevent proper crust formation.
Storage and Reheating
Store leftover pie covered in the refrigerator for up to 4 days. Individual slices reheat beautifully in the microwave for 60-90 seconds, or in a 350°F (175°C) oven for 10-12 minutes until heated through. For make-ahead convenience, assemble the entire pie up to the baking step, cover tightly, and refrigerate for up to 24 hours before baking.
Scaling Success
This recipe doubles perfectly in a 9×13 inch baking dish – just increase the baking time to 30-35 minutes. For individual portions, use 6-8 ramekins and reduce baking time to 18-20 minutes. Always check doneness with a knife inserted in the center – it should come out clean when properly set.
This cheeseburger pie proves that the best comfort food doesn’t require complicated techniques or exotic ingredients – just quality basics combined with a little kitchen magic. Whether you’re feeding a hungry family on a busy weeknight or impressing friends with your effortless cooking skills, this recipe delivers every single time with minimal fuss and maximum satisfaction.