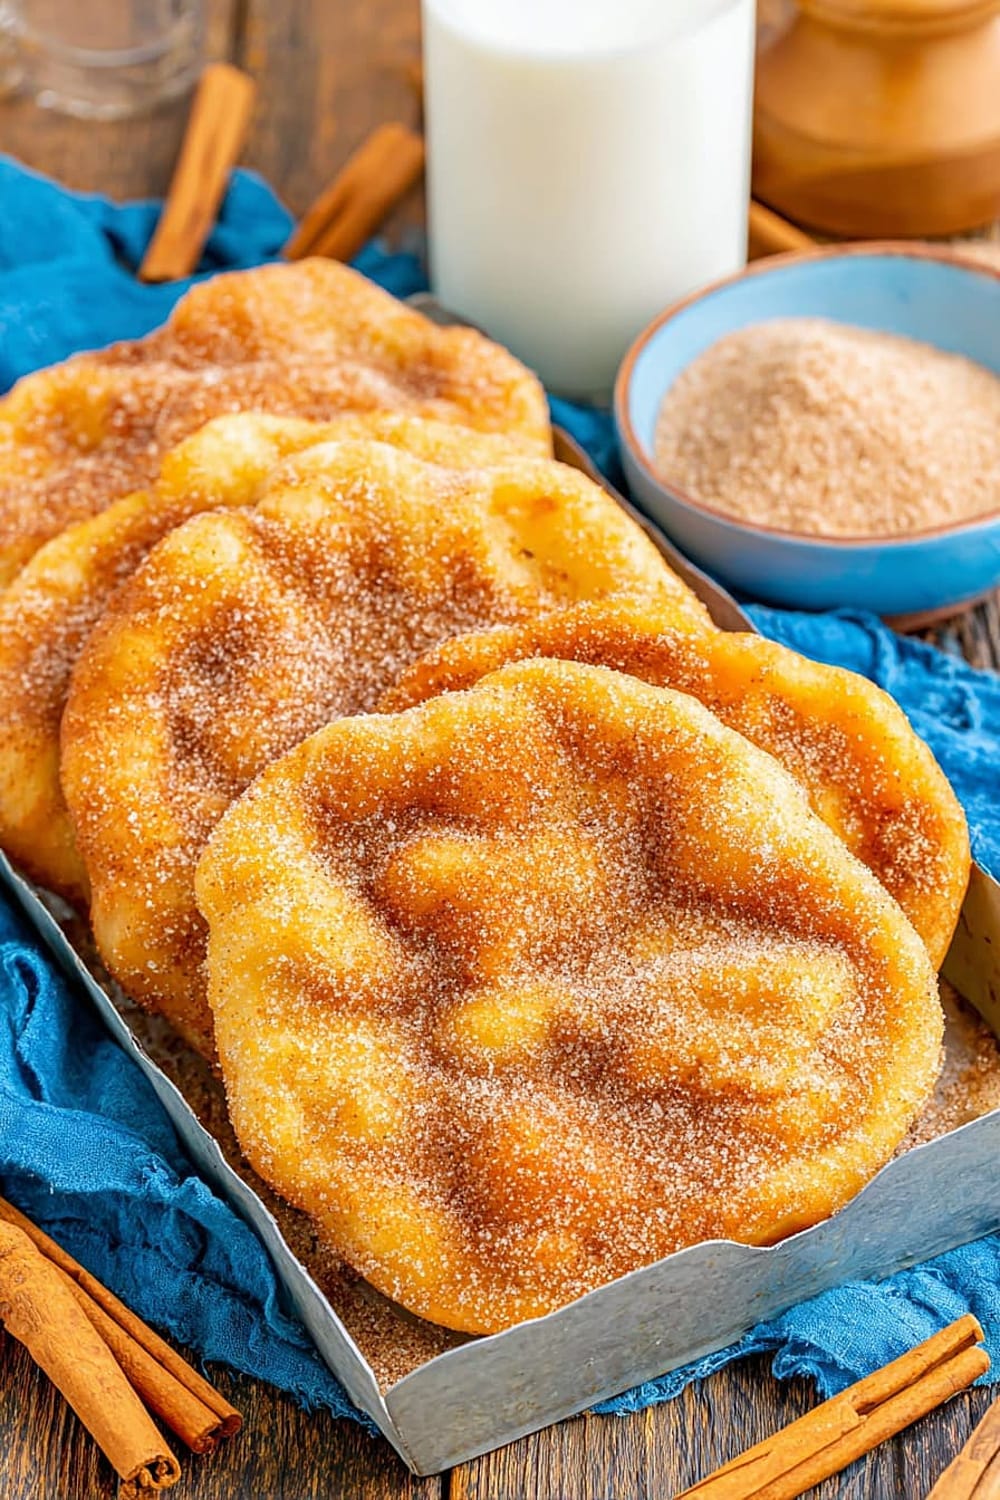
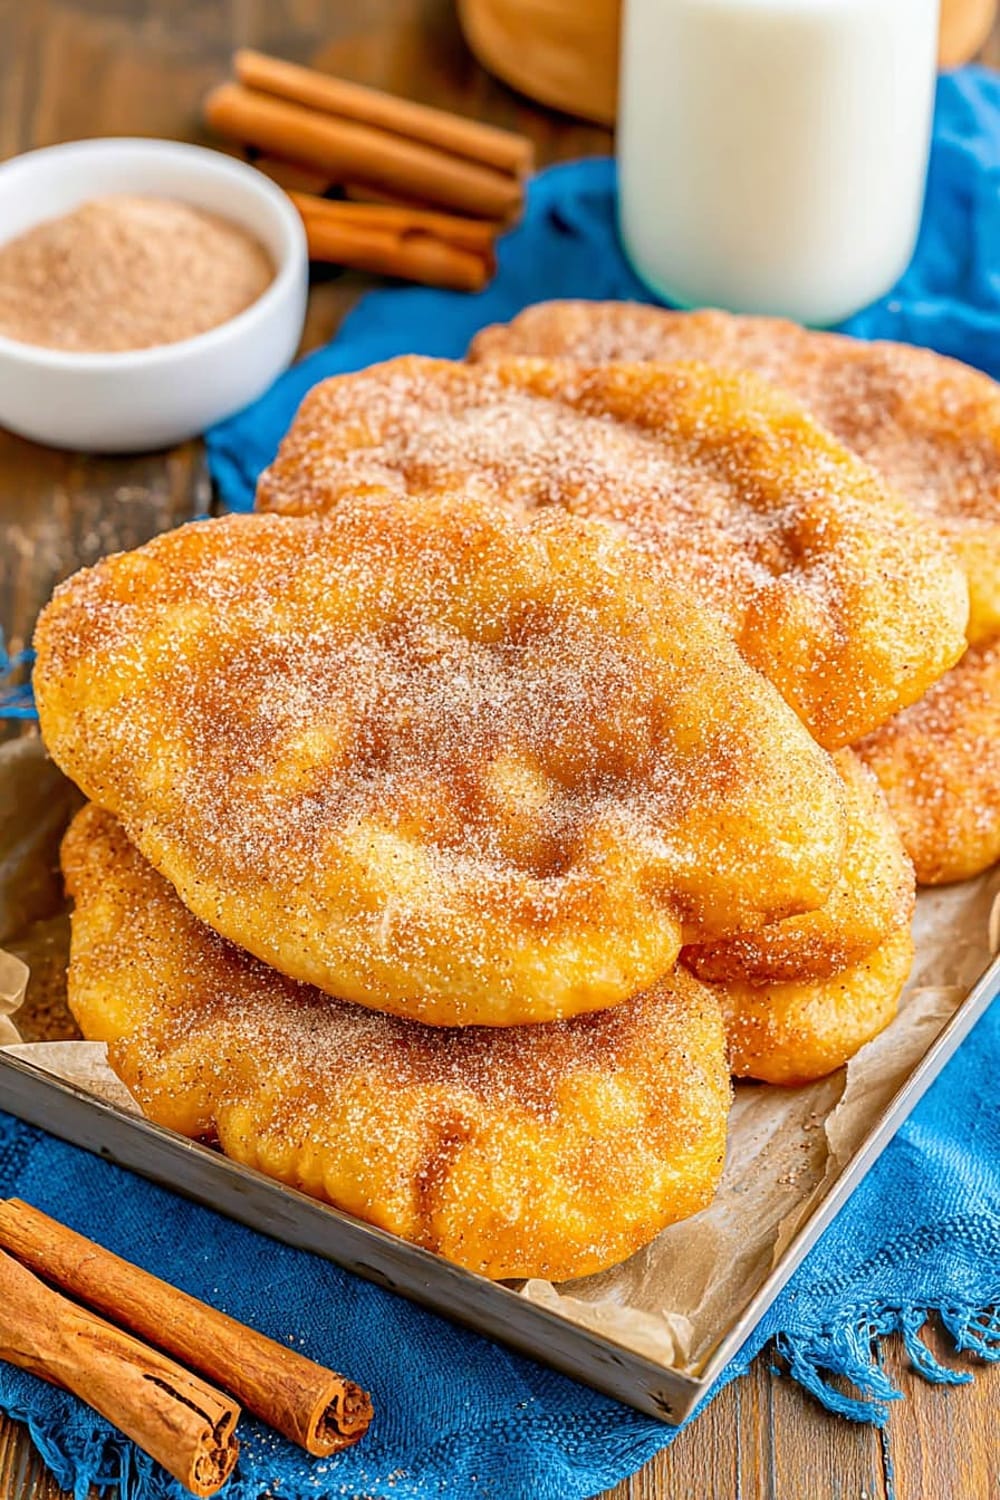
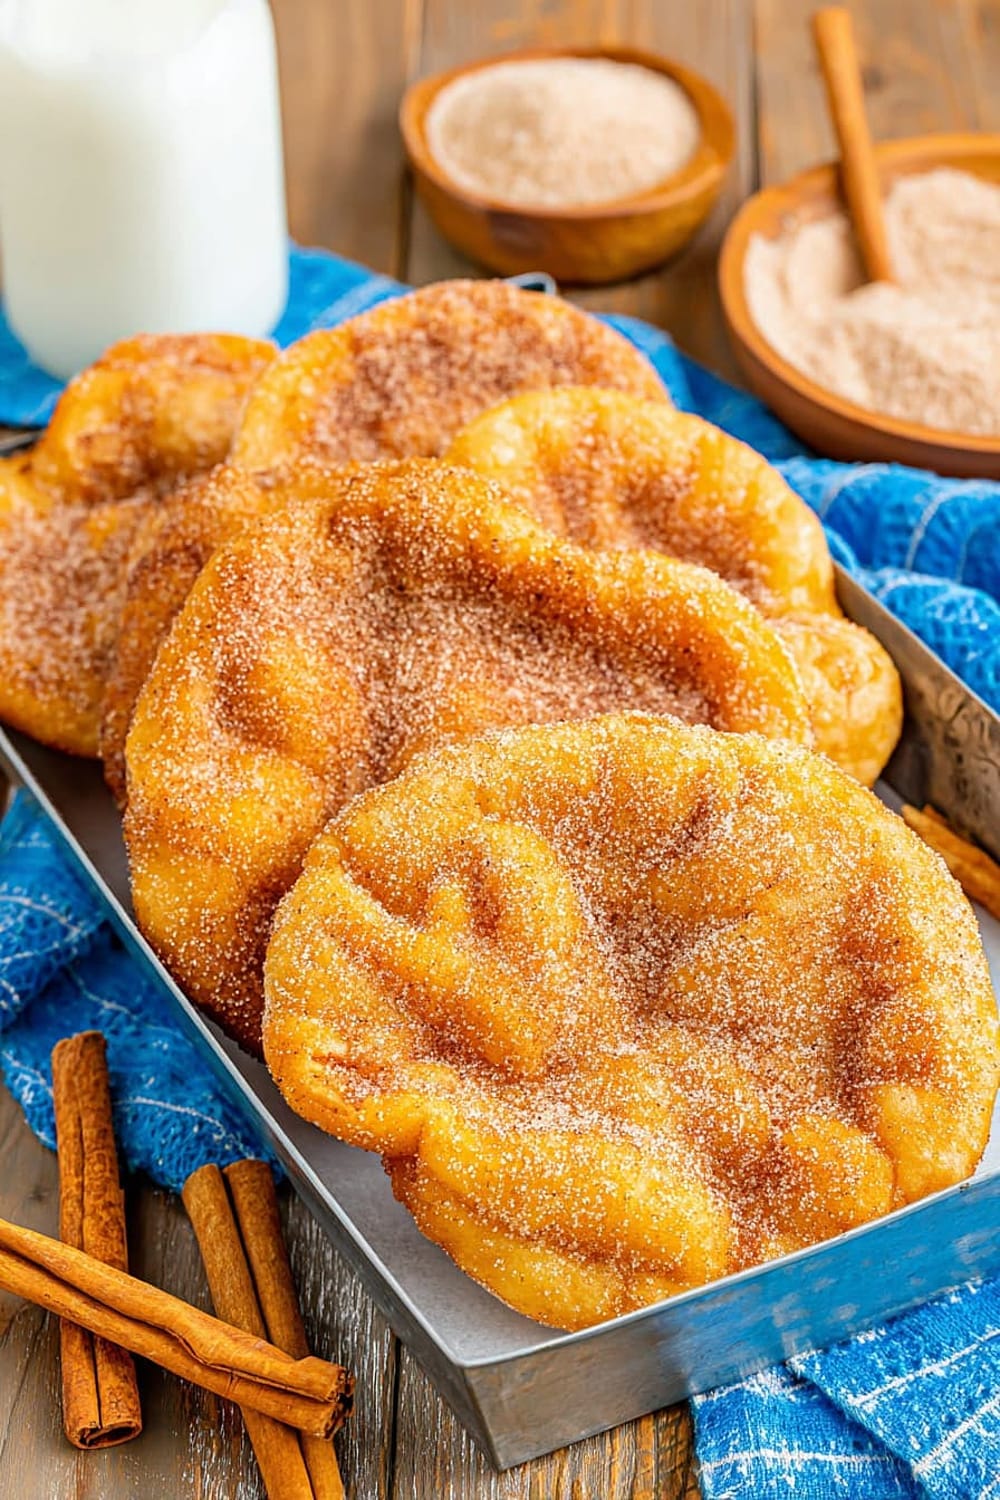
Homemade Elephant Ears Recipe
These crispy, golden elephant ears are about to become your new obsession, delivering that irresistible fair food magic right from your own kitchen.
Picture this: delicate, paper-thin dough that puffs and bubbles in hot oil, transforming into impossibly light and crispy rounds that practically melt in your mouth.
The secret lies in the perfect balance of a tender, slightly sticky dough that rolls out beautifully and fries up into those signature crispy edges with a tender center.
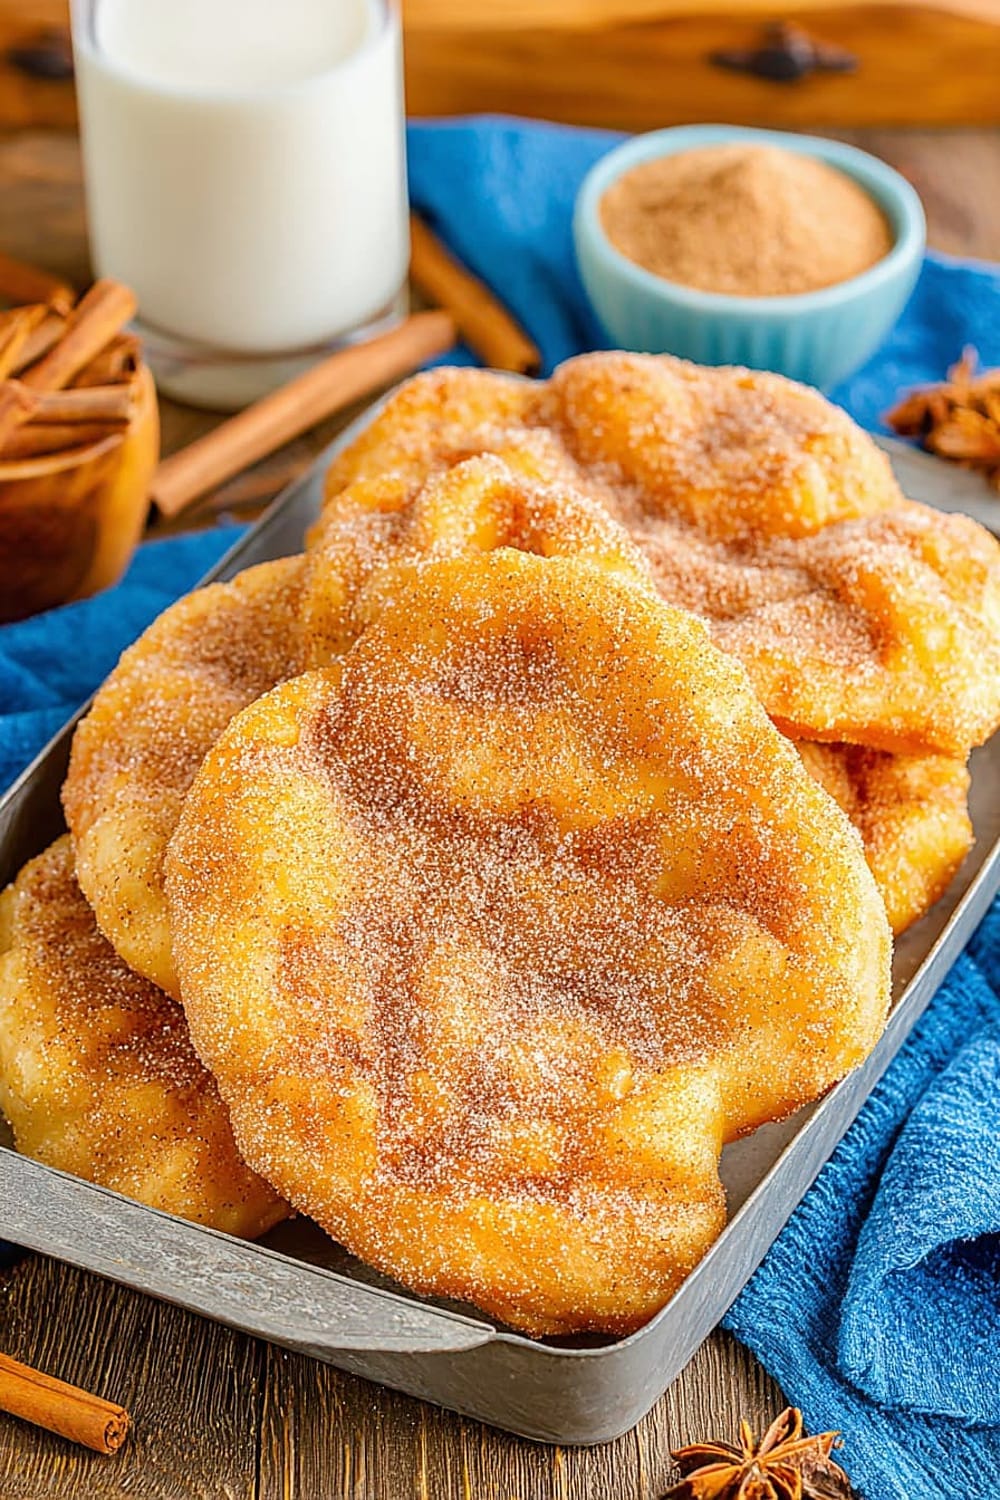
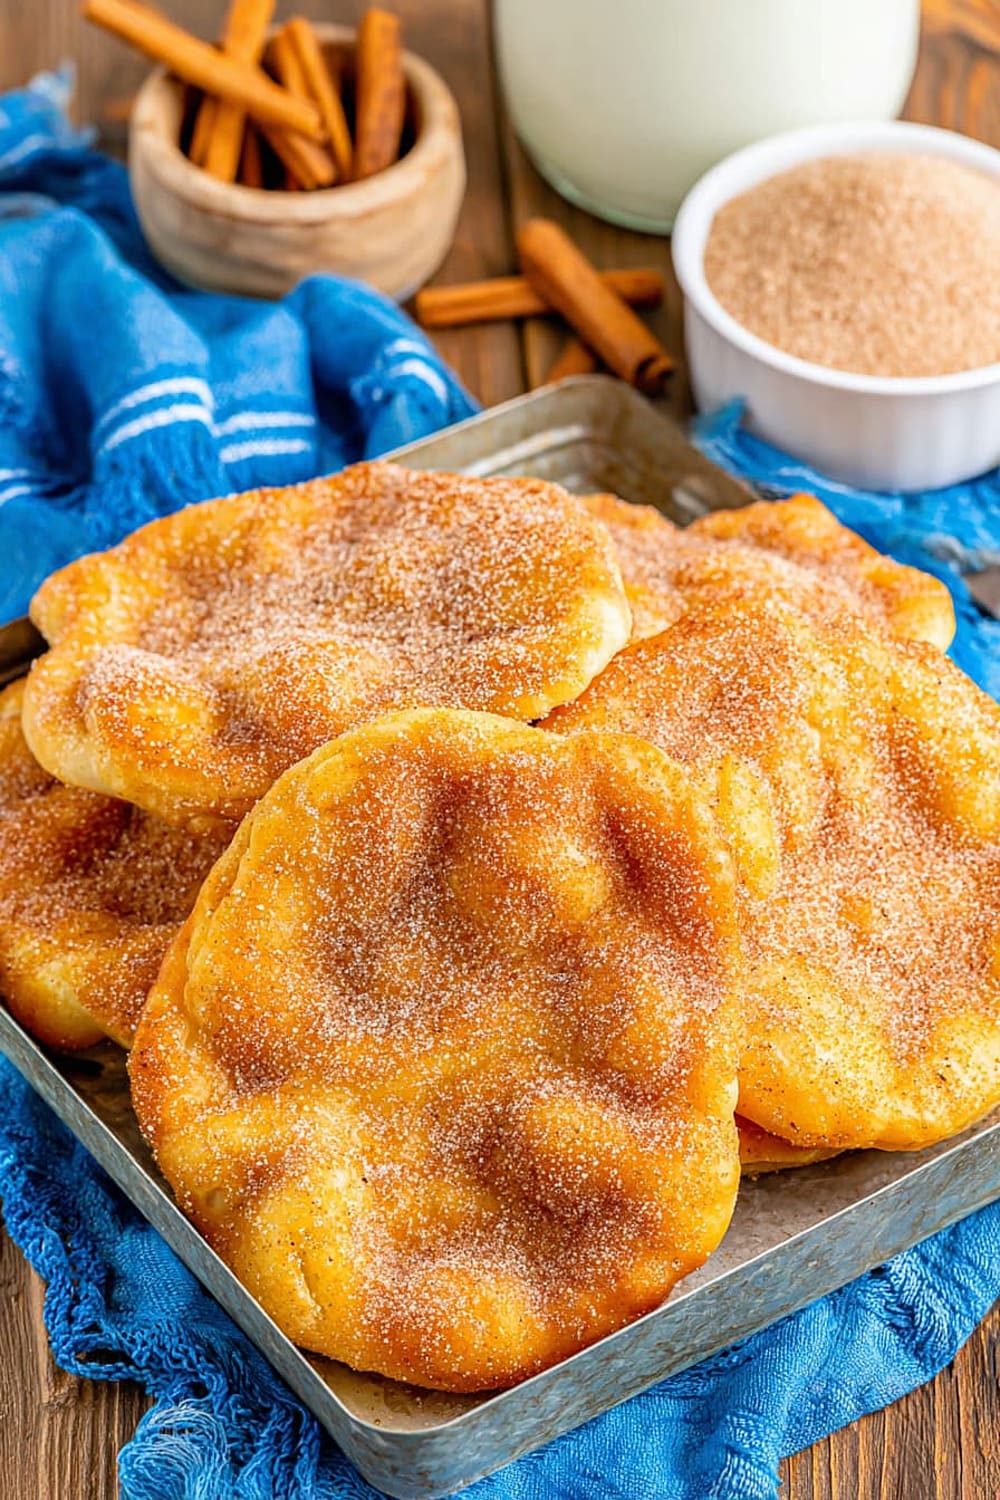
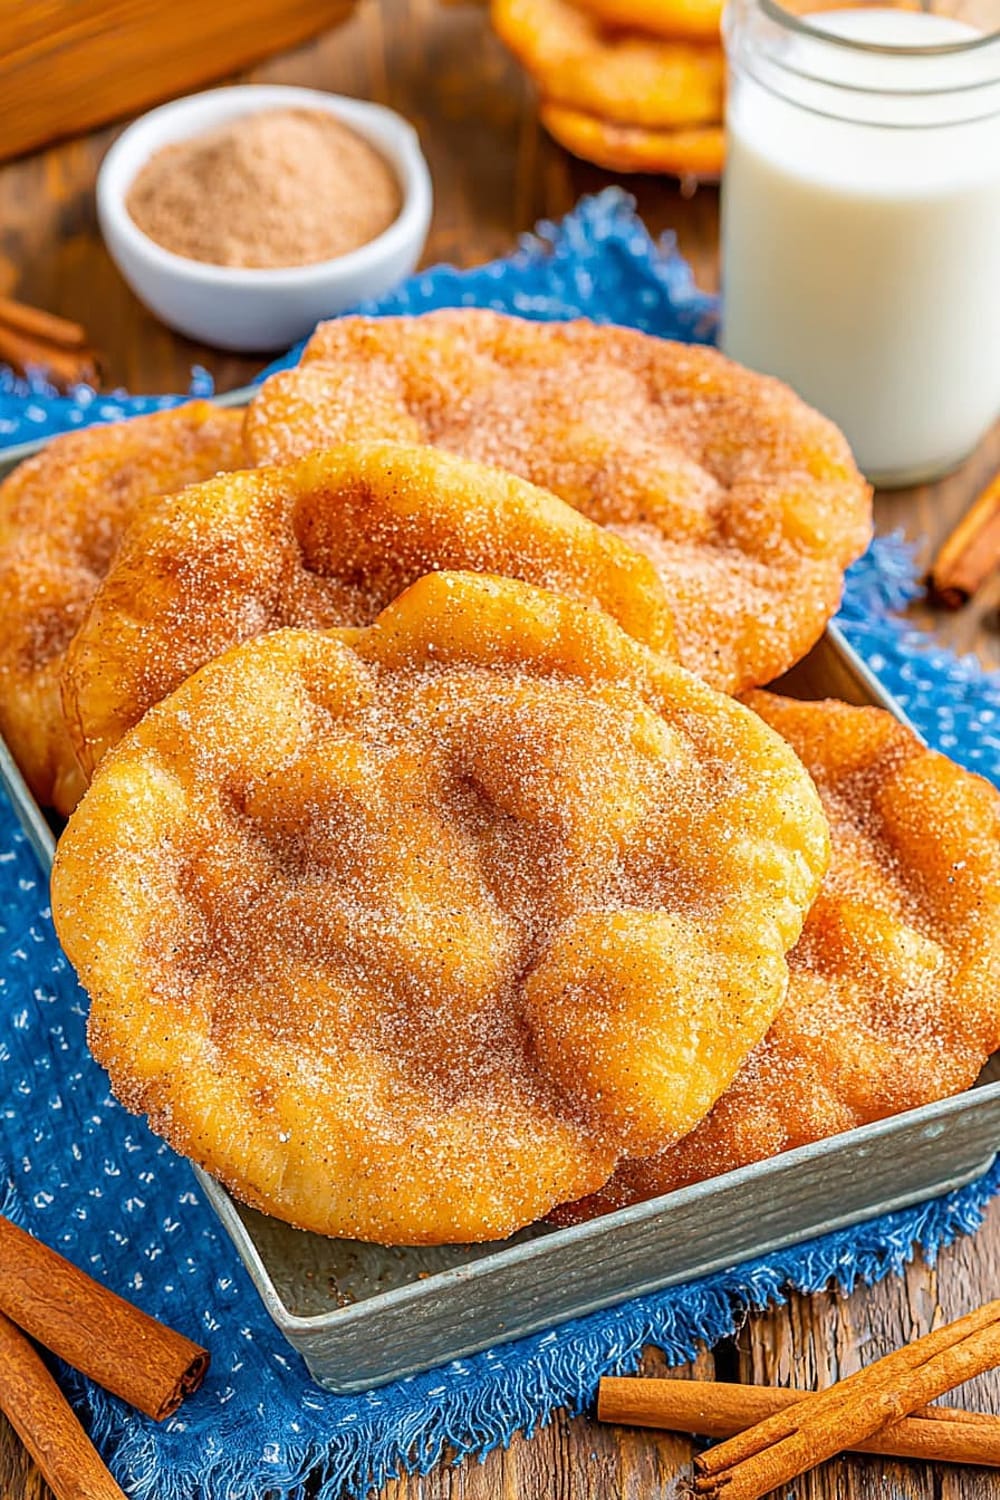
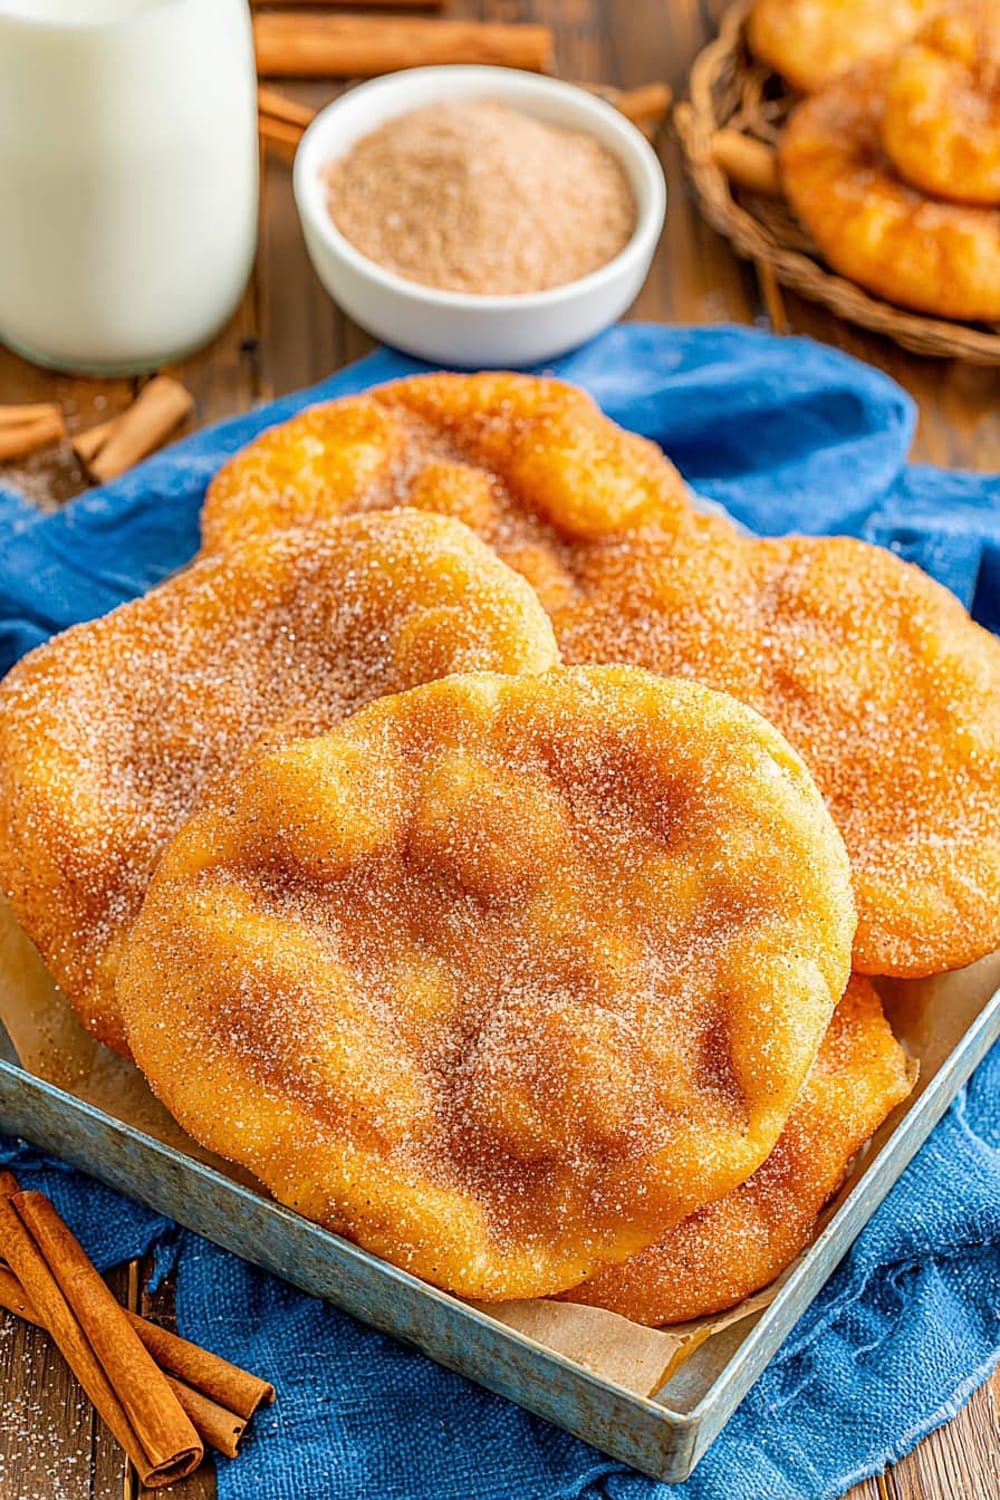
Each bite delivers that nostalgic carnival sweetness with warm cinnamon sugar coating every golden surface, creating the perfect contrast of textures and flavors.
What makes this recipe absolutely brilliant is how simple ingredients like flour, milk, and butter transform into something that looks and tastes like you spent hours perfecting the technique.

The best part is watching that dough hit the hot oil and immediately start dancing and bubbling, creating those beautiful irregular shapes that make each elephant ear unique and utterly delicious.
Ingredients
For the Dough
- 1 ½ cups whole milk
- 3 ¼ cups all-purpose flour, plus extra for dusting
- 1 tablespoon granulated sugar (from the total 5 tablespoons)
- 1 teaspoon baking powder
- 1 teaspoon fine sea salt
- 2 tablespoons unsalted butter, melted
For the Cinnamon Sugar Coating
- 4 tablespoons granulated sugar (remaining from total)
- 1 tablespoon ground cinnamon
For Frying
- Peanut oil for deep frying (enough for 2-3 inches depth)
Instructions
Prepare the Dough
- 1 Place the 1 ½ cups whole milk in a microwave-safe bowl and microwave in 15-30 second intervals until warmed to 110°F (43°C). This lukewarm temperature helps create a tender dough without activating any unwanted reactions. Use an instant-read thermometer for accuracy, as milk that’s too hot will create a tough texture. Set aside once the perfect temperature is reached.
- 2 In a large mixing bowl, stir together the 3 ¼ cups all-purpose flour, 1 tablespoon sugar, 1 teaspoon baking powder, and 1 teaspoon fine sea salt until evenly distributed. Create a well in the center of the dry ingredients, then add the 2 tablespoons melted butter. Slowly stream in the warmed milk while stirring continuously with a wooden spoon or silicone spatula until a slightly sticky dough forms. The dough should pull away from the sides of the bowl but still feel tacky to the touch.
- 3 Cover the bowl tightly with plastic wrap and let the dough rest for 10 minutes. This resting period allows the flour to fully hydrate and the gluten to relax, making the dough much easier to roll out thin without springing back.
Prepare for Frying
- 4 While the dough is resting, start heating 2-3 inches of peanut oil in a large cast iron skillet with deep sides or a heavy-bottomed dutch oven over medium heat. The oil needs to reach 350°F (175°C) for proper frying. Use a candy thermometer or instant-read thermometer to monitor the temperature carefully, as oil that’s too cool will result in greasy elephant ears, while oil that’s too hot will burn the outside before the inside cooks through.
- 5 In a small bowl, stir together the remaining 4 tablespoons of sugar and 1 tablespoon ground cinnamon until well combined. Set this cinnamon sugar mixture aside near your frying station for immediate coating of the hot elephant ears.
Shape and Fry
- 6 Generously dust a clean work surface with all-purpose flour. Turn out the rested dough and divide it into 8 equal portions using a bench scraper or sharp knife. Roll each portion in flour so it’s lightly coated on all surfaces, which prevents sticking during the rolling process.
- 7 Working with one portion at a time, use a rolling pin to roll the dough into a rough circle approximately ¼ inch thick. The shape doesn’t need to be perfect – irregular edges are part of the charm of authentic elephant ears. The dough should be thin enough to see your hand through it when held up to the light, but not so thin that it tears easily.
- 8 Place each finished rolled-out circle between sheets of parchment paper to prevent sticking. This stacking method keeps them ready for frying without taking up excessive counter space.
Final Frying and Finishing
- 9 Once the oil reaches and maintains 350°F (175°C), carefully place one elephant ear at a time into the hot oil using tongs or your hands. The dough should immediately start bubbling and puffing. Fry for 1-2 minutes on the first side until light golden brown, watching for even color development across the surface.
- 10 Using tongs, carefully flip the elephant ear and fry for another 1-2 minutes on the second side until both sides are evenly golden brown and crispy. The total frying time should be 2-4 minutes per elephant ear, depending on thickness and oil temperature.
- 11 Remove the fried elephant ear and place it on a paper-towel-lined plate for 30 seconds to absorb excess oil, then immediately transfer to a wire rack set over a sheet tray. While still hot, generously sprinkle the cinnamon sugar mixture over both sides, ensuring complete coverage. The residual heat and slight oil coating will help the cinnamon sugar adhere perfectly. Repeat this process with the remaining elephant ears, maintaining oil temperature throughout.
Recommended Equipment and Kitchen Tools
Recommended Tools (for best results)
- Instant-read thermometer – Essential for monitoring both milk temperature and oil temperature accurately, ensuring perfect texture and preventing burning
- Heavy-bottomed dutch oven or cast iron skillet – Provides even heat distribution and maintains consistent oil temperature for uniform frying
- Rolling pin – Creates the thin, even dough circles that are signature to authentic elephant ears
- Wire cooling rack with sheet tray – Allows proper drainage while keeping elephant ears crispy instead of soggy
Helpful Upgrades
- Digital kitchen scale – Measuring flour by weight (approximately 390g) ensures consistent dough texture every time
- Bench scraper – Makes dividing dough into equal portions effortless and keeps your work surface clean
- Candy thermometer with clip – Hands-free oil temperature monitoring lets you focus on the frying process
- Silicone-tipped tongs – Gentle on delicate fried dough while providing secure grip for safe handling
Nice-to-Have Options
- Large mixing bowls – Extra space makes incorporating ingredients easier and reduces mess
- Parchment paper sheets – Pre-cut sheets streamline the stacking process between rolling and frying
- Fine-mesh spider strainer – Professional tool for lifting elephant ears with better oil drainage than regular tongs
Recipe Variations and Dietary Modifications
Gluten-Free Adaptation
- Replace 3 ¼ cups all-purpose flour with 3 ½ cups gluten-free flour blend (containing xanthan gum)
- Add 1 teaspoon xanthan gum if your flour blend doesn’t include it for proper binding
- Expect slightly more delicate handling and a denser final texture compared to traditional wheat flour
- Increase resting time to 15 minutes to allow gluten-free flours to fully hydrate
Dairy-Free Modifications
- Substitute 1 ½ cups unsweetened oat milk or almond milk for the whole milk
- Replace 2 tablespoons melted butter with 2 tablespoons melted coconut oil or neutral vegetable oil
- Warm plant milk to the same 110°F (43°C) temperature for optimal dough development
Flavor Variations
- Apple Cinnamon: Add 1 teaspoon apple pie spice to the cinnamon sugar mixture
- Chocolate Drizzle: Drizzle melted dark chocolate over cooled elephant ears
- Maple Sugar: Replace cinnamon sugar with 5 tablespoons maple sugar for fall flavoring
- Citrus Twist: Add 1 teaspoon orange zest to the dough and dust with powdered sugar instead
Mini Elephant Ears
- Divide dough into 16 portions instead of 8 for bite-sized treats
- Reduce frying time to 30-60 seconds per side due to smaller size
- Perfect for parties and portion control
Nutritional Information and Health Benefits
Key Nutritional Highlights
Each elephant ear contains approximately 285 calories, with the majority coming from the all-purpose flour and frying oil. The 3 ¼ cups flour provides substantial carbohydrates for quick energy, while the whole milk contributes protein and calcium. Each serving delivers about 45 grams of carbohydrates, 8 grams of fat from the oil and butter, and 6 grams of protein from the flour and milk combination.
Health Benefits of Main Ingredients
The whole milk provides complete proteins containing all essential amino acids, plus significant calcium for bone health and vitamin D for immune function. All-purpose flour, while refined, still offers B-vitamins including thiamine and niacin that support energy metabolism. The cinnamon in the coating contains antioxidants and compounds that may help regulate blood sugar levels, making it more than just a flavoring agent. Peanut oil used for frying provides monounsaturated fats and vitamin E, though the high-heat cooking process should be balanced with other nutrient-dense foods.
Dietary Considerations
Contains gluten from wheat flour, dairy from milk and butter, making it unsuitable for those with celiac disease or lactose intolerance without modifications. The deep-frying cooking method increases caloric density significantly. Best enjoyed as an occasional treat rather than a regular dietary staple, ideally paired with protein or fiber-rich foods to balance blood sugar response.
Smart Swaps and Ingredient Substitutions
Common Substitutions:
- Whole milk → Buttermilk (1:1 ratio) for tangier flavor and more tender texture
- All-purpose flour → Bread flour (1:1 ratio) for slightly chewier texture with better oil absorption
- Peanut oil → Vegetable oil or canola oil (same amount) for neutral flavor frying
- Granulated sugar → Brown sugar (1:1 ratio) for deeper, molasses-tinged sweetness
Budget-Friendly Swaps:
- Whole milk → 2% milk or even whole milk powder reconstituted for same richness at lower cost
- Unsalted butter → Vegetable shortening (2 tablespoons) for similar fat content without dairy expense
- Ground cinnamon → Pumpkin pie spice for similar warmth using a blend you might already own
Pantry Emergency Substitutions:
- Baking powder → 1 teaspoon baking soda plus 2 teaspoons cream of tartar if you’re missing this leavening agent
- Fine sea salt → Table salt (¾ teaspoon) since table salt is more concentrated than sea salt
- Peanut oil → Any neutral high-heat oil like grapeseed, avocado, or refined coconut oil
Pro Tips for Substitutions:
- Store opened peanut oil in a cool, dark place and strain after use for up to 3 more frying sessions
- When using buttermilk, reduce resting time to 5 minutes as the acid works faster on gluten development

Make It Diabetes-Friendly
Sugar Substitutions:
- Replace 5 tablespoons granulated sugar with 3 tablespoons erythritol or 2 tablespoons stevia blend
- Use sugar-free cinnamon blend or make your own with 1 tablespoon cinnamon plus 2 tablespoons erythritol
- Reduces carbohydrates by approximately 15-20 grams per serving
Flour & Carb Modifications:
- Substitute 1 ½ cups all-purpose flour with 1 ½ cups almond flour plus 1 ¾ cups all-purpose flour for 25% carb reduction
- Try coconut flour replacement: use 1 cup coconut flour plus 2 ¼ cups all-purpose flour and add 1 extra egg for binding
- Consider whole wheat pastry flour (1:1 substitution) for added fiber and slower glucose response
Portion & Timing Tips:
- Reduce serving size to ½ elephant ear per person paired with 2 tablespoons nuts or 1 ounce cheese
- Estimated 22-25 grams carbohydrates per half-serving with modifications
- Best consumed after protein-rich meals to minimize blood sugar spikes
- Air-fry option: brush shaped dough with oil and air-fry at 375°F (190°C) for 3-4 minutes per side
Total Carb Reduction: Modified version reduces carbohydrates by approximately 30-40% compared to traditional recipe.
Perfect Pairing Suggestions
Beverage Pairings
Hot apple cider or spiced chai tea complement the warm cinnamon flavors beautifully, especially during fall and winter months. For coffee lovers, a rich dark roast coffee or café au lait provides the perfect bitter contrast to the sweet, crispy elephant ears. Cold milk remains the classic pairing that balances the oil and sweetness while cleansing the palate between bites.
Side Dish Recommendations
Fresh sliced apples or pears provide crisp, refreshing contrast to the rich fried dough. Vanilla Greek yogurt offers protein and probiotics that balance the indulgent nature of elephant ears. A small portion of mixed nuts adds healthy fats and creates a more satisfying snack experience that helps stabilize blood sugar.
Complete Meal Ideas
Serve elephant ears as dessert after a hearty chili dinner or barbecue meal where the sweet finish complements savory, spiced main courses. For brunch occasions, pair with scrambled eggs and turkey sausage to create a balanced sweet-and-savory plate. During outdoor gatherings, serve alongside grilled corn and fresh fruit salad for that authentic fair food experience.
Occasion Suggestions
Perfect for county fair themes, birthday parties, family reunions, and weekend treats when you want to recreate childhood memories. Excellent rainy day activity for cooking with kids, and ideal for holiday gatherings where you want impressive results without complicated techniques.
Pro Tips and Troubleshooting
Professional Frying Techniques
Maintain oil temperature consistently by frying only one elephant ear at a time and allowing oil to return to 350°F (175°C) between batches. The dough should sizzle immediately upon contact – if it doesn’t, the oil isn’t hot enough. Watch for golden brown edges as your doneness indicator rather than timing alone, since thickness variations affect cooking speed.
Common Mistakes Prevention
Avoid overworking the dough during mixing, which creates tough, chewy elephant ears instead of tender ones. Don’t skip the resting period – this crucial step prevents the dough from shrinking back during rolling. Never overcrowd the oil, as this drops temperature rapidly and results in greasy, unevenly cooked elephant ears.
Storage and Reheating
Store completely cooled elephant ears in airtight containers for up to 3 days at room temperature. For best results, reheat in a 350°F (175°C) oven for 2-3 minutes to restore crispiness – avoid microwaving, which makes them soggy. Freeze unbaked dough circles between parchment paper for up to 1 month, then fry directly from frozen, adding 30-60 seconds extra cooking time.
Make-Ahead Strategies
Prepare dough up to 24 hours ahead and refrigerate covered – bring to room temperature before rolling. Pre-roll circles and stack with parchment paper, refrigerating for up to 4 hours before frying. Mix cinnamon sugar coating weeks ahead and store in airtight containers for instant access.