Korean Cheese Corn

This Korean Cheese Corn is what happens when sweet corn meets gooey cheese in a sizzling skillet of pure deliciousness.
It’s the perfect side dish that somehow always becomes the star of the show.
One bite of this creamy, cheesy corn and you’ll wonder how you ever lived without it.
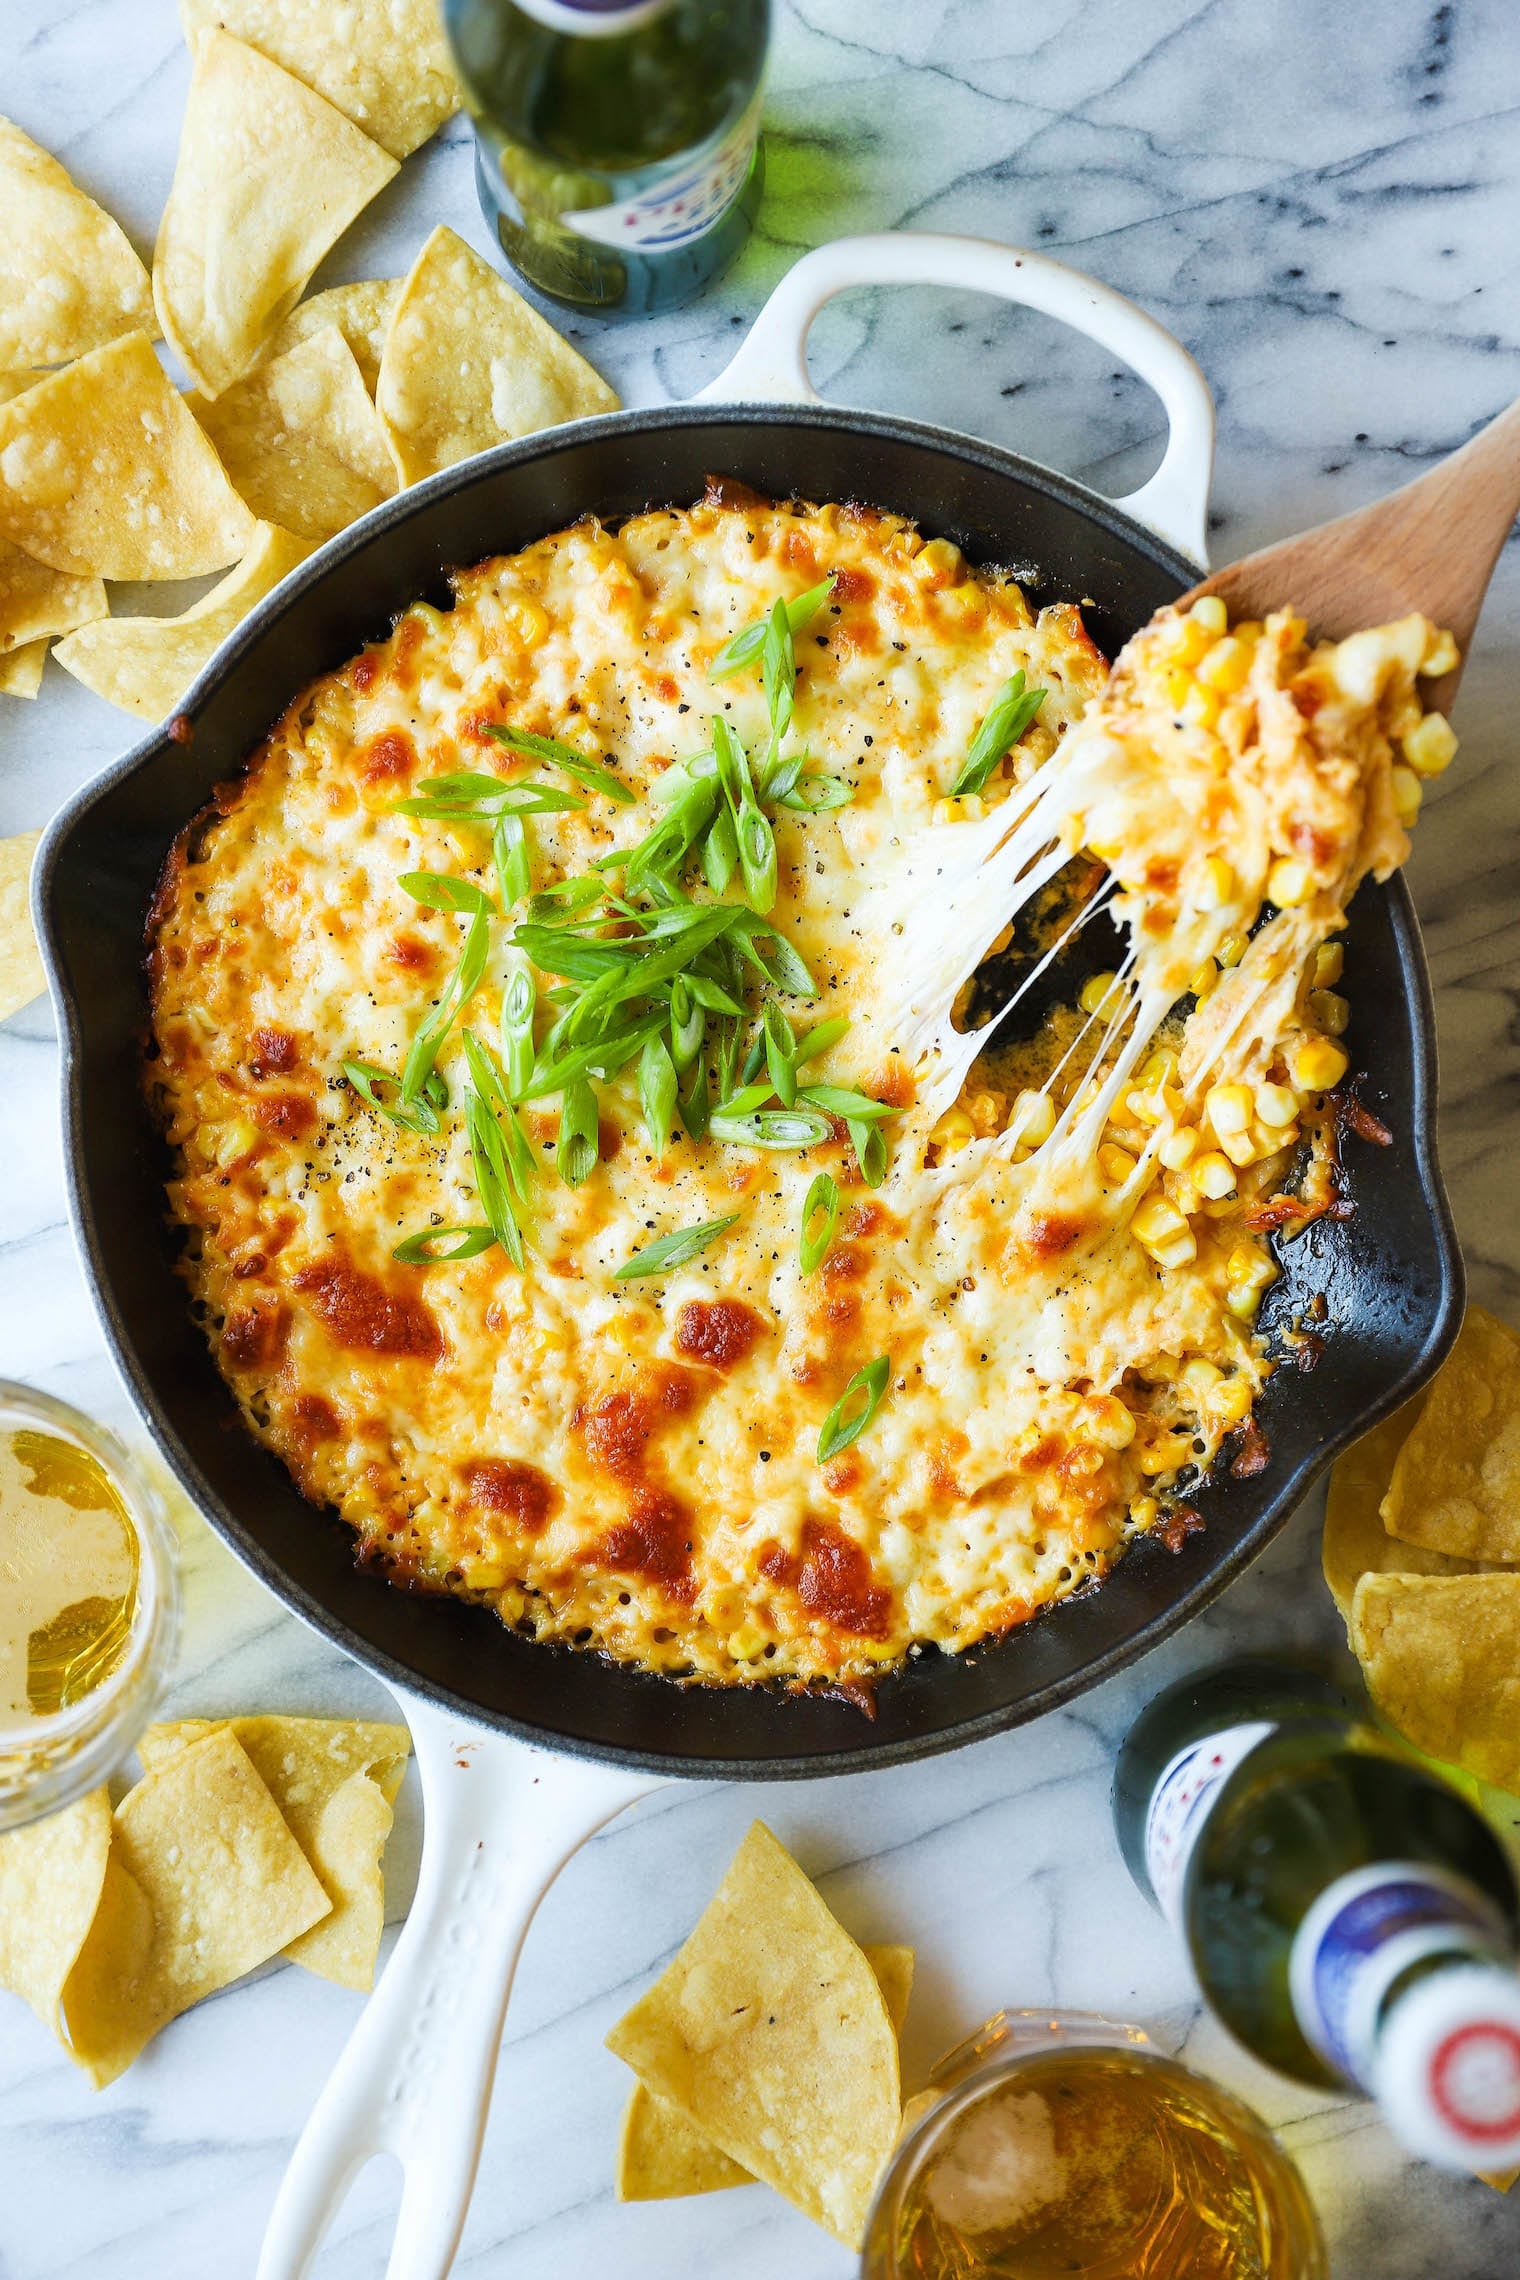
What makes this dish so irresistible is the perfect balance of flavors – sweet corn kernels coated in creamy kewpie mayo with just the right kick of Sriracha heat, all blanketed under a golden-brown mozzarella crust.
It’s a popular Korean street food that’s made its way into home kitchens because it’s ridiculously easy to make yet delivers restaurant-quality taste.
The cast iron skillet creates those crispy, caramelized edges that everyone fights over.

Ingredients
- 4 ears corn, shucked (about 3 cups)
- ½ cup kewpie mayonnaise
- 2 teaspoons Sriracha, or more, to taste
- 1½ teaspoons sugar
- Kosher salt and freshly ground black pepper, to taste
- 8 ounces whole milk mozzarella, shredded and divided
- 2 green onions, thinly sliced
Equipment
- 10-inch cast iron skillet

Steps
- Preheat your oven to 400°F (205°C). Thoroughly oil your cast iron skillet or coat with nonstick spray to prevent sticking – this is crucial as the cheese will create a delicious but sticky crust.
- In a large mixing bowl, combine the corn kernels, kewpie mayonnaise, Sriracha, sugar, ¾ teaspoon salt and ¼ teaspoon pepper. The kewpie mayo’s richness is what gives this dish its signature creaminess, so don’t substitute with regular mayo if possible.
- Fold in half the mozzarella (about 4 ounces) until evenly distributed. The cheese should be at room temperature for better melting and incorporation with the other ingredients.
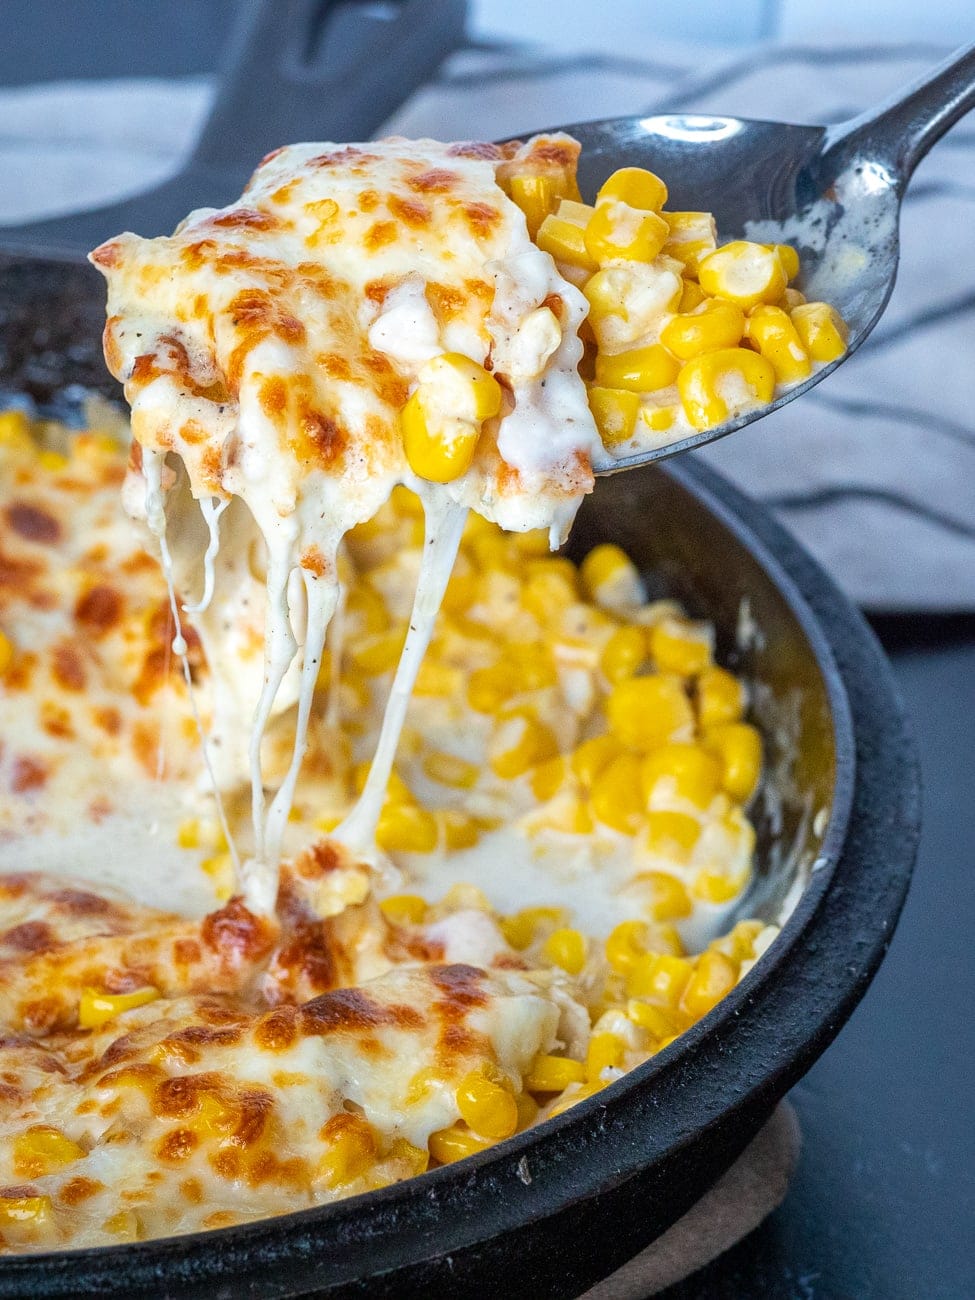
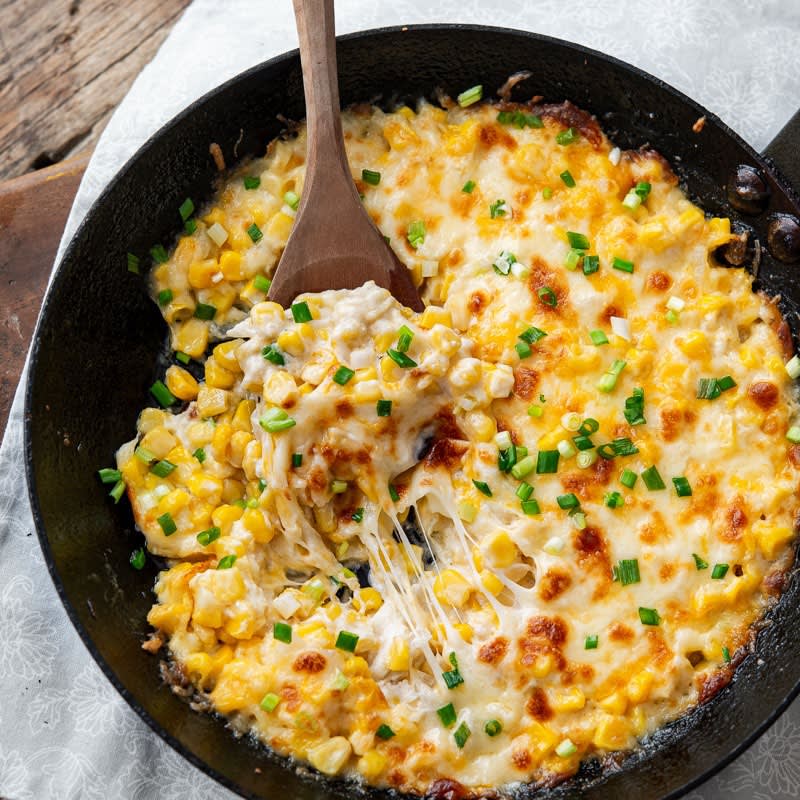
- Transfer the corn mixture into your prepared skillet, spreading it into an even layer. Sprinkle the remaining 4 ounces of mozzarella over the top, making sure to cover the entire surface for that perfect cheese pull.
- Bake in the preheated oven until the mixture is bubbling around the edges, about 15 minutes. You’ll know it’s ready when you can see the corn mixture actively bubbling through the melted cheese layer.
- Switch your oven to broil and broil for 2-3 minutes, watching carefully to prevent burning. You’re looking for a golden-brown, slightly blistered cheese top with some caramelized spots.
- Remove from the oven and let rest for 2 minutes before serving. This brief rest allows the molten cheese to set slightly, making serving easier.
- Garnish with the sliced green onions and serve immediately while still hot and bubbly for the best cheese-pull experience.

Smart Swaps
- Replace kewpie mayonnaise with ½ cup Greek yogurt mixed with 1 teaspoon rice vinegar for a tangier, higher-protein version
- Swap mozzarella with Mexican blend cheese for a different flavor profile
- Use frozen corn kernels (about 3 cups) when fresh corn isn’t in season – just thaw and drain well first
Make It Diabetes-Friendly
- Substitute sugar with 1 tablespoon monk fruit sweetener to reduce carbs by approximately 6g per serving
- Use light kewpie mayo or a mix of ¼ cup light mayo and ¼ cup plain Greek yogurt to reduce fat content without sacrificing creaminess
- Add 1 cup diced bell peppers to increase fiber and reduce the glycemic impact while adding volume
- Serve smaller portions (⅓ cup instead of ½ cup) alongside protein to balance blood sugar response
Pro Tips
- For extra flavor, try grilling or roasting the corn before mixing with other ingredients
- The dish can be assembled up to 24 hours ahead and refrigerated before baking – just add 5-7 minutes to the baking time
- For a spicier version, add ½ teaspoon gochugaru (Korean chili flakes) to the corn mixture
- This dish is best eaten fresh – the cheese tends to harden as it cools, though it can be gently reheated in a 350°F oven for 5-7 minutes