Layered Rainbow Jello
Get ready for the most eye-catching dessert that’ll have everyone at your next party asking, “How did you make this?!” These rainbow jello squares aren’t just gorgeous to look at—they’re a delightful jiggly treat that’s surprisingly simple to create. Remember those magical layered desserts from childhood parties? This is that nostalgia in technicolor glory!
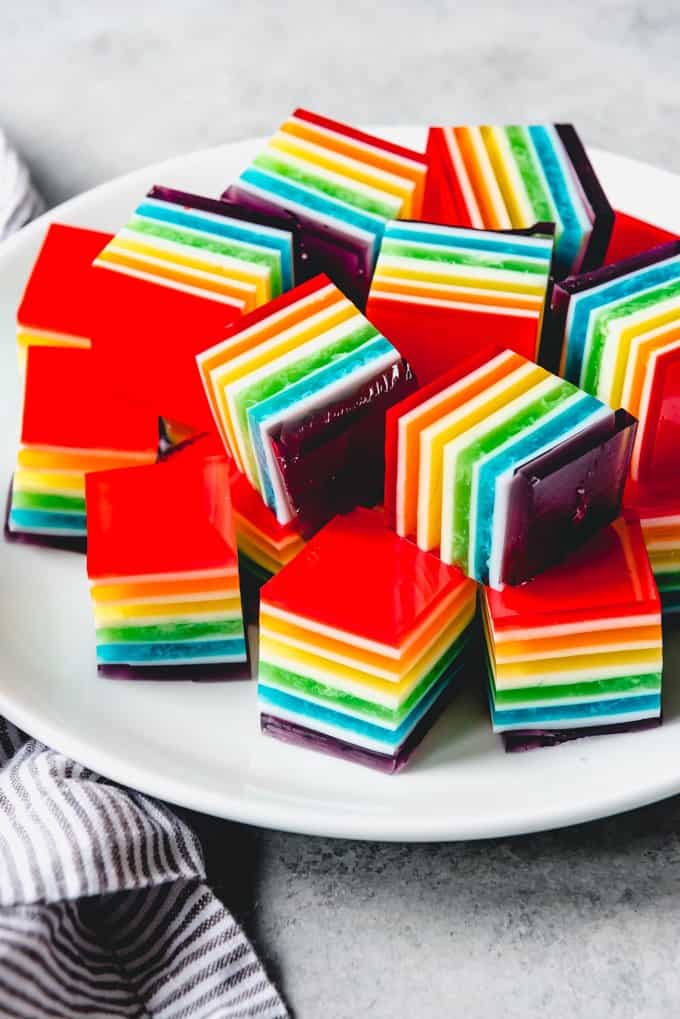
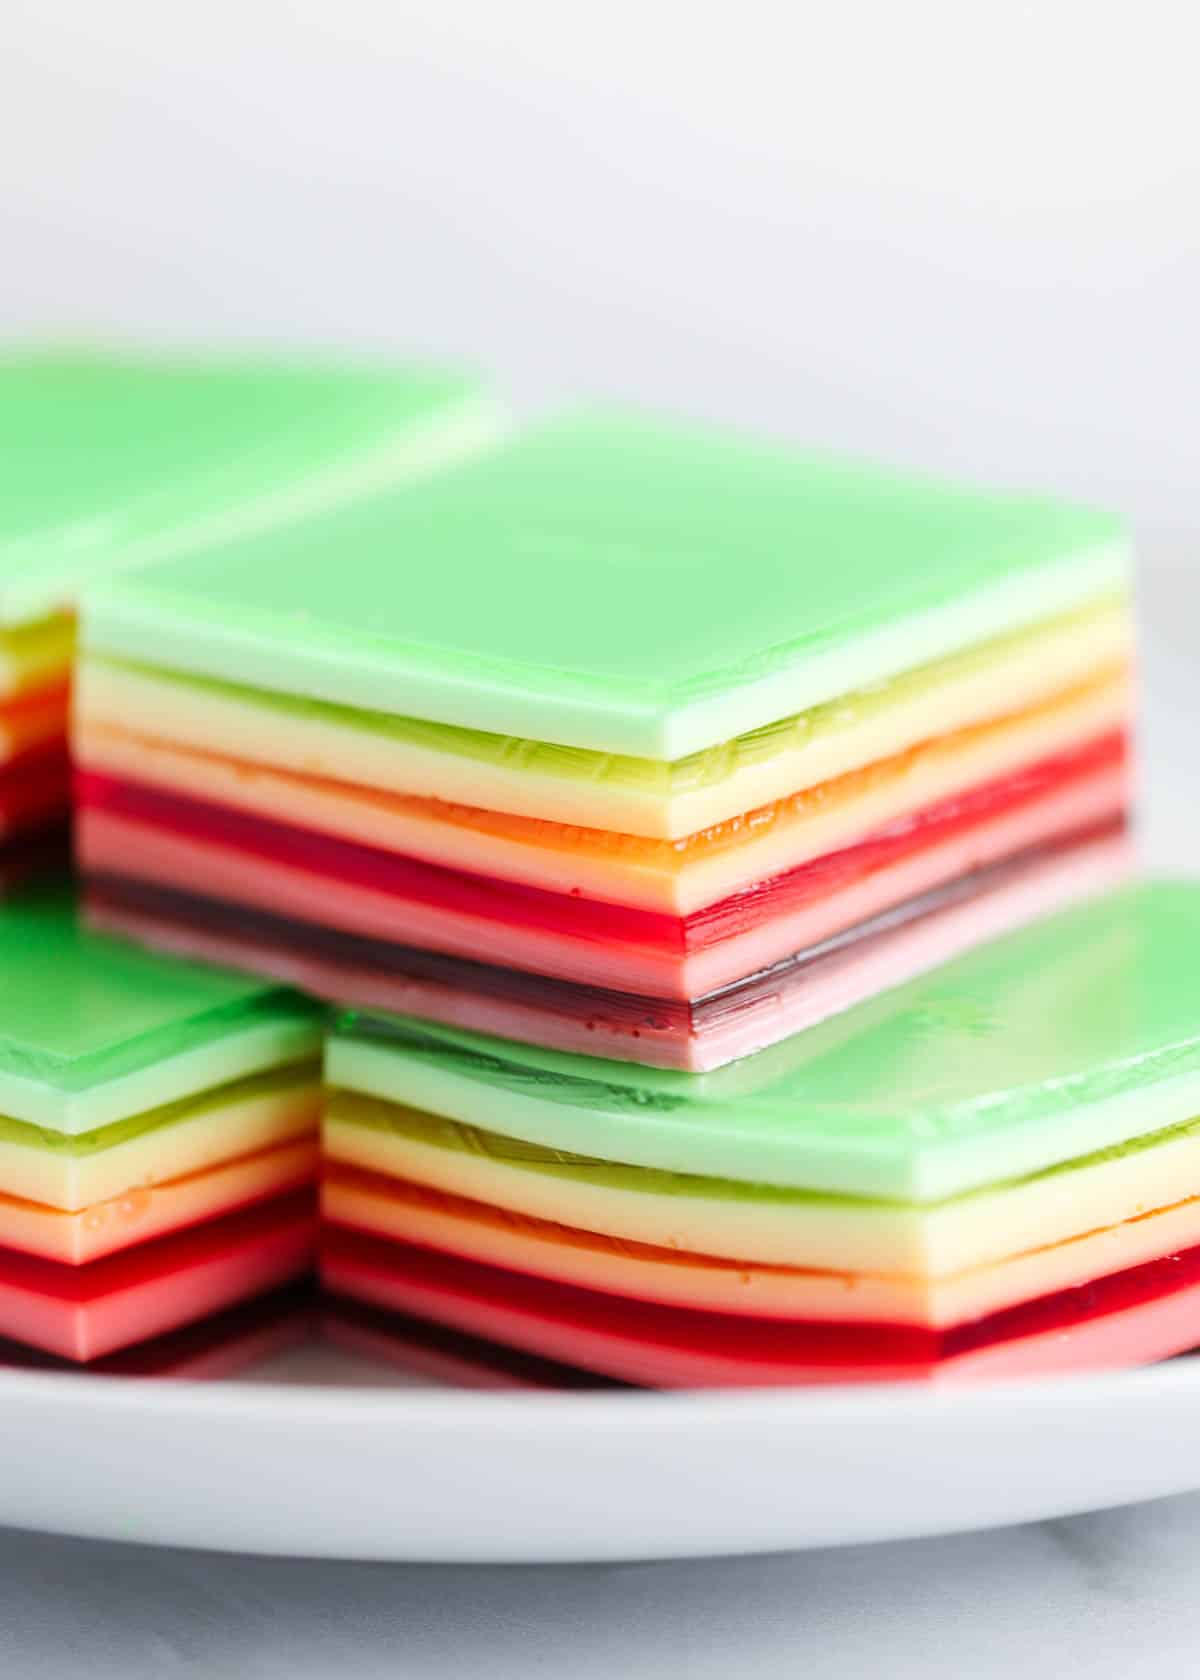
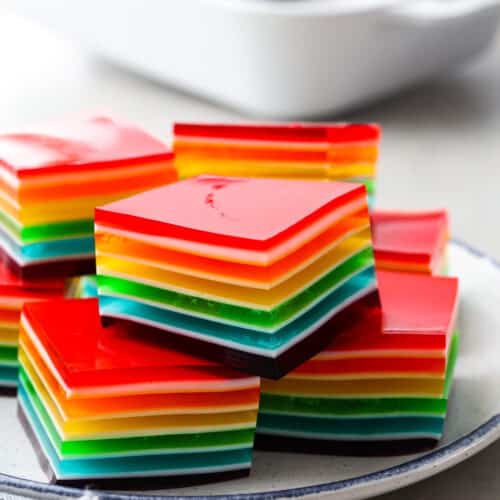
What makes this layered jello special is the stunning contrast between vibrant colored layers and creamy white ones. Each bite offers a different color combination, making it not just a dessert but a conversation piece. The sweetened condensed milk creates smooth, opaque layers between the bright jello colors, giving this treat its distinctive stained-glass window effect that’s impossible to resist photographing before eating.
Ingredients

- 6 different Jello flavors (3-ounce packages):
- Berry Blue
- Lime
- Lemon
- Orange
- Grape
- Raspberry, Cherry or Strawberry (for red layer)
- 5 packages unflavored gelatin (Knox)
- 1½ (14-ounce) cans sweetened condensed milk
- 8½ cups water (boiling)
- 9×13-inch pan

Steps
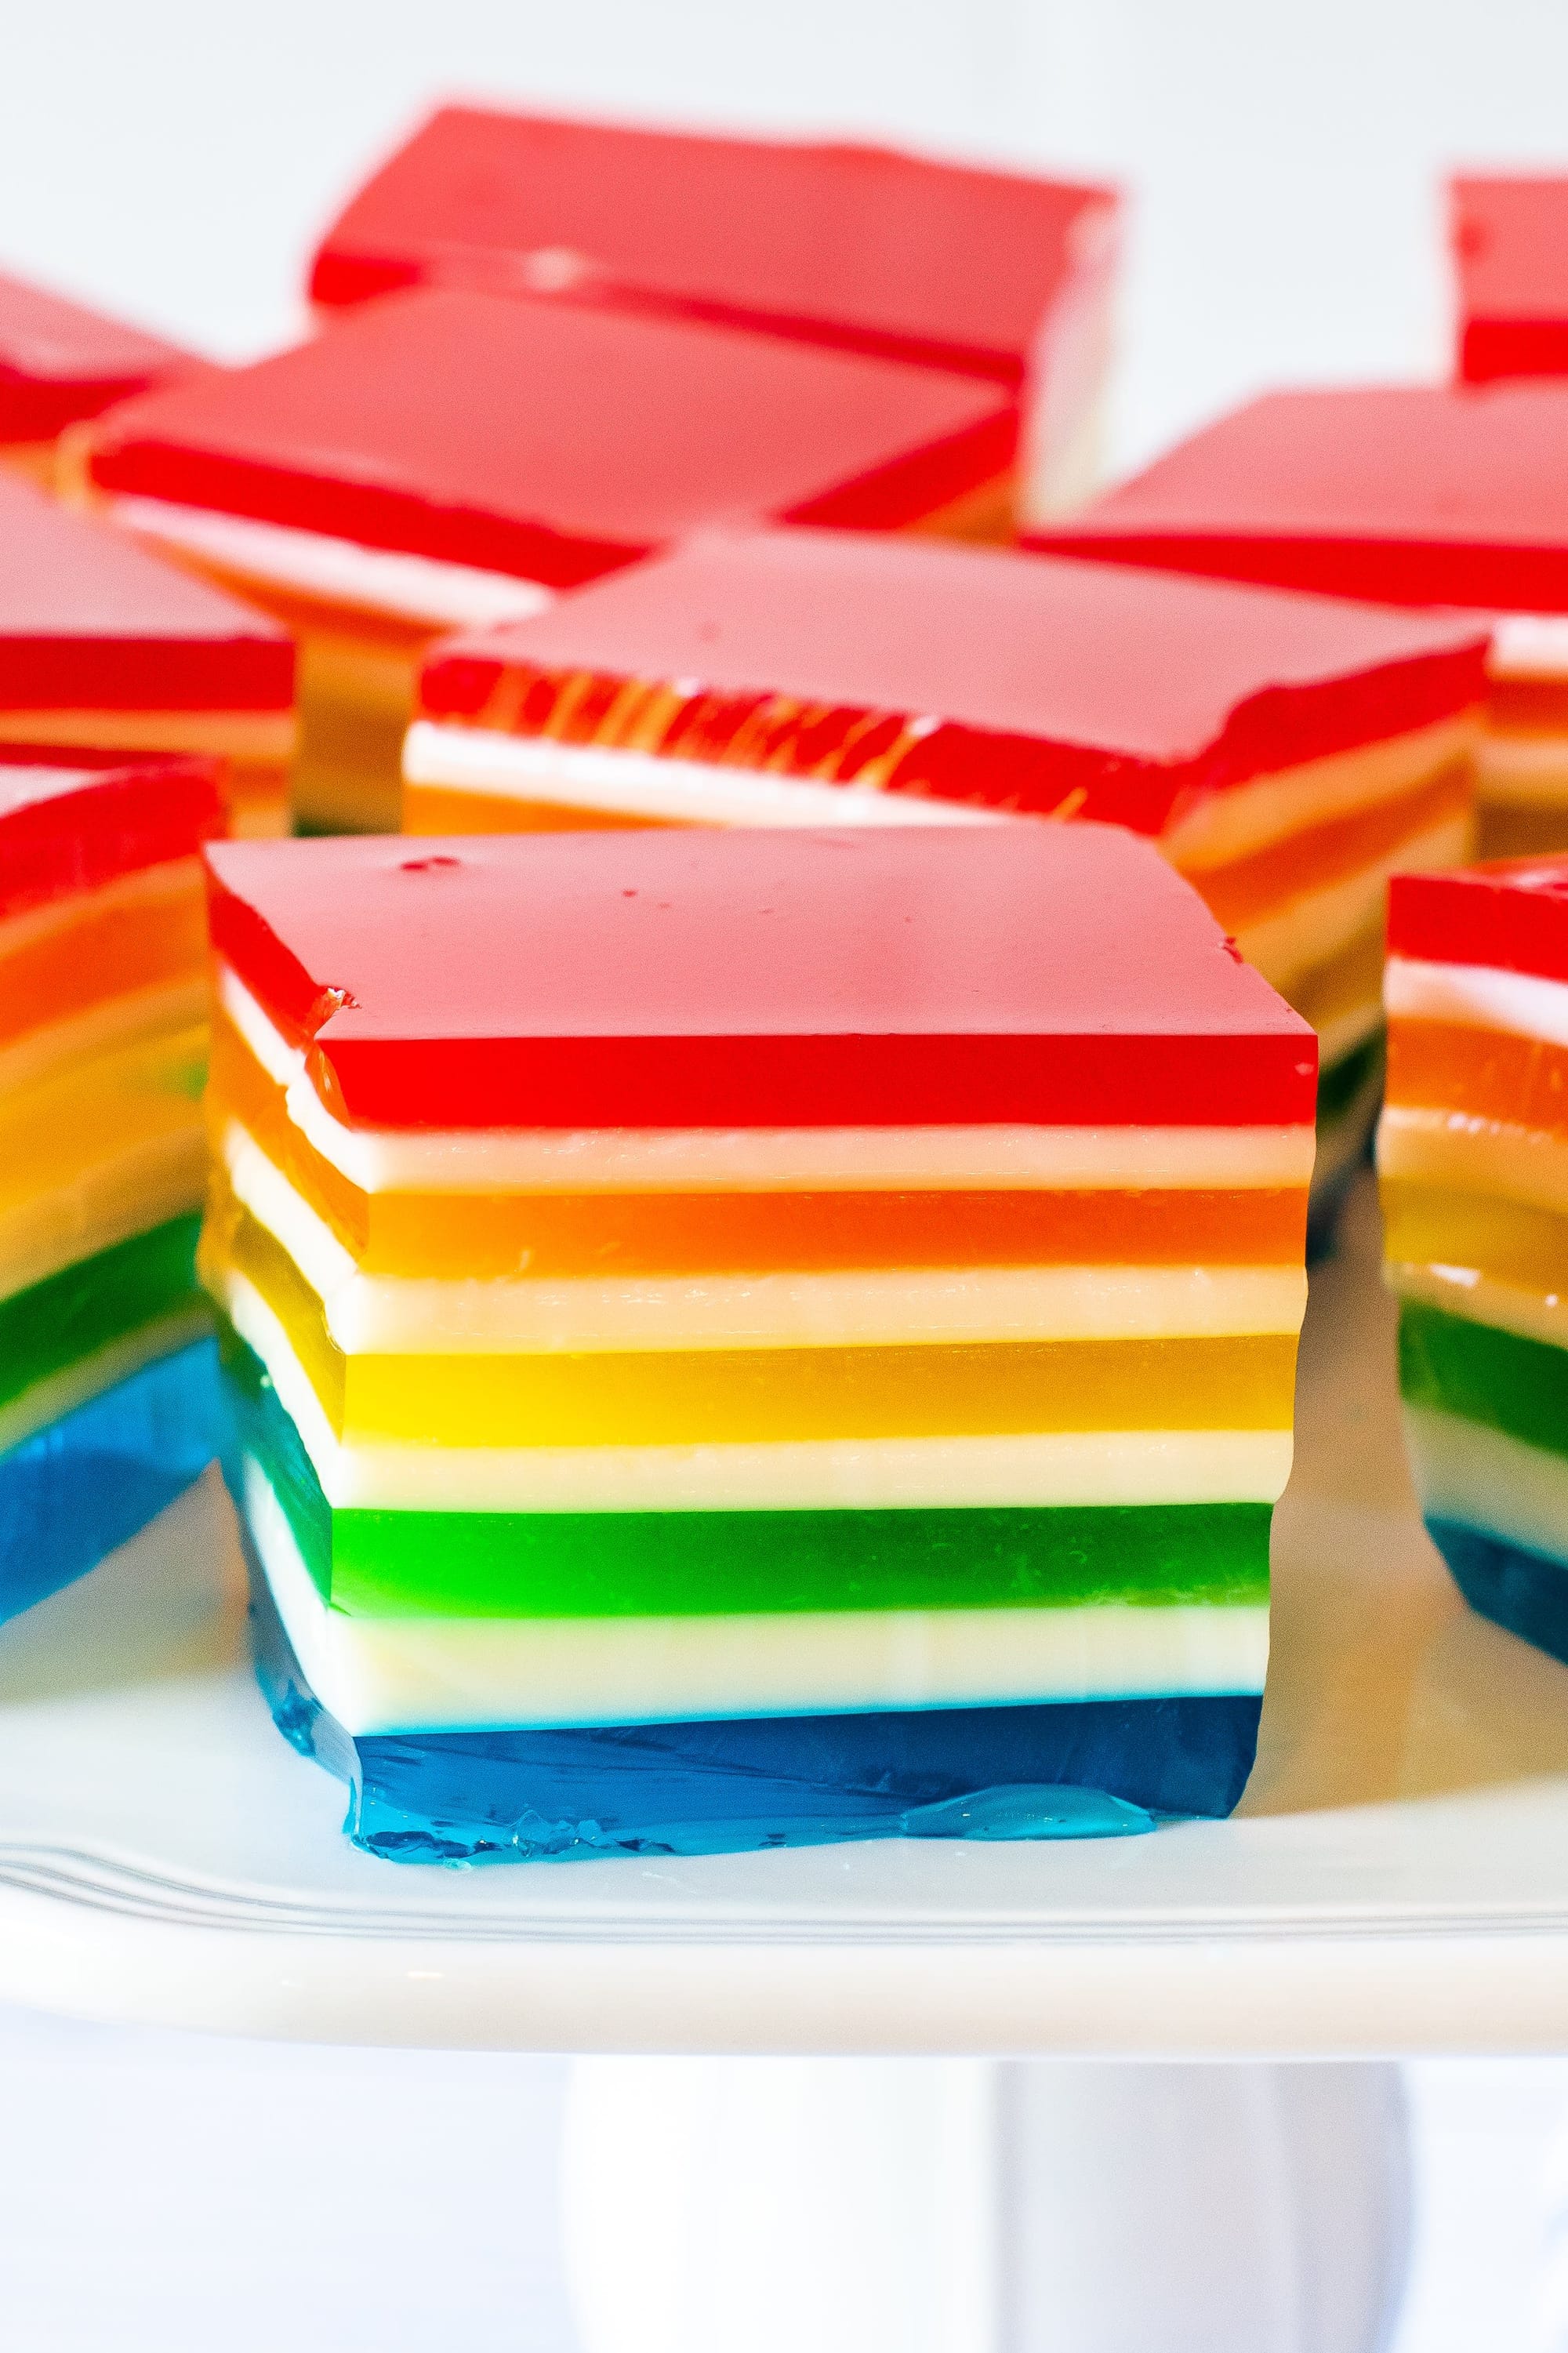
- Bottom (purple) layer: Dissolve a 3-ounce package of grape flavored jello with 1 teaspoon of unflavored gelatin (½ envelope of Knox) in 1 cup of boiling water, stirring until completely dissolved. Pour into a 9×13-inch pan and transfer to the refrigerator. Ensure the pan is sitting completely flat—any tilting will create uneven layers! Chill until completely set, about 30 minutes. The jello should feel firm to the touch and not sticky when you gently press it.
- Second (white) layer: Make this layer simultaneously with the bottom layer for efficiency. Stir 2 teaspoons (1 envelope) of Knox unflavored gelatin in 1 cup of boiling water until completely dissolved—no granules should be visible. Add ½ can of sweetened condensed milk and stir until fully combined with no streaks. Let this sit out on the counter until cooled to room temperature but not yet set while the purple layer sets in the fridge. If it starts to thicken too much, stir gently to loosen.
- Once the first colored layer has set, prepare the next colored layer (berry blue) following the directions in Step 1 so it can start to cool. Then pour ¾ cup of the white jello mixture over the purple layer and gently tilt the pan side to side for even distribution. Avoid pouring in one spot which can break through the layer below. Return jello to the refrigerator to set up, which takes about 20 minutes. The white layer should be opaque and firm to the touch before adding the next color.
- Continue making layers following steps 1 & 2, alternating flavored colorful layers (following rainbow order: blue, green, yellow, orange, and red) with the creamy white layers. Let each jello layer set completely before adding the next—rushing this process will result in layers that blend together. You will need to make the white layer mixture 2-3 times during the process because even without refrigeration it will set up on the counter if made all at once.
- Once all layers are completed and the jello is completely set (at least 4 hours, preferably overnight), slice into 1-inch squares using a sharp paring knife (not a serrated blade which leaves jagged marks in the jello). Cut with a straight down motion rather than sawing. A small offset spatula will help you get the jello cubes out of the pan without damaging their perfect layers.
Smart Swaps
- Use sugar-free Jello packages to reduce calories and sugar content
- Try coconut cream instead of sweetened condensed milk for a tropical twist (use ¾ cup coconut cream mixed with 3 tablespoons sugar)
- For a grown-up version, replace ¼ cup of the water with vodka or rum in the colored layers (not the white layers)
Make It Diabetes-Friendly
- Use sugar-free Jello varieties for all colored layers (reduces approximately 8g carbs per serving)
- Replace sweetened condensed milk with a mixture of 1 cup unsweetened almond milk, 2 tablespoons sugar-free vanilla syrup, and 2 teaspoons additional unflavored gelatin (reduces approximately 12g carbs per serving)
- Cut squares into ½-inch pieces instead of 1-inch to create smaller portions with lower glycemic impact
- Serve with a small protein source to slow sugar absorption
Pro Tips
- Spray your measuring cup with non-stick spray before measuring sweetened condensed milk for easier pouring
- Keep a kettle of hot water ready throughout the process for making new layers
- For perfectly clean cuts, dip your knife in hot water and wipe dry between slices
- Make this up to 3 days ahead and keep covered in the refrigerator
- Let the pan sit at room temperature for 5 minutes before cutting for cleaner slices