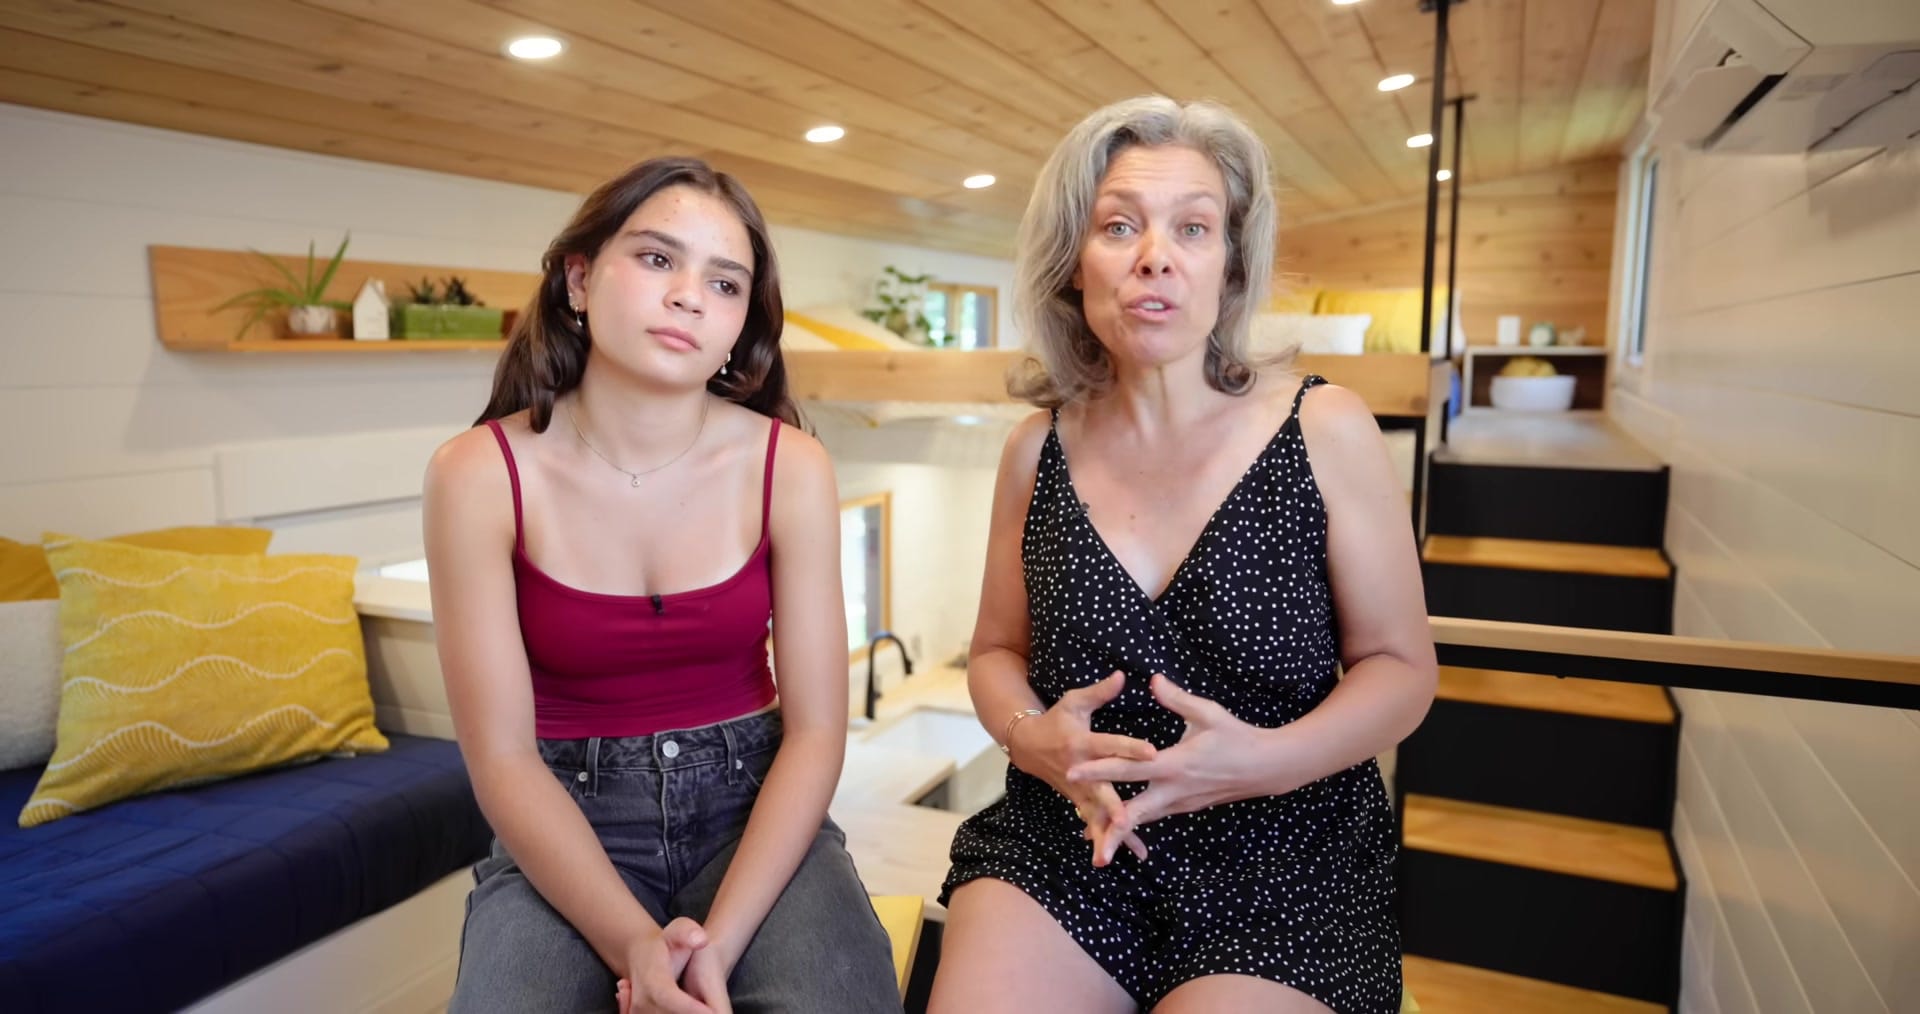
She Designed a 25' x 10' Gooseneck Tiny House — At 14
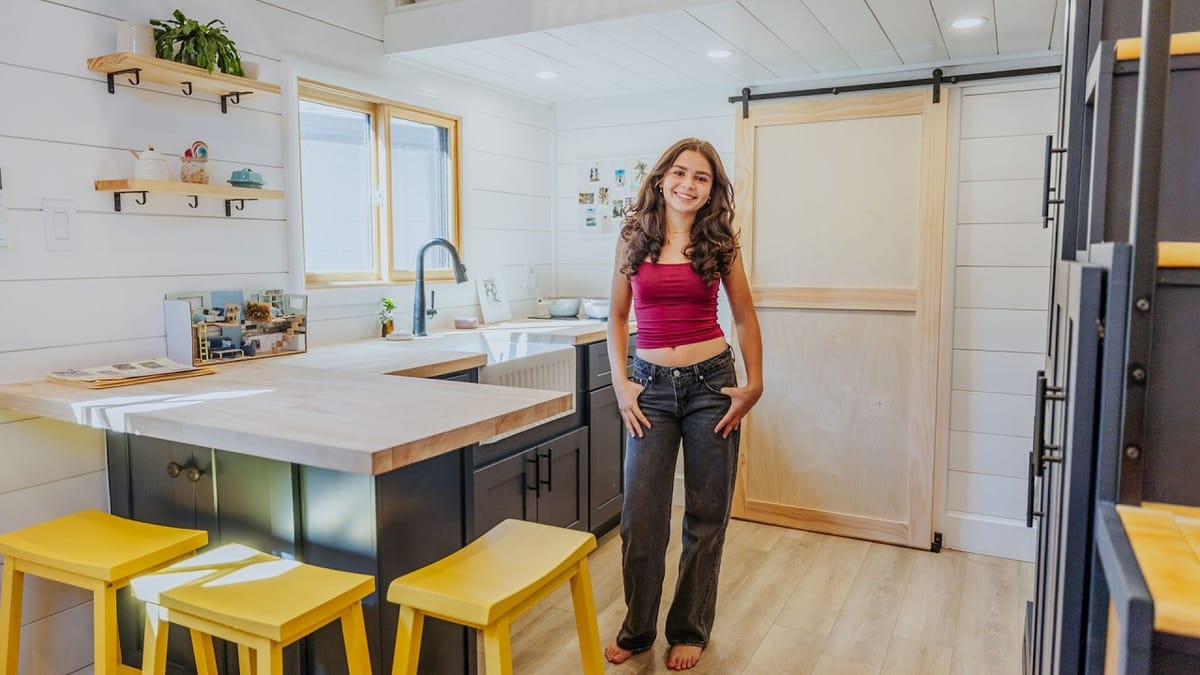
Emma dreamed it on paper, then built it with help from her family and builders.
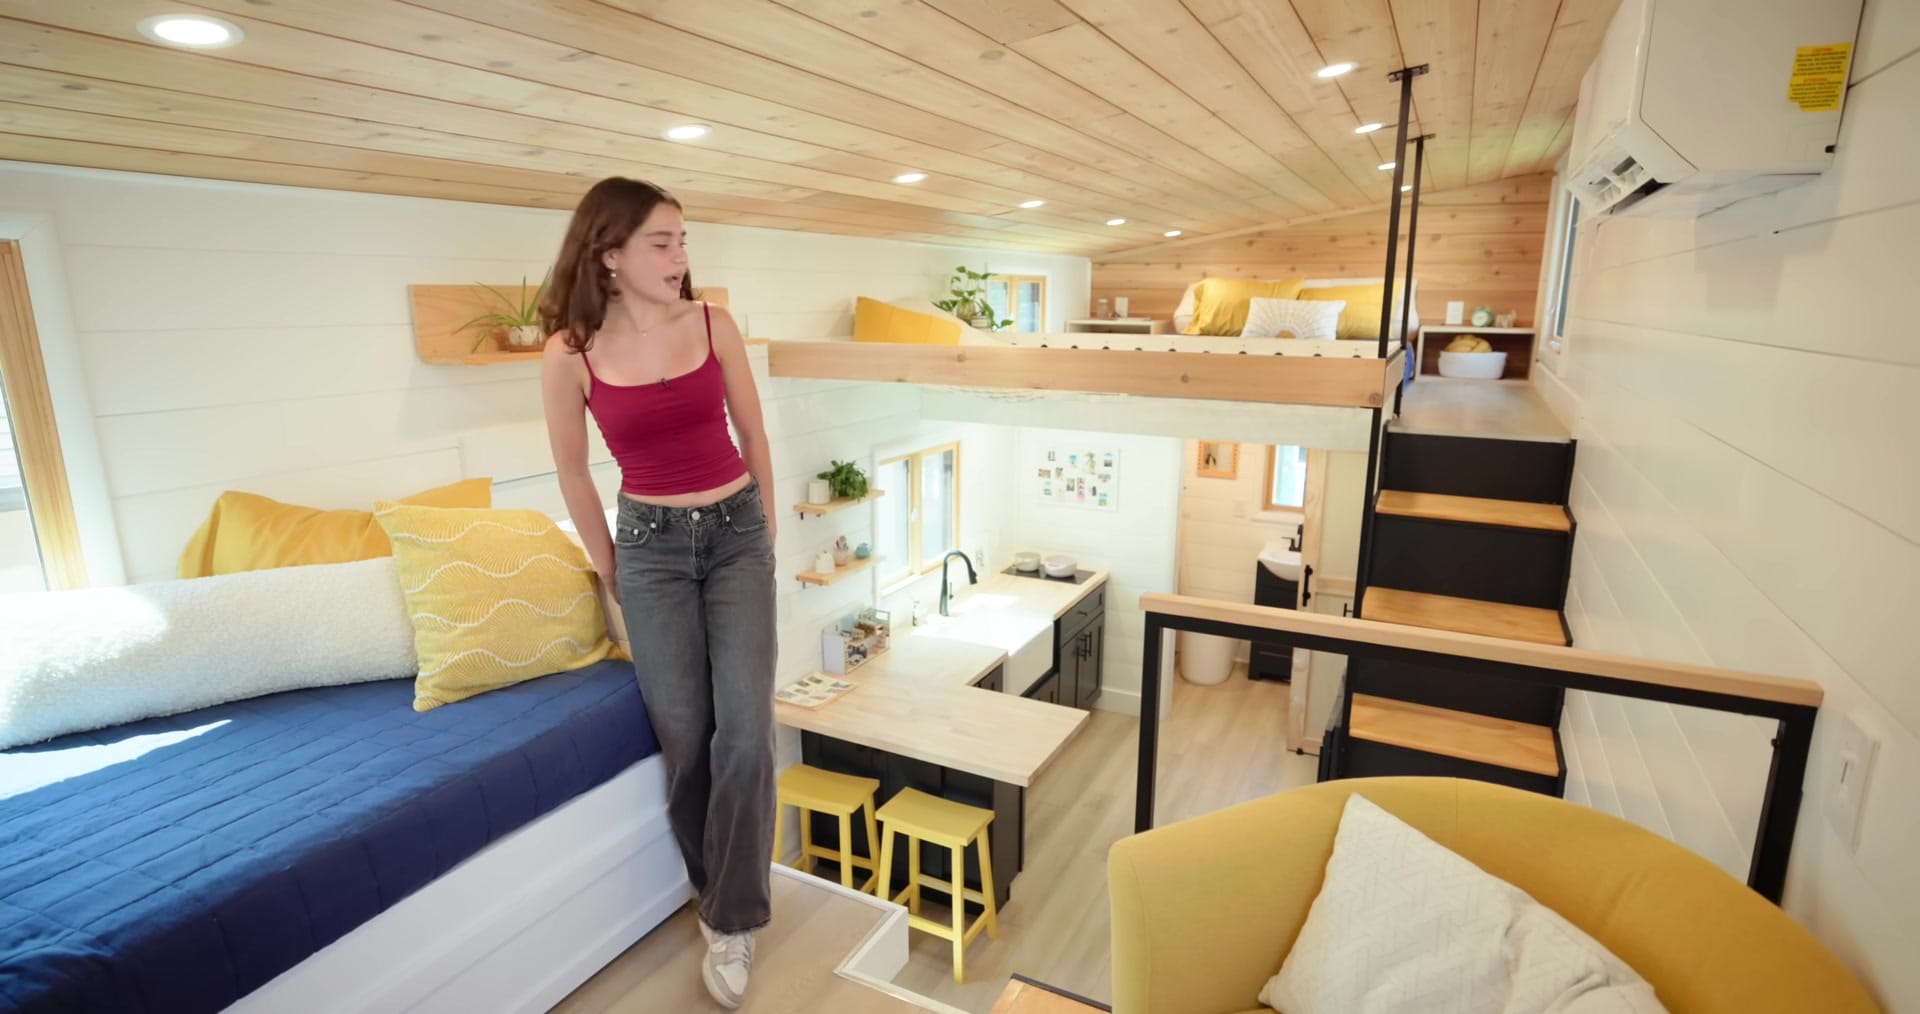
The result is a 25' × 10' gooseneck tiny home that prioritizes a big central kitchen and smart, habitable lofts.
Quick Tour & Big Idea — 25' x 10' Gooseneck Overview
This is a full gooseneck layout with the living room tucked up front and everything else arranged around the kitchen.
It was designed to feel roomy without adding length.
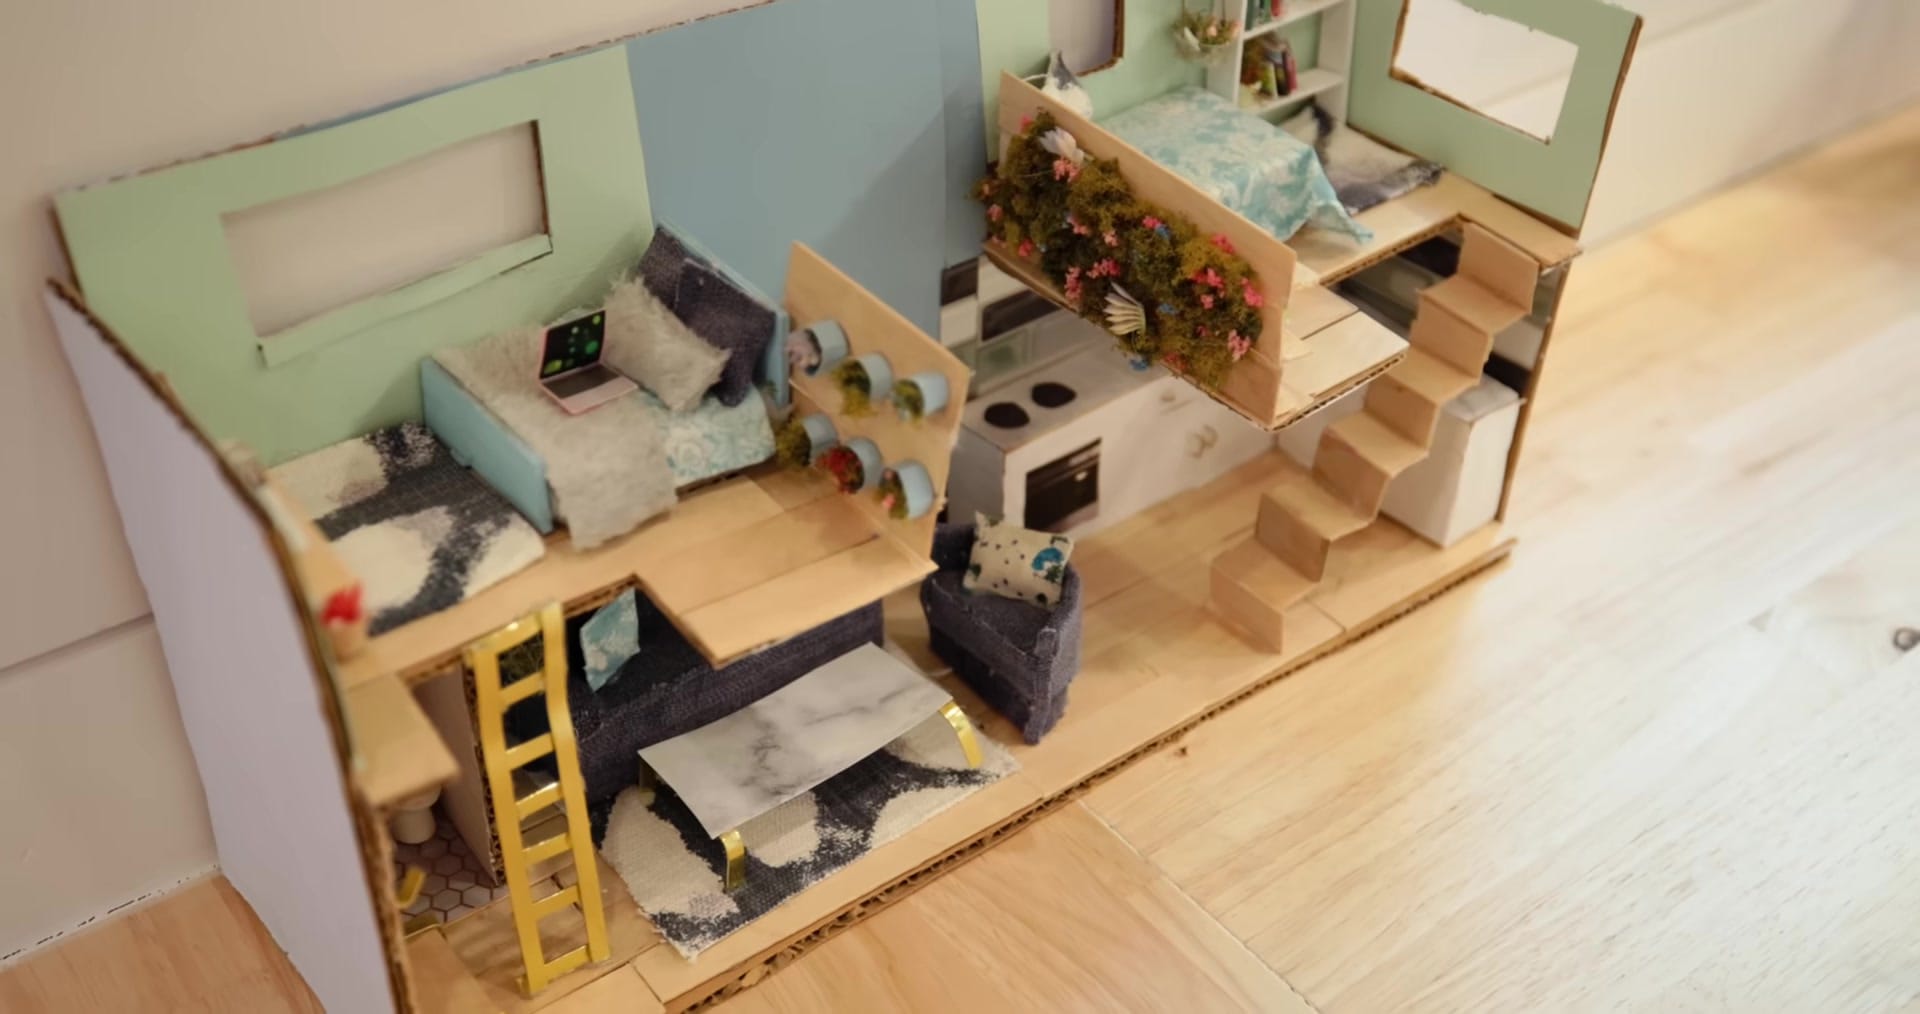
She sketched the build as a pre-teen and started turning it into reality at 12.
The trailer footprint reads as 18' + 7' in the gooseneck for a 25' total by 10' wide.
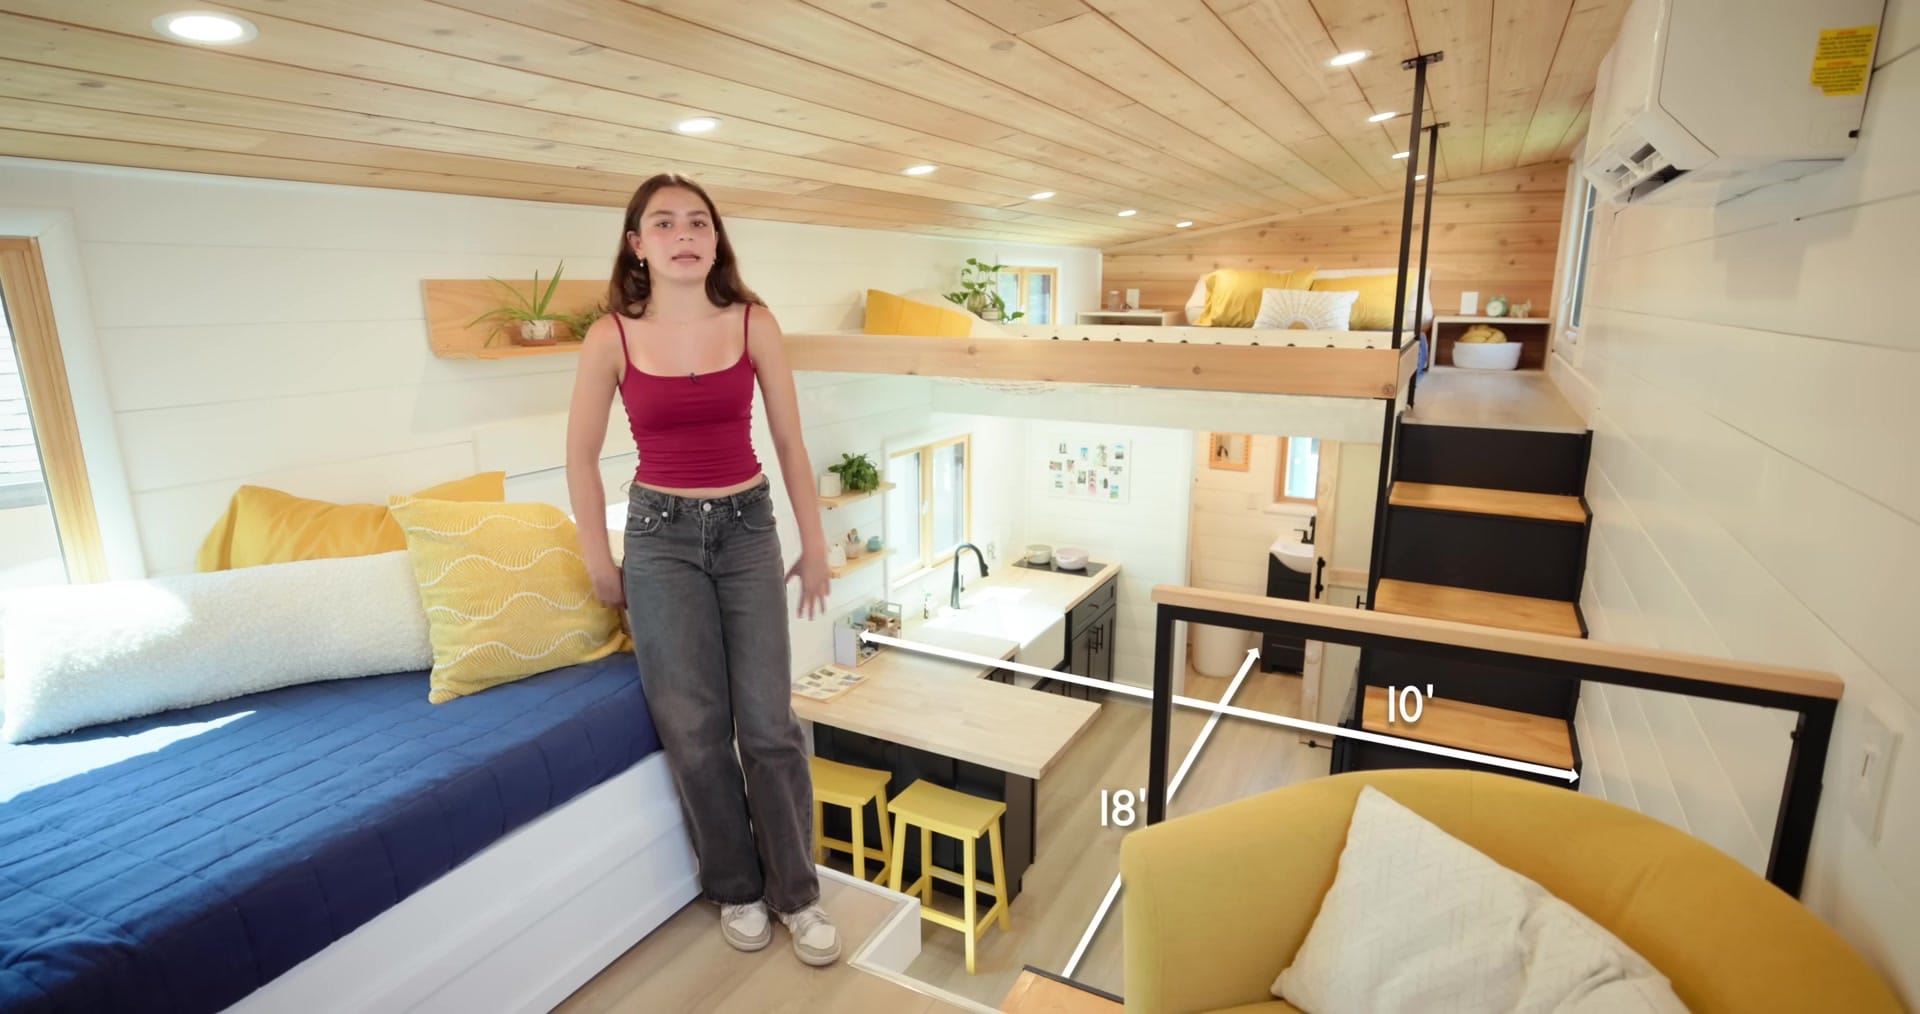
Emma counts the full 10-foot width as a win—she kept the extra broadness instead of the typical 8'.
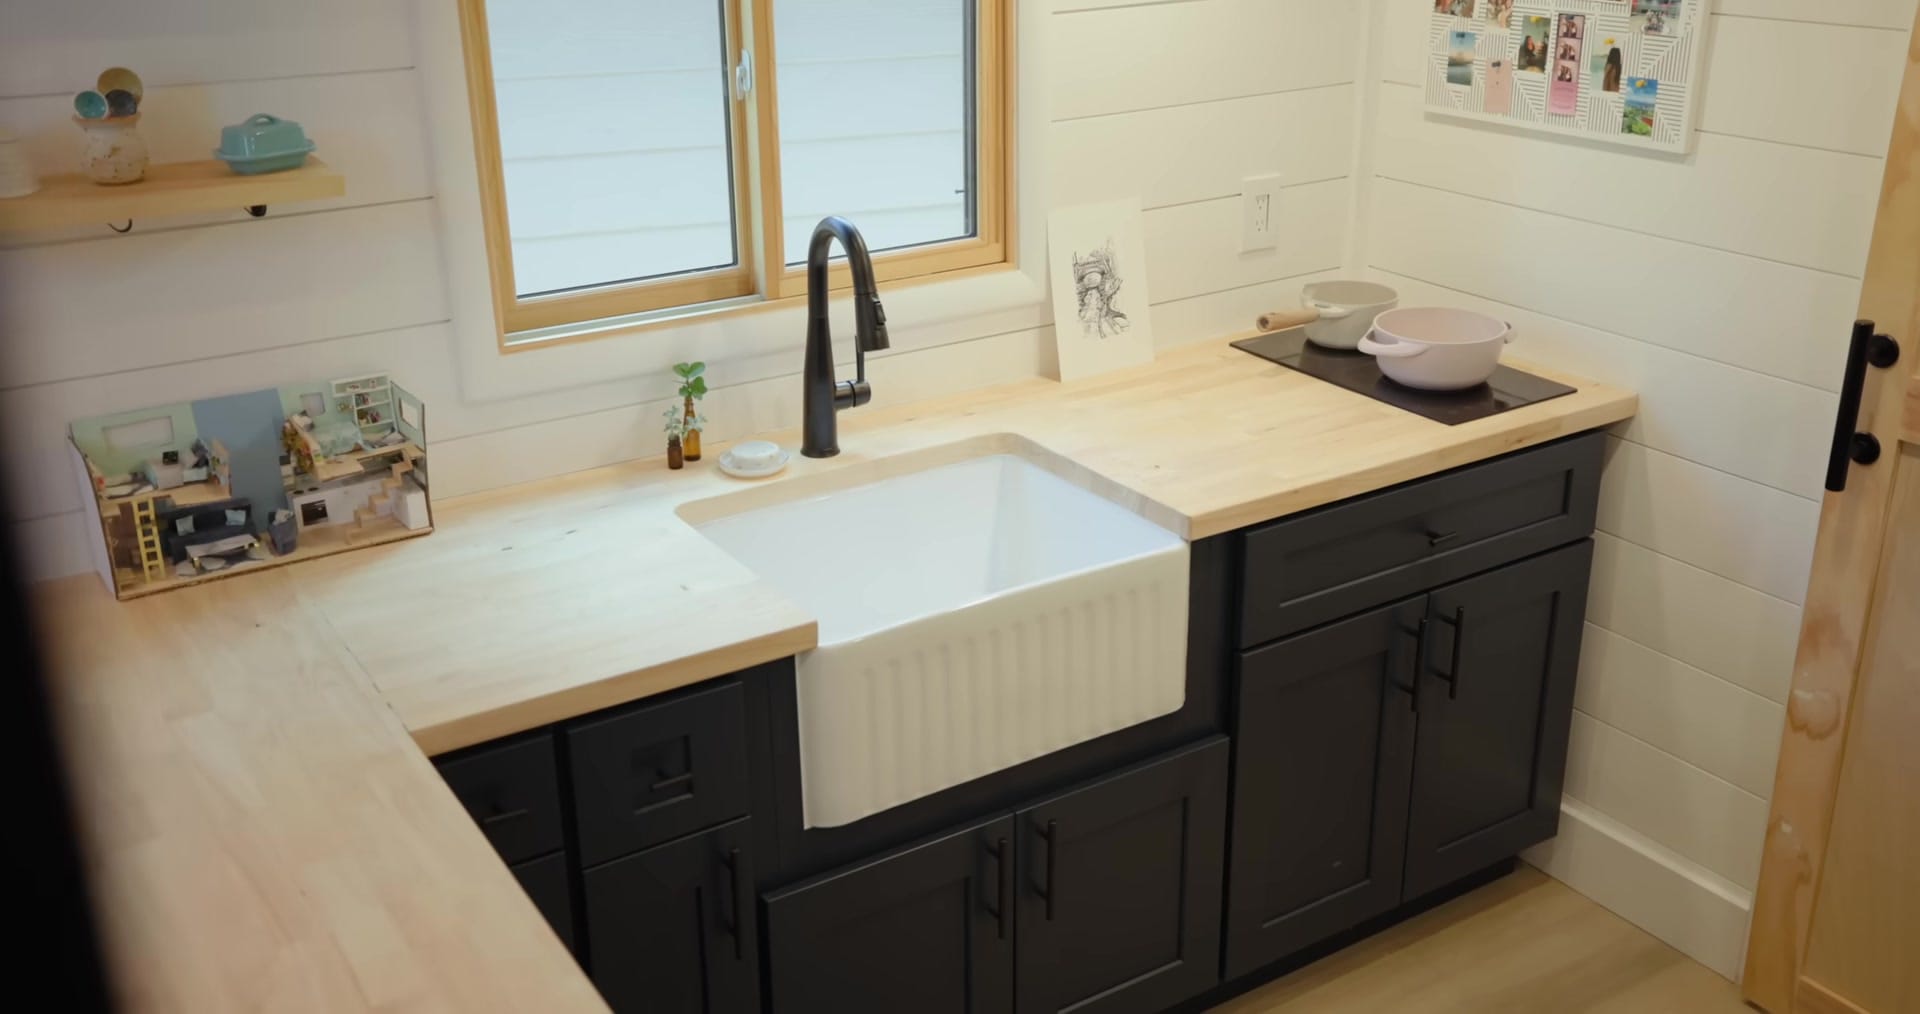
Her first priority was putting the kitchen front-and-center as you walk in.
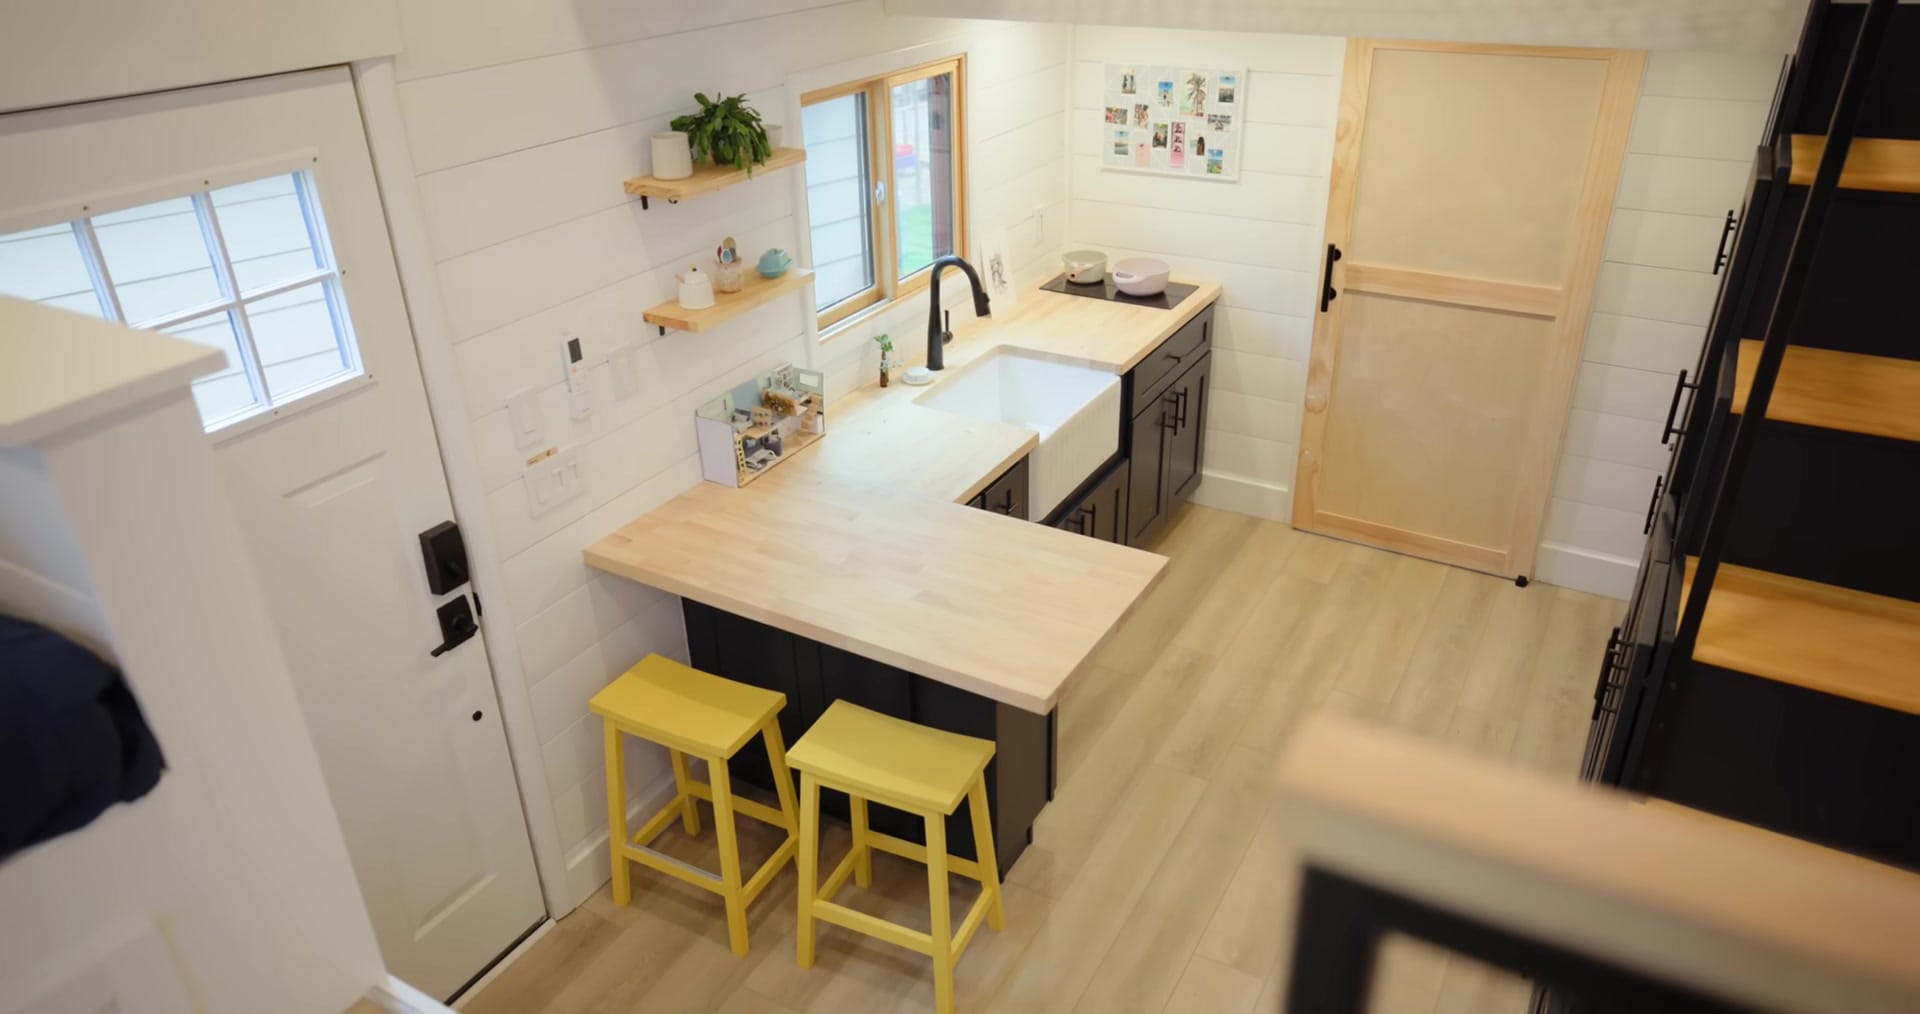
The Kitchen at the Heart — layout, storage, and small‑space choices
The kitchen is intentionally the main event: wide counters, plenty of drawers, and an eating nook for three.
Design choices favor openness and accessible storage over bulky upper cabinets.
An induction cooktop keeps the counters clean and low‑profile.
A folding air‑fryer idea gives flexibility when two burners aren’t enough.
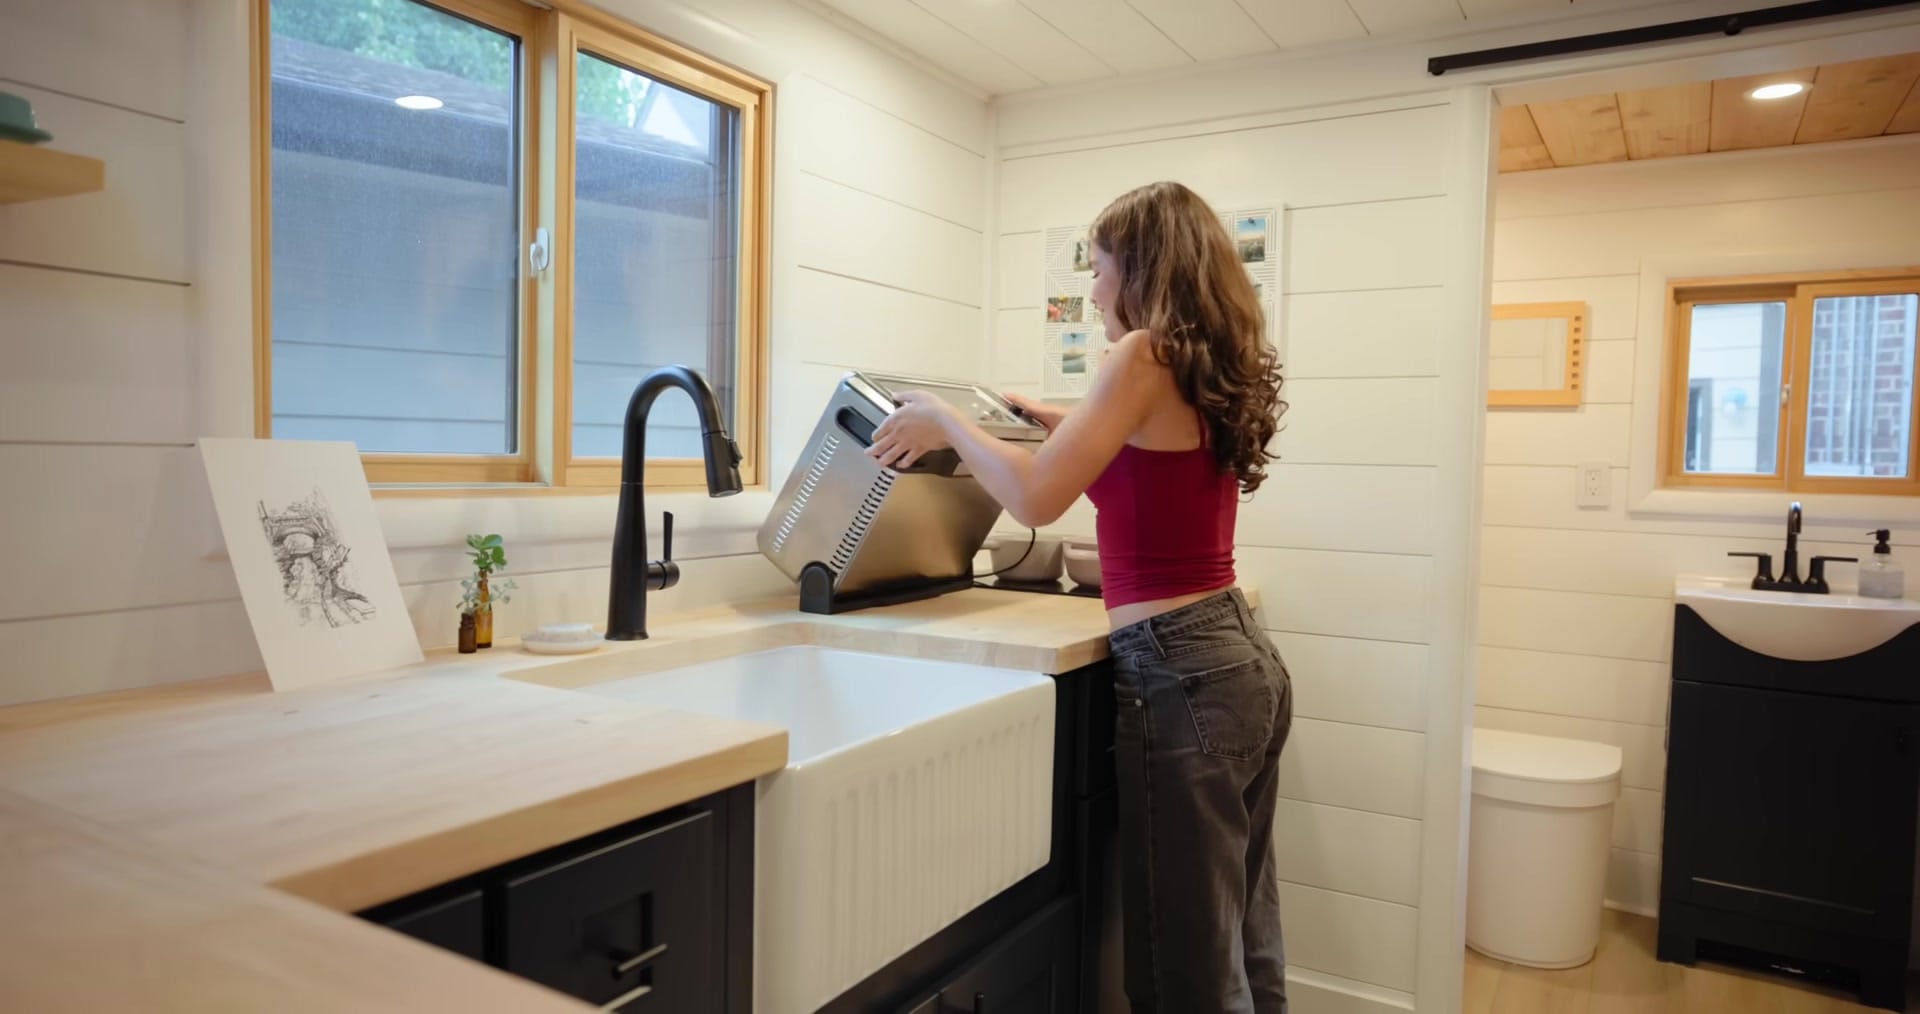
The farmhouse sink sits beneath a window so dishes come with a view.
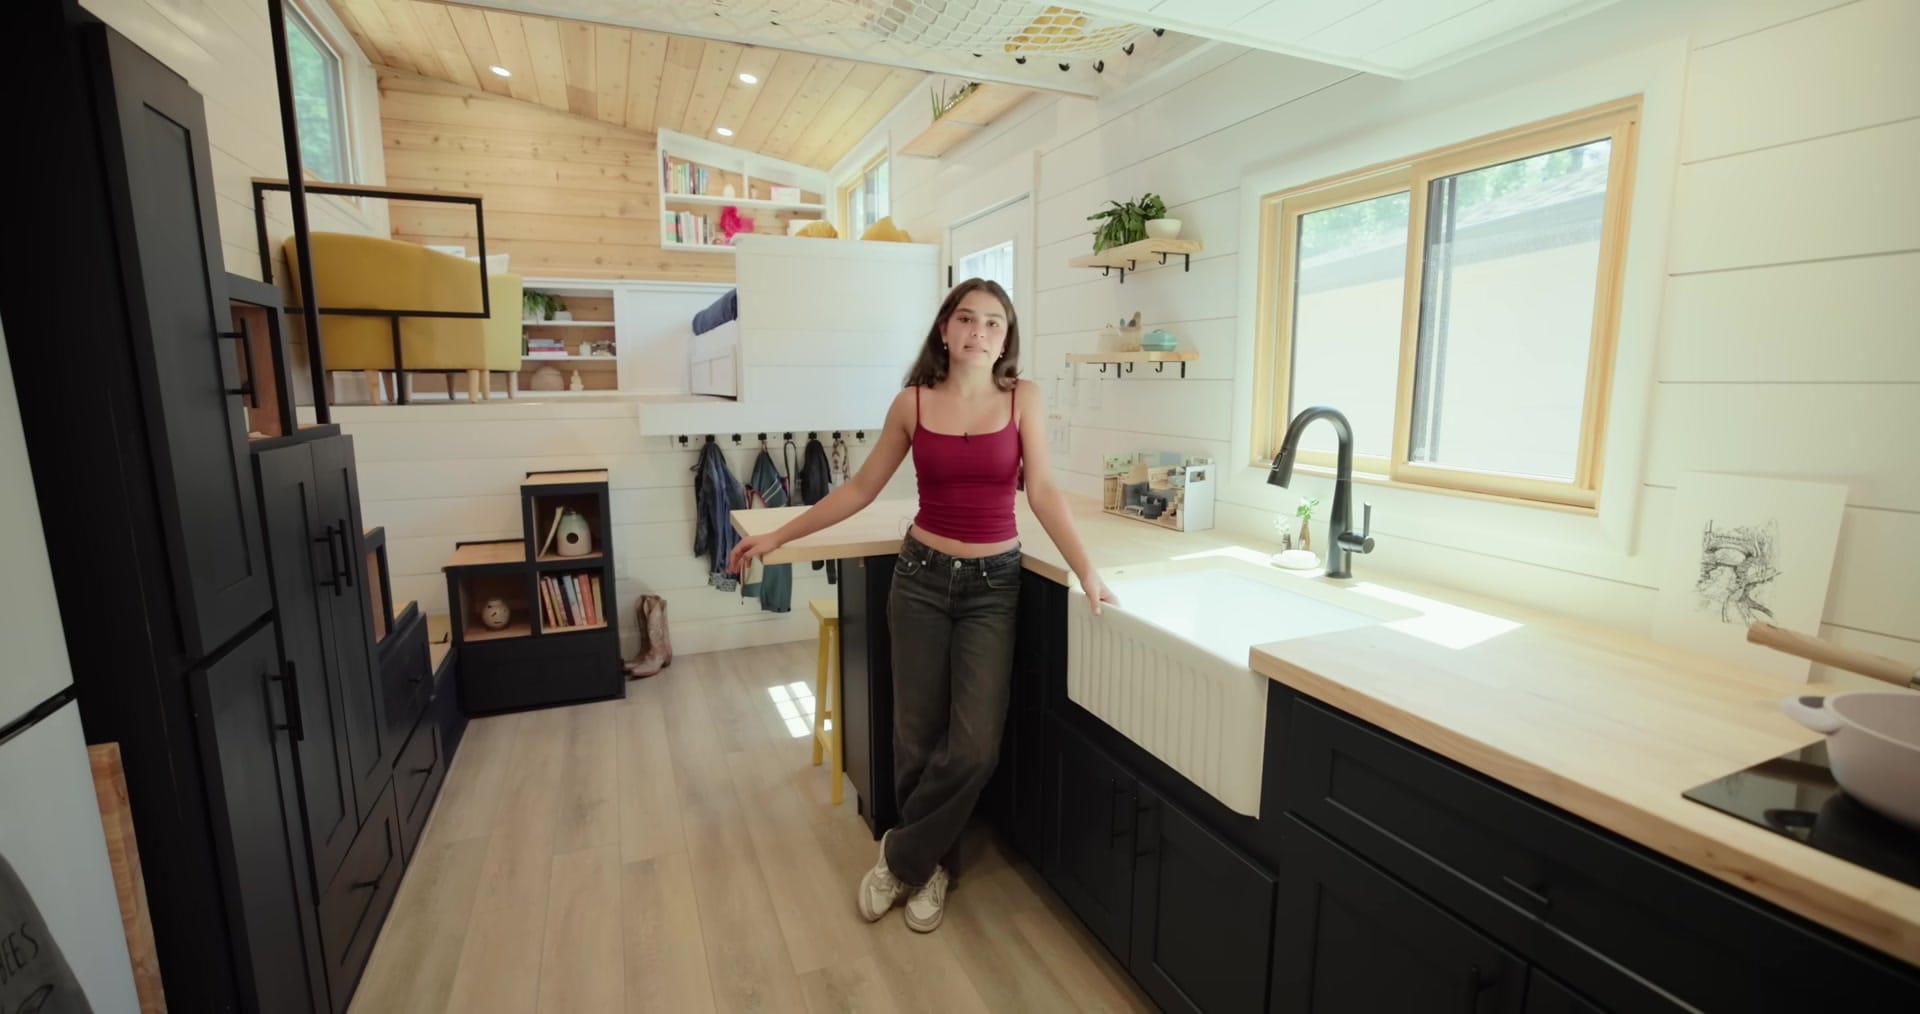
Unstained butcher‑block counters are oiled and used with a removable chopping block for durability.
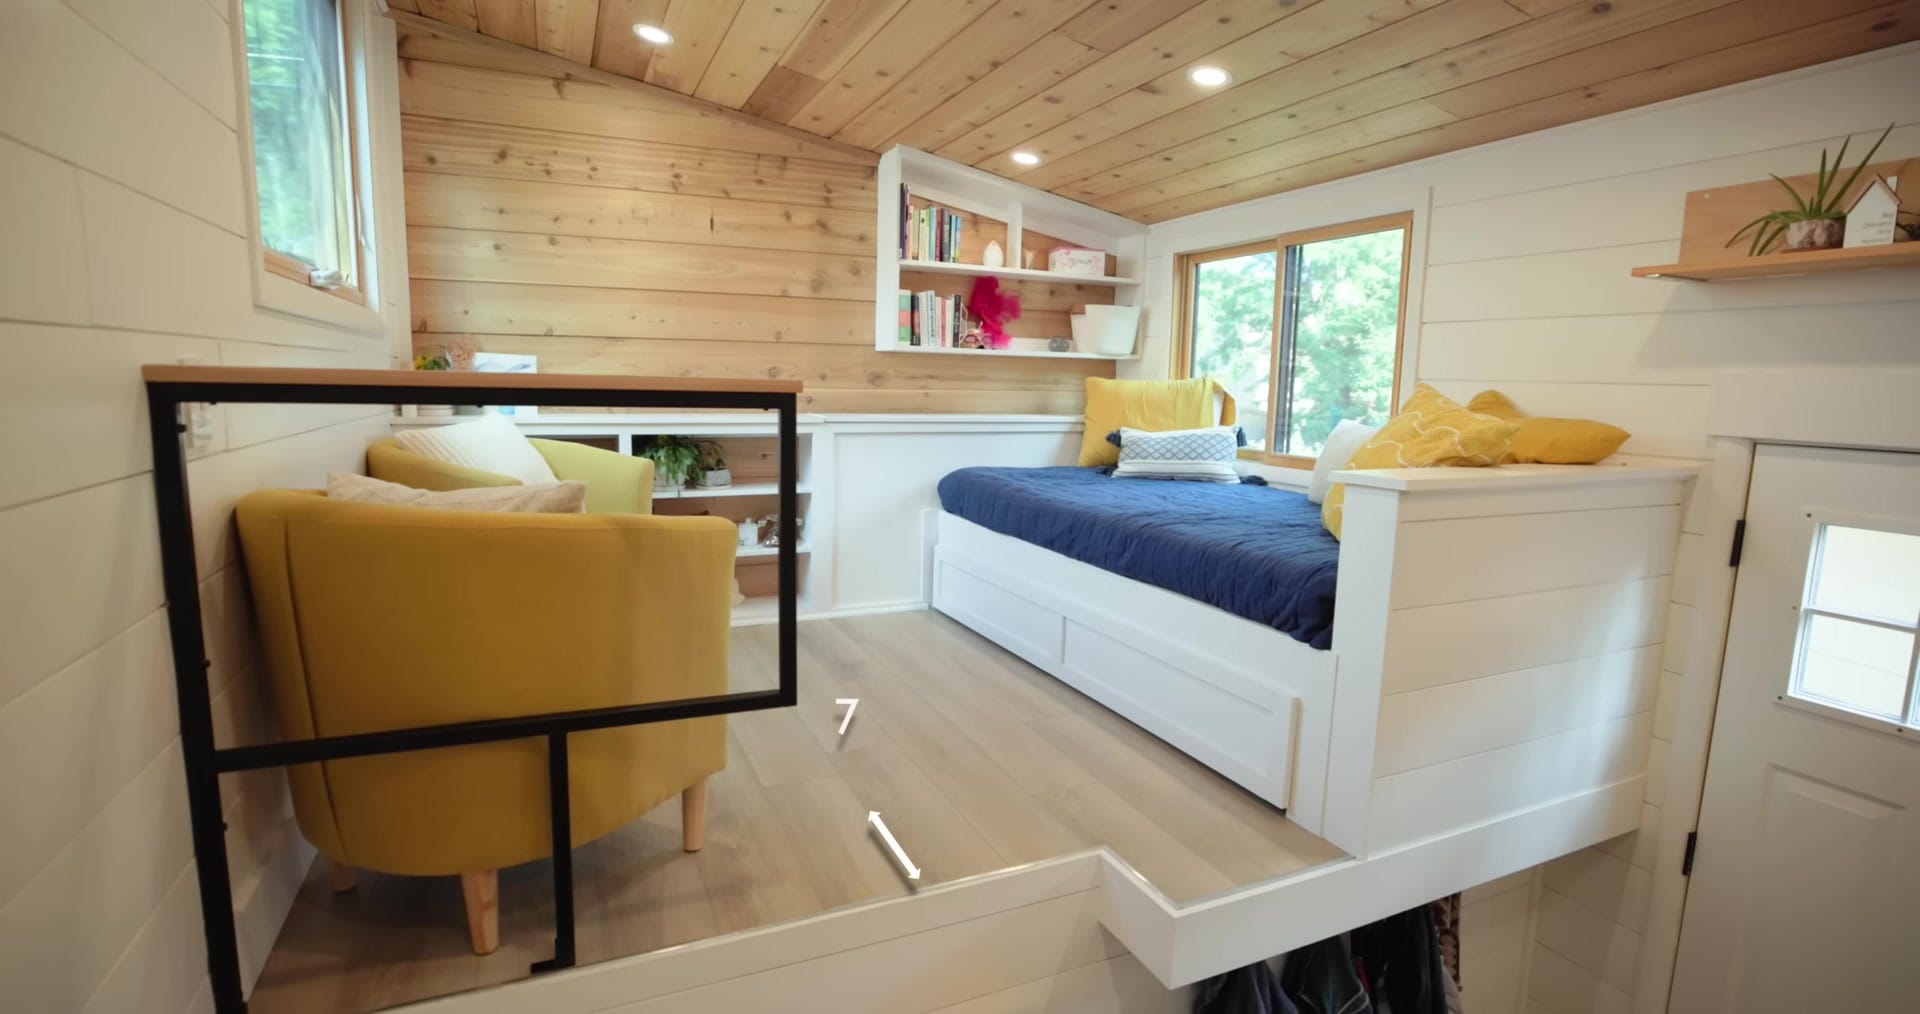
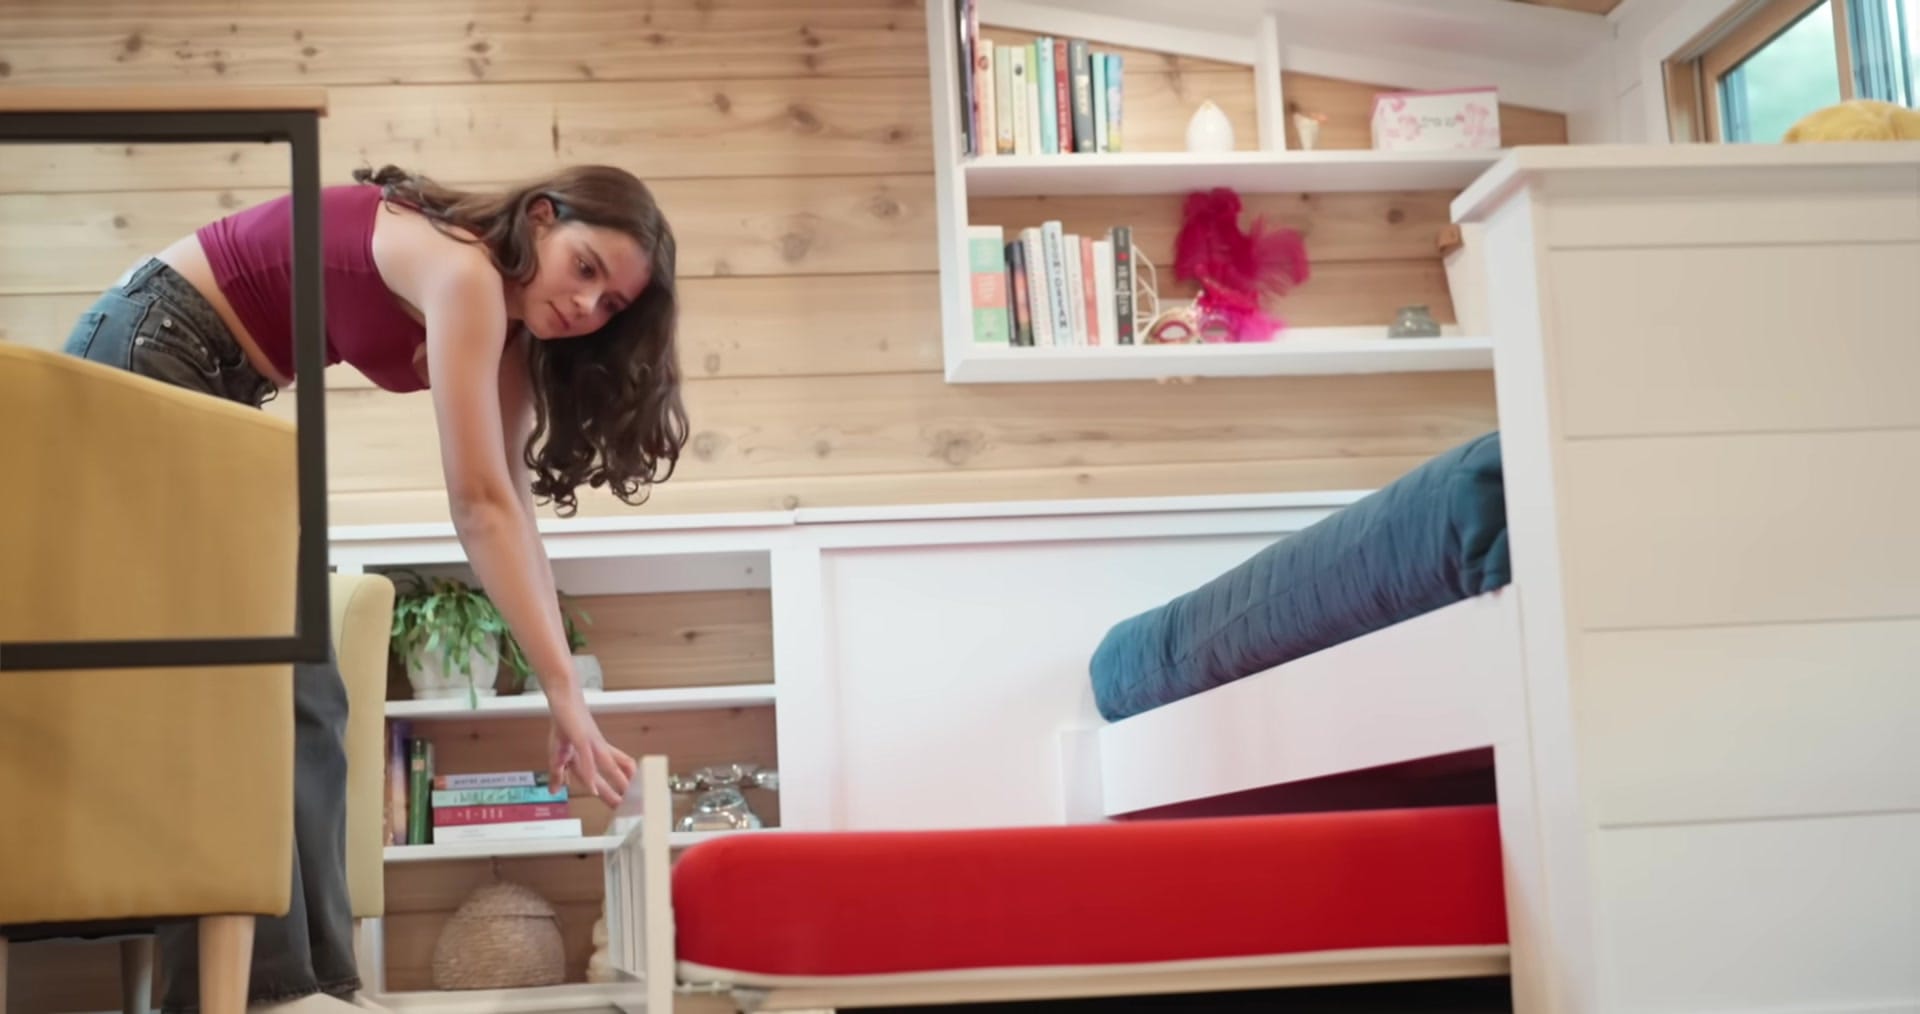
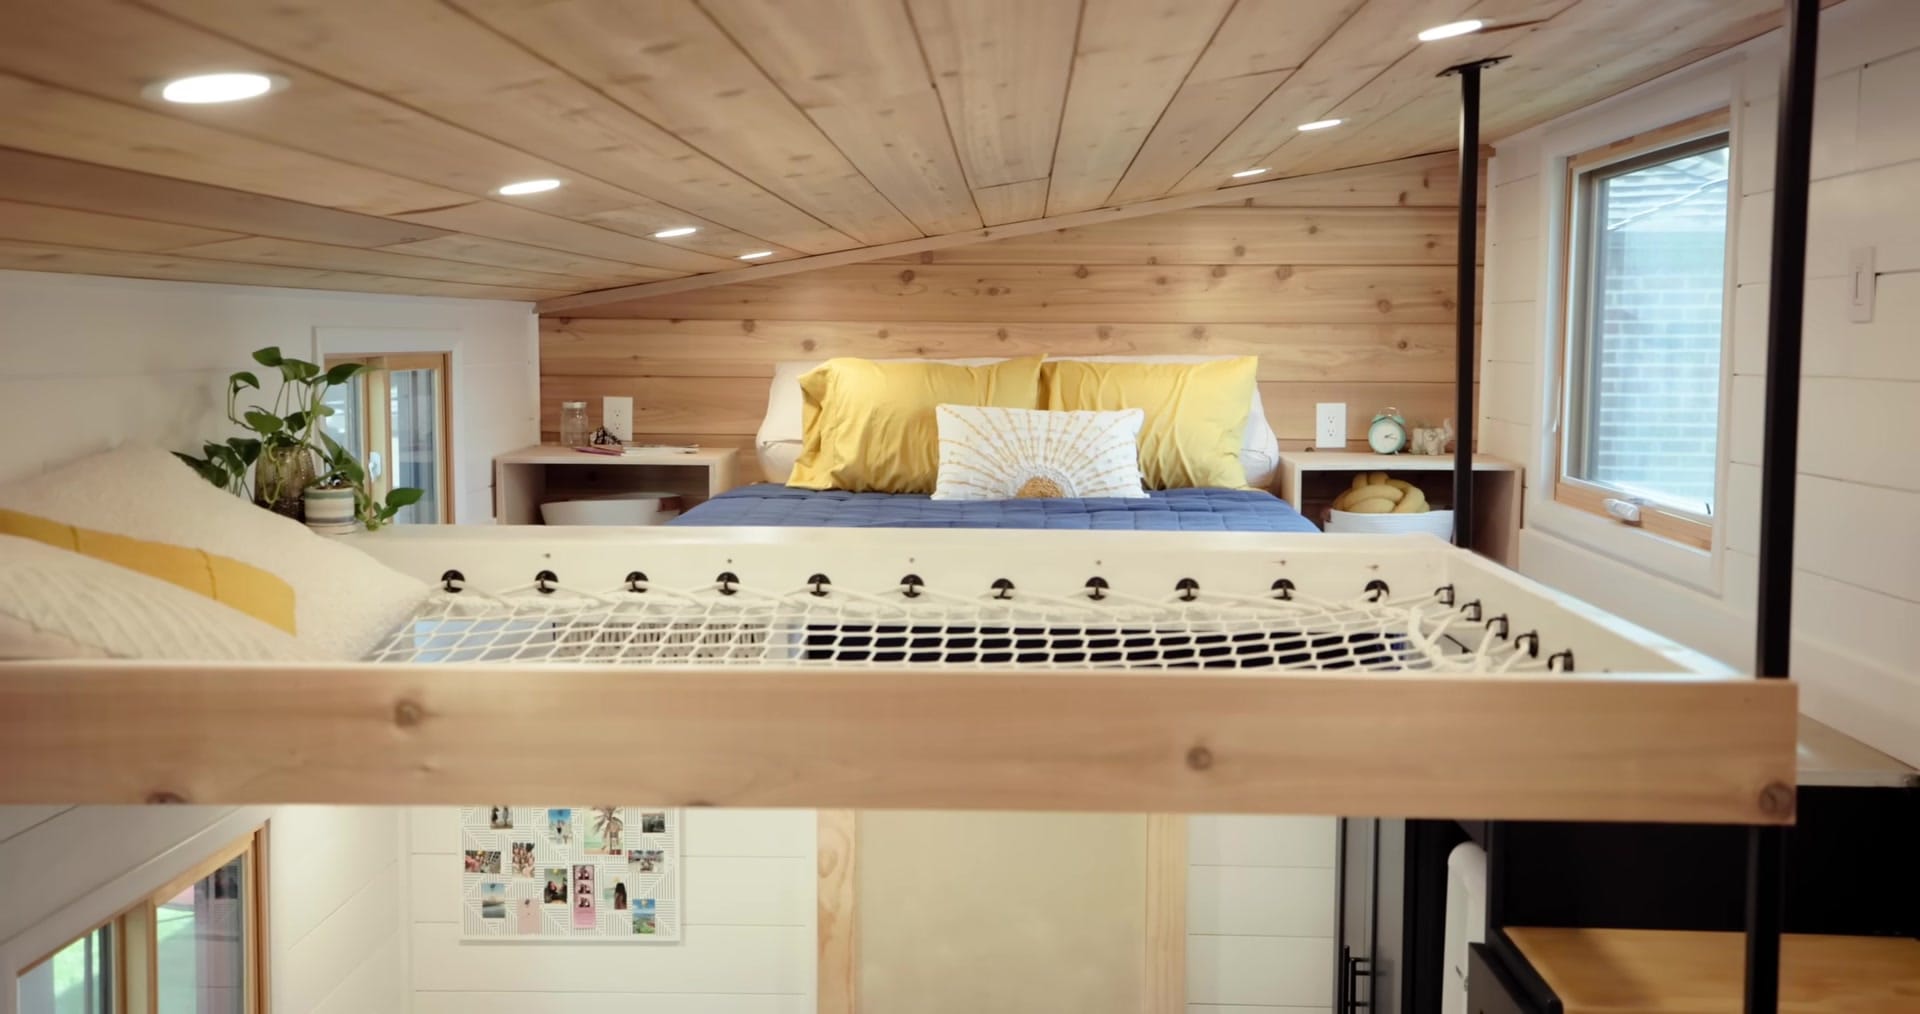
Living Up — the gooseeneck living room, daybed + trundle, and hangout net
The raised gooseneck living room separates lounge life from meal prep and creates a cozy retreat.
Emma packed that loft with storage, a daybed that doubles as sleeping space, and a see‑through hangout net.
This lofted living room sits three steps up in the gooseneck to carve out separation from the kitchen.
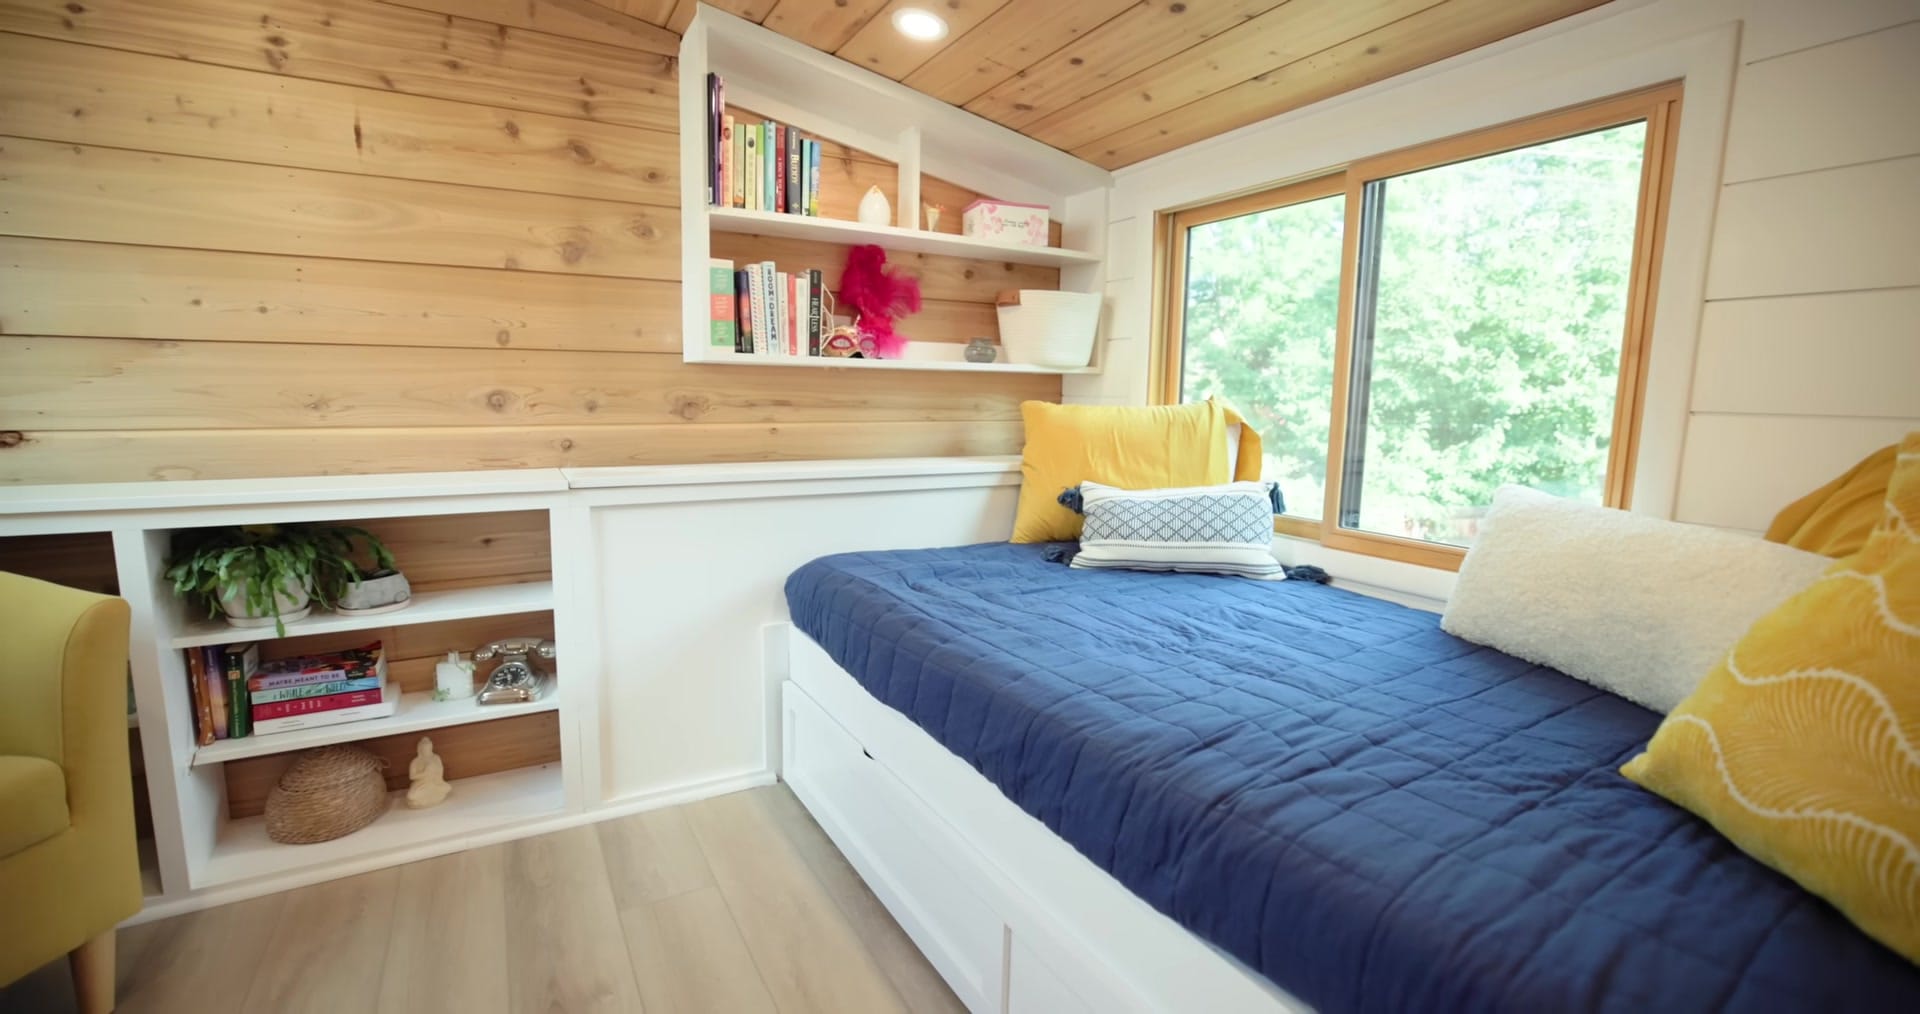
The daybed doubles as seating and two twin trundle beds underneath for guests.
A suspended net adds extra square‑feet for lounging and keeps the loft feeling open .
Stairs were chosen over a ladder to make access easier and add built‑in storage .
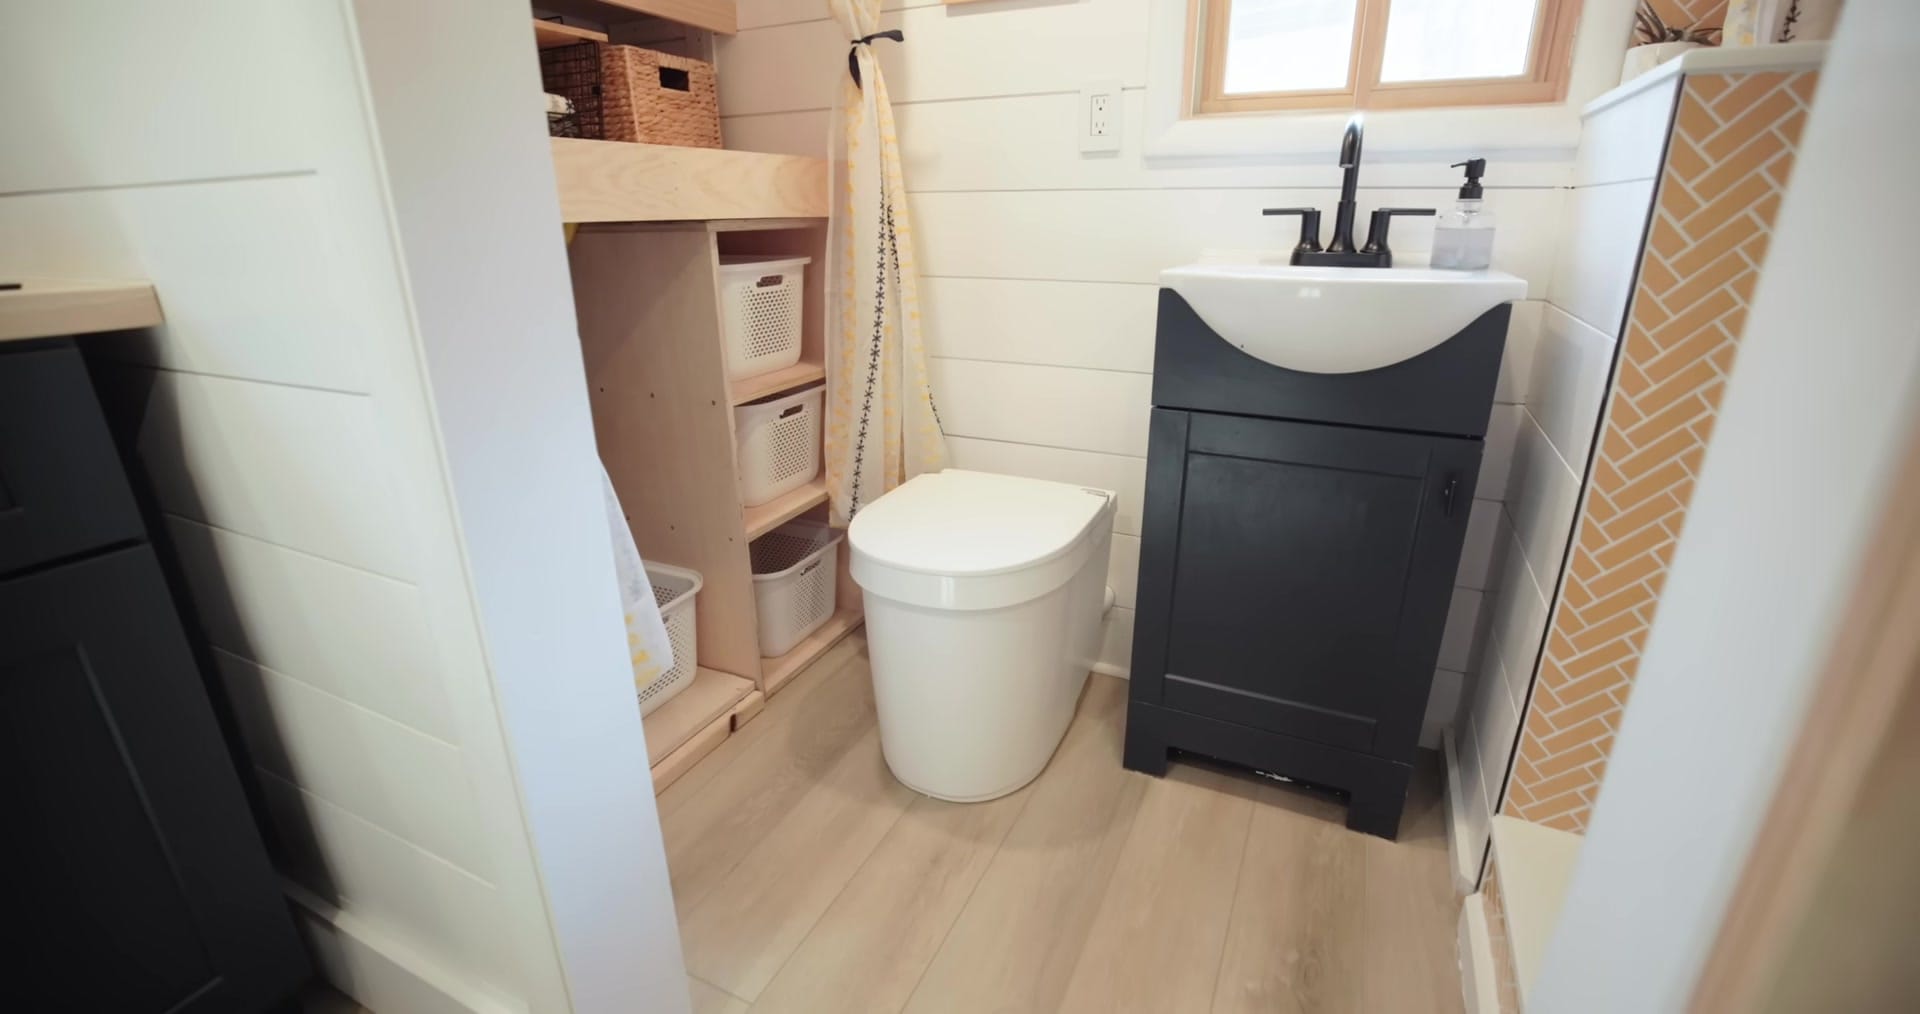
Bathroom & Systems — tiled shower, composting toilet, and hidden service access
The bathroom is zoned into storage, shower, and toilet/sink, with thoughtful access to service panels.
Tile and functional details make the small room feel intentional rather than cramped.
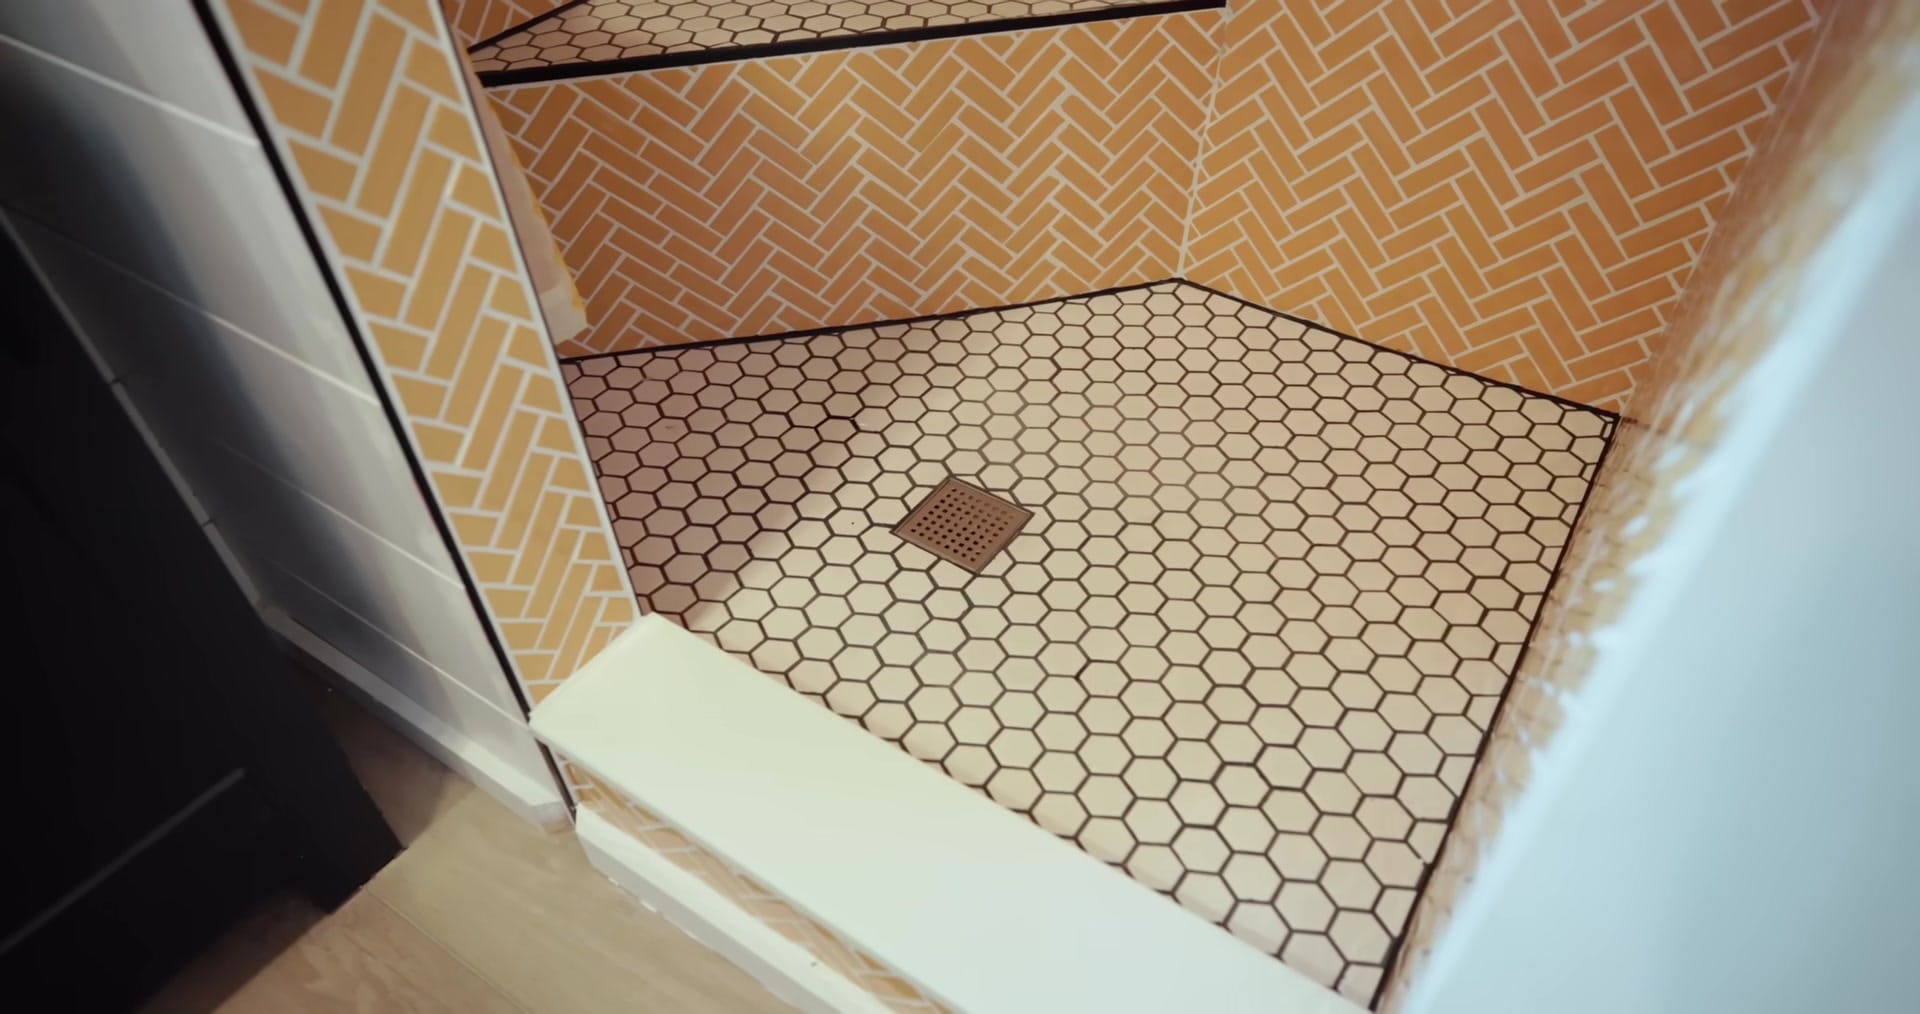
A tiled shower with a half wall gives privacy and a built‑in ledge that doubles as a seat.
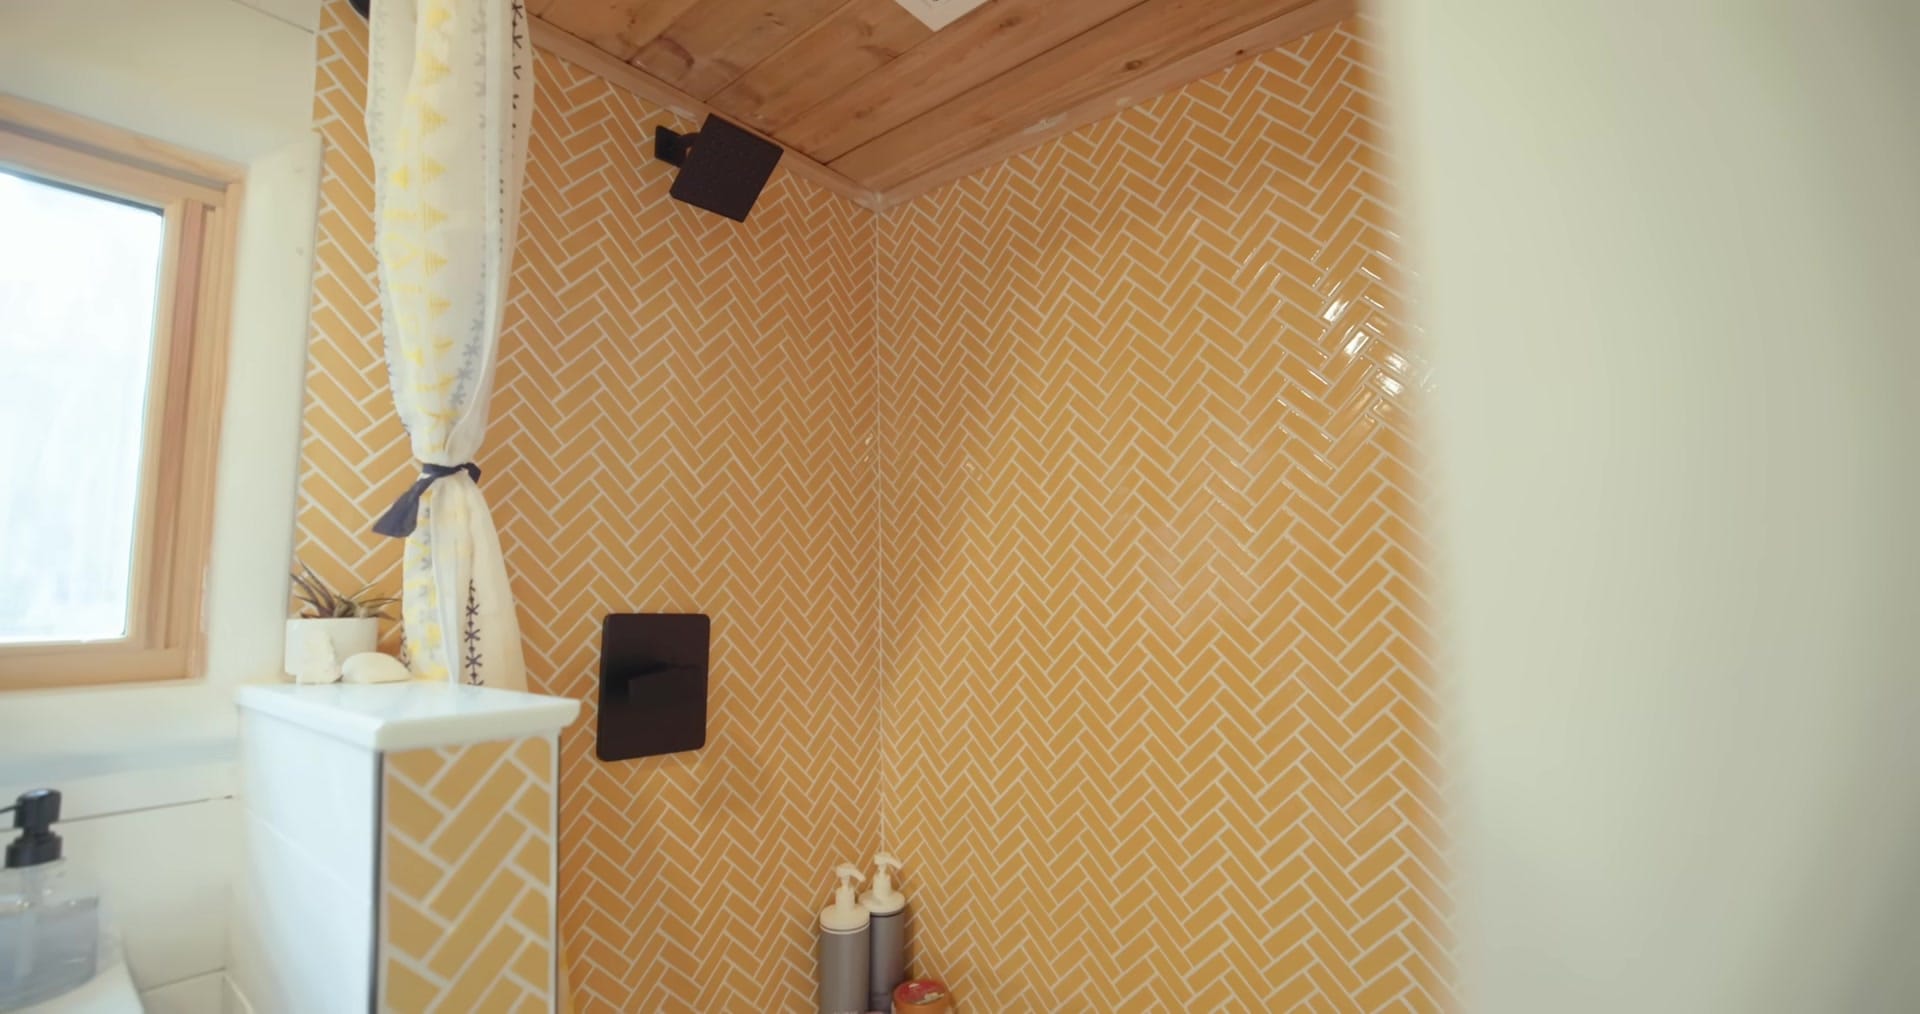
Herringbone and honeycomb tile patterns were chosen after in‑person selection for texture and light play.

Emma learned to lay the shower pan and participated in concrete and tile work hands‑on.
The toilet is composting by choice, though plumbing is roughed in for a future flush option.
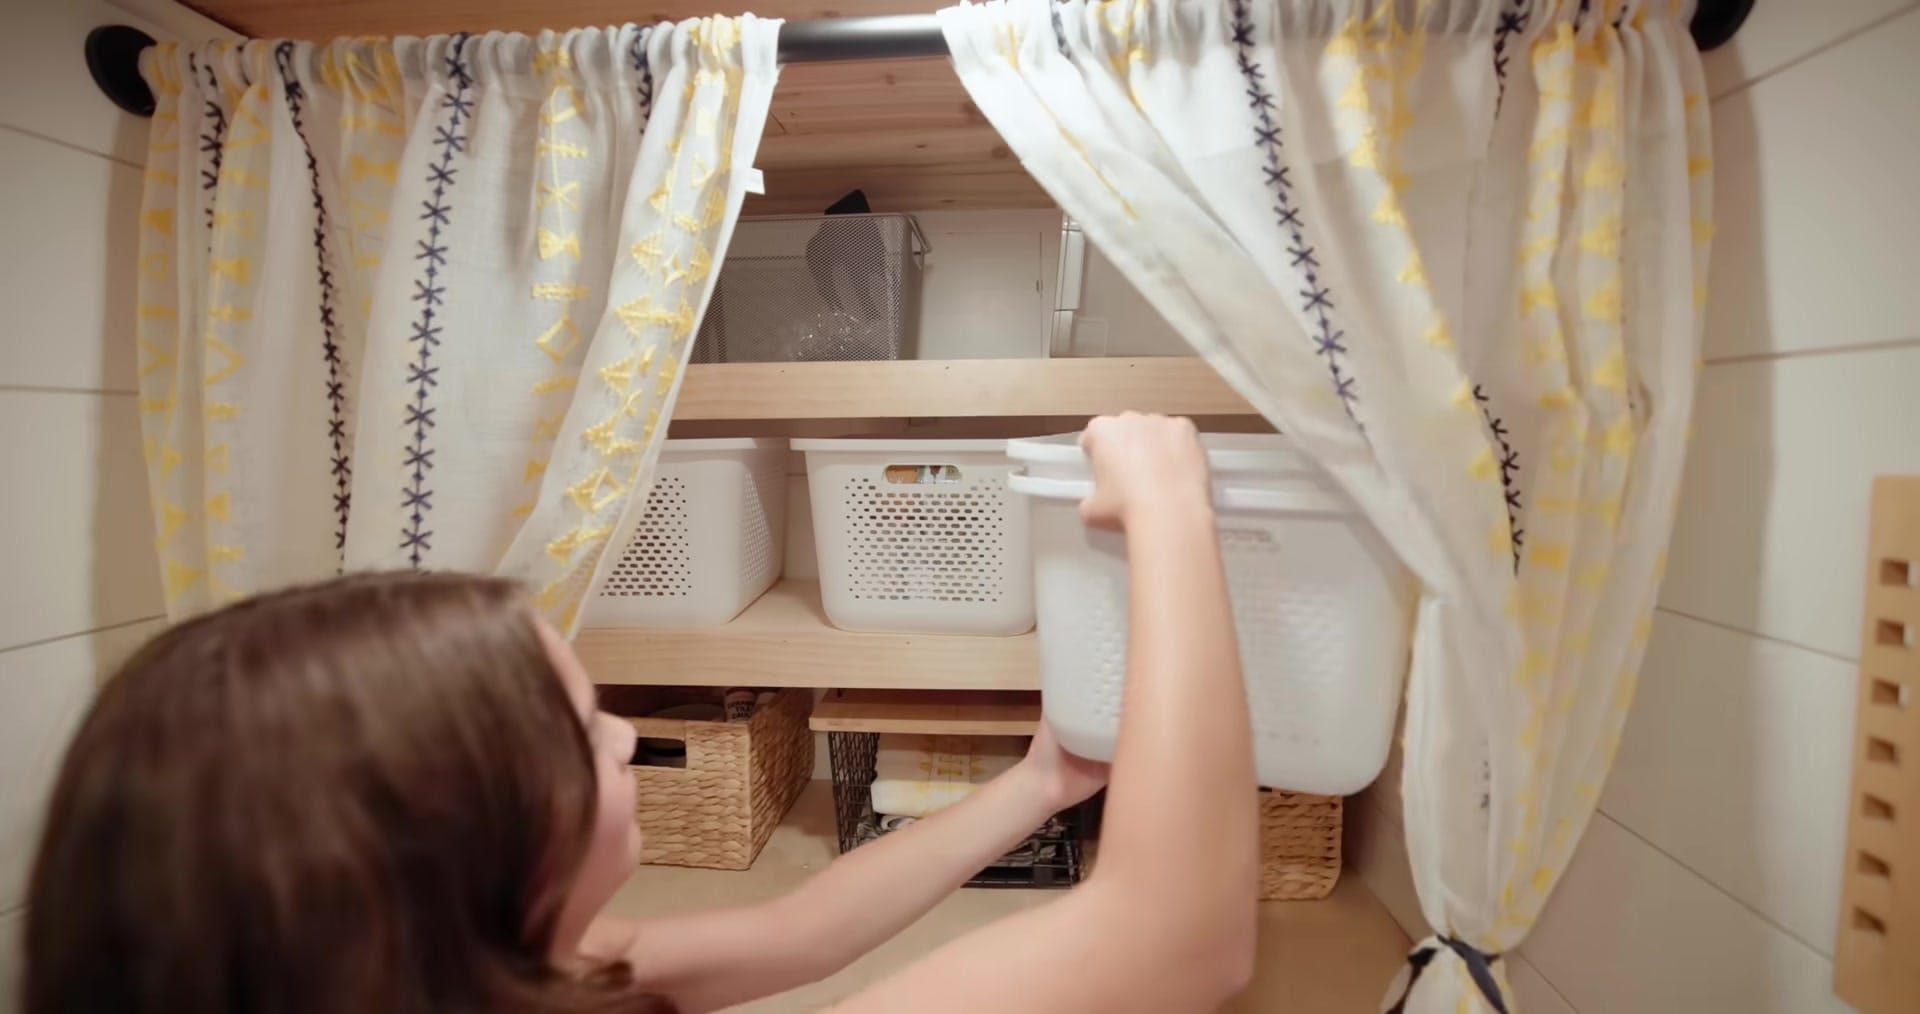
Shelves pull forward to reveal the electrical panel and a sliding false back hides the water heater for easy service access.
Sleeping Loft & Smart Storage — queen loft, windows, and stair storage
The primary loft is a queen that prioritizes daylight and stowage while maximizing usable floor space.
Emma designed storage zones both at the foot of the bed and downstairs to balance hanging and folded clothes.
The loft was sized around the bed she wanted—this is the primary sleeping area up top.
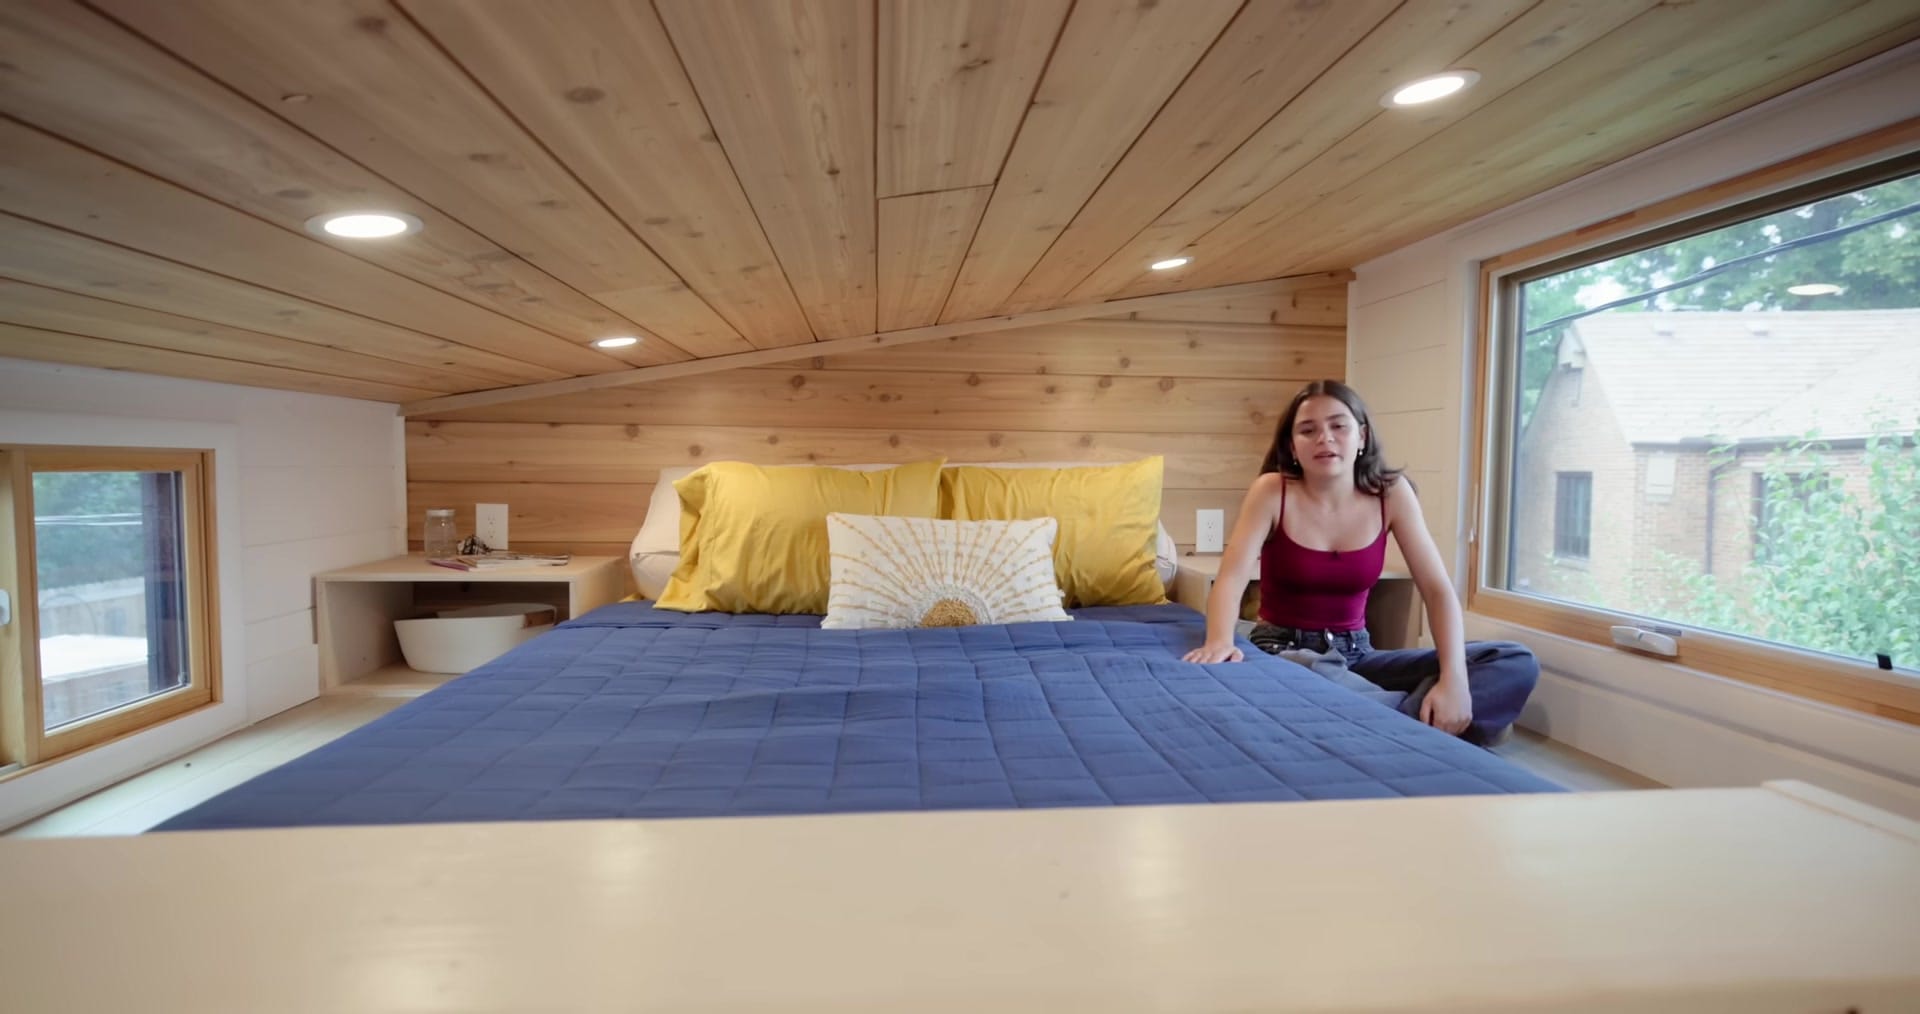
A built platform fits a queen mattress with custom side tables to match the footprint.
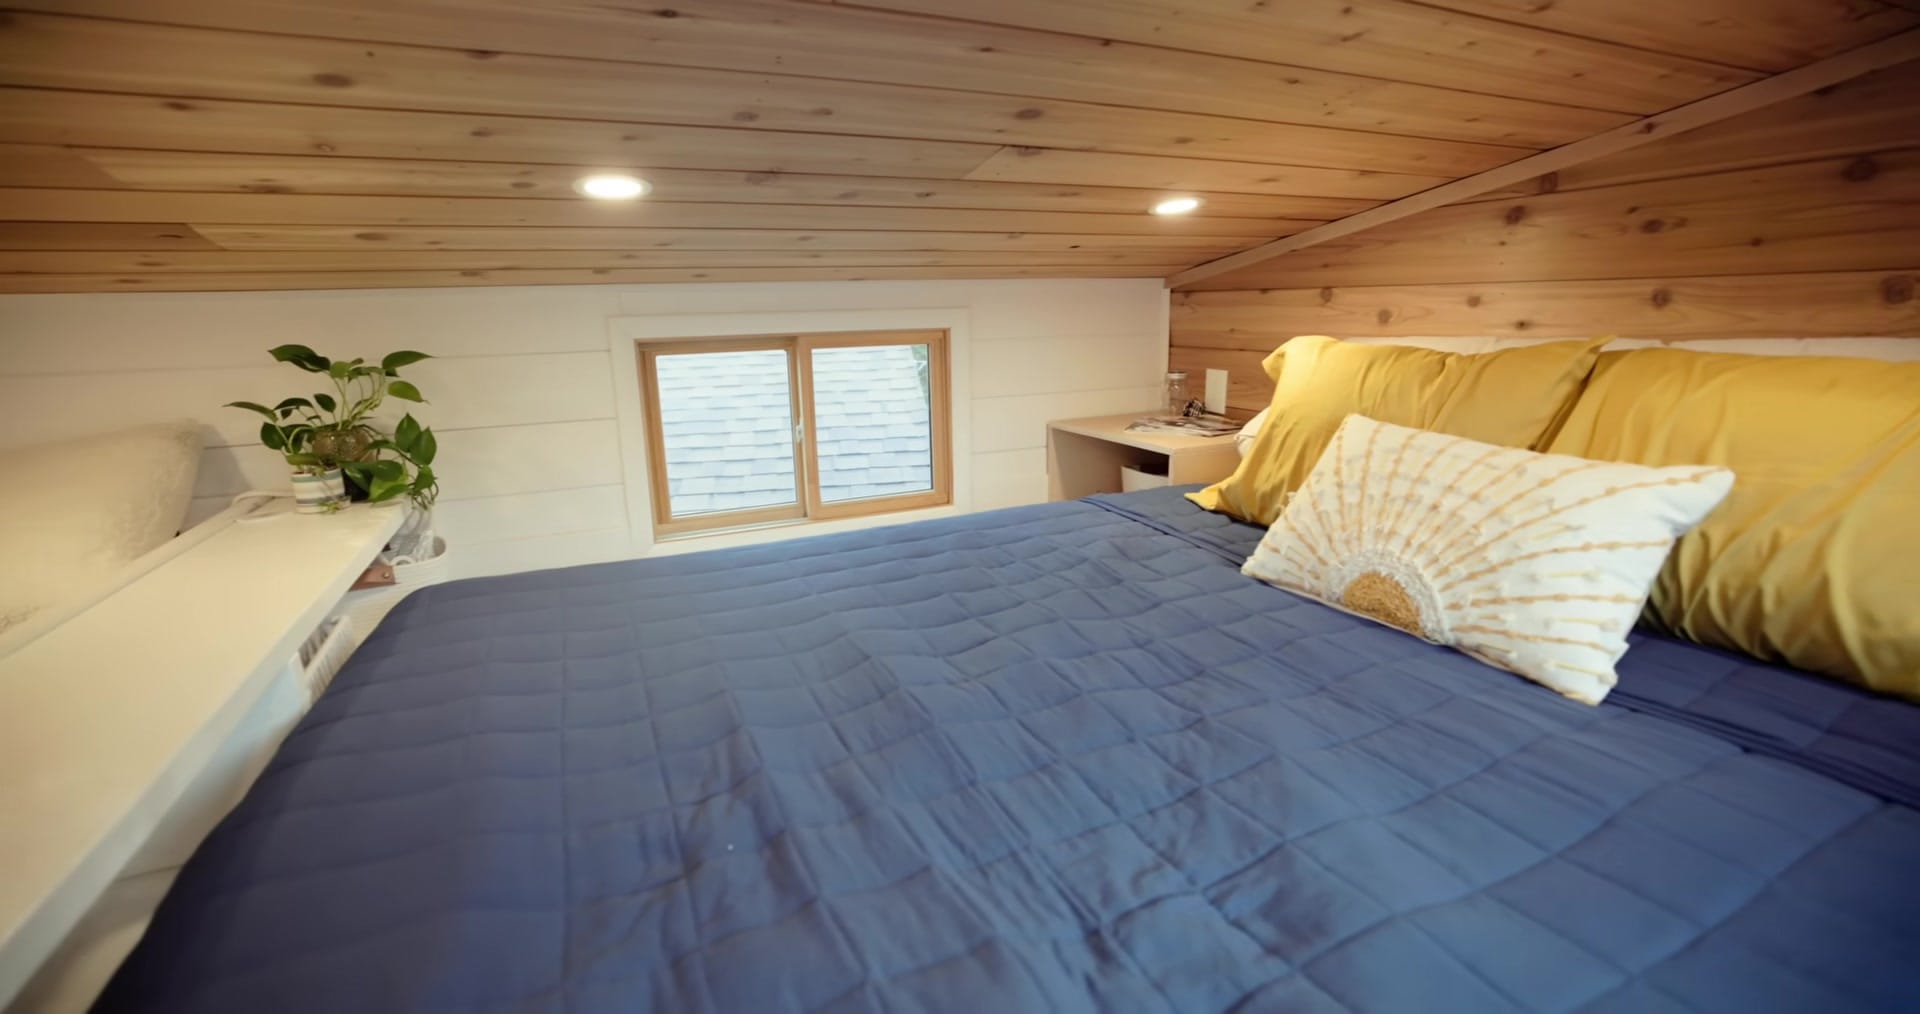
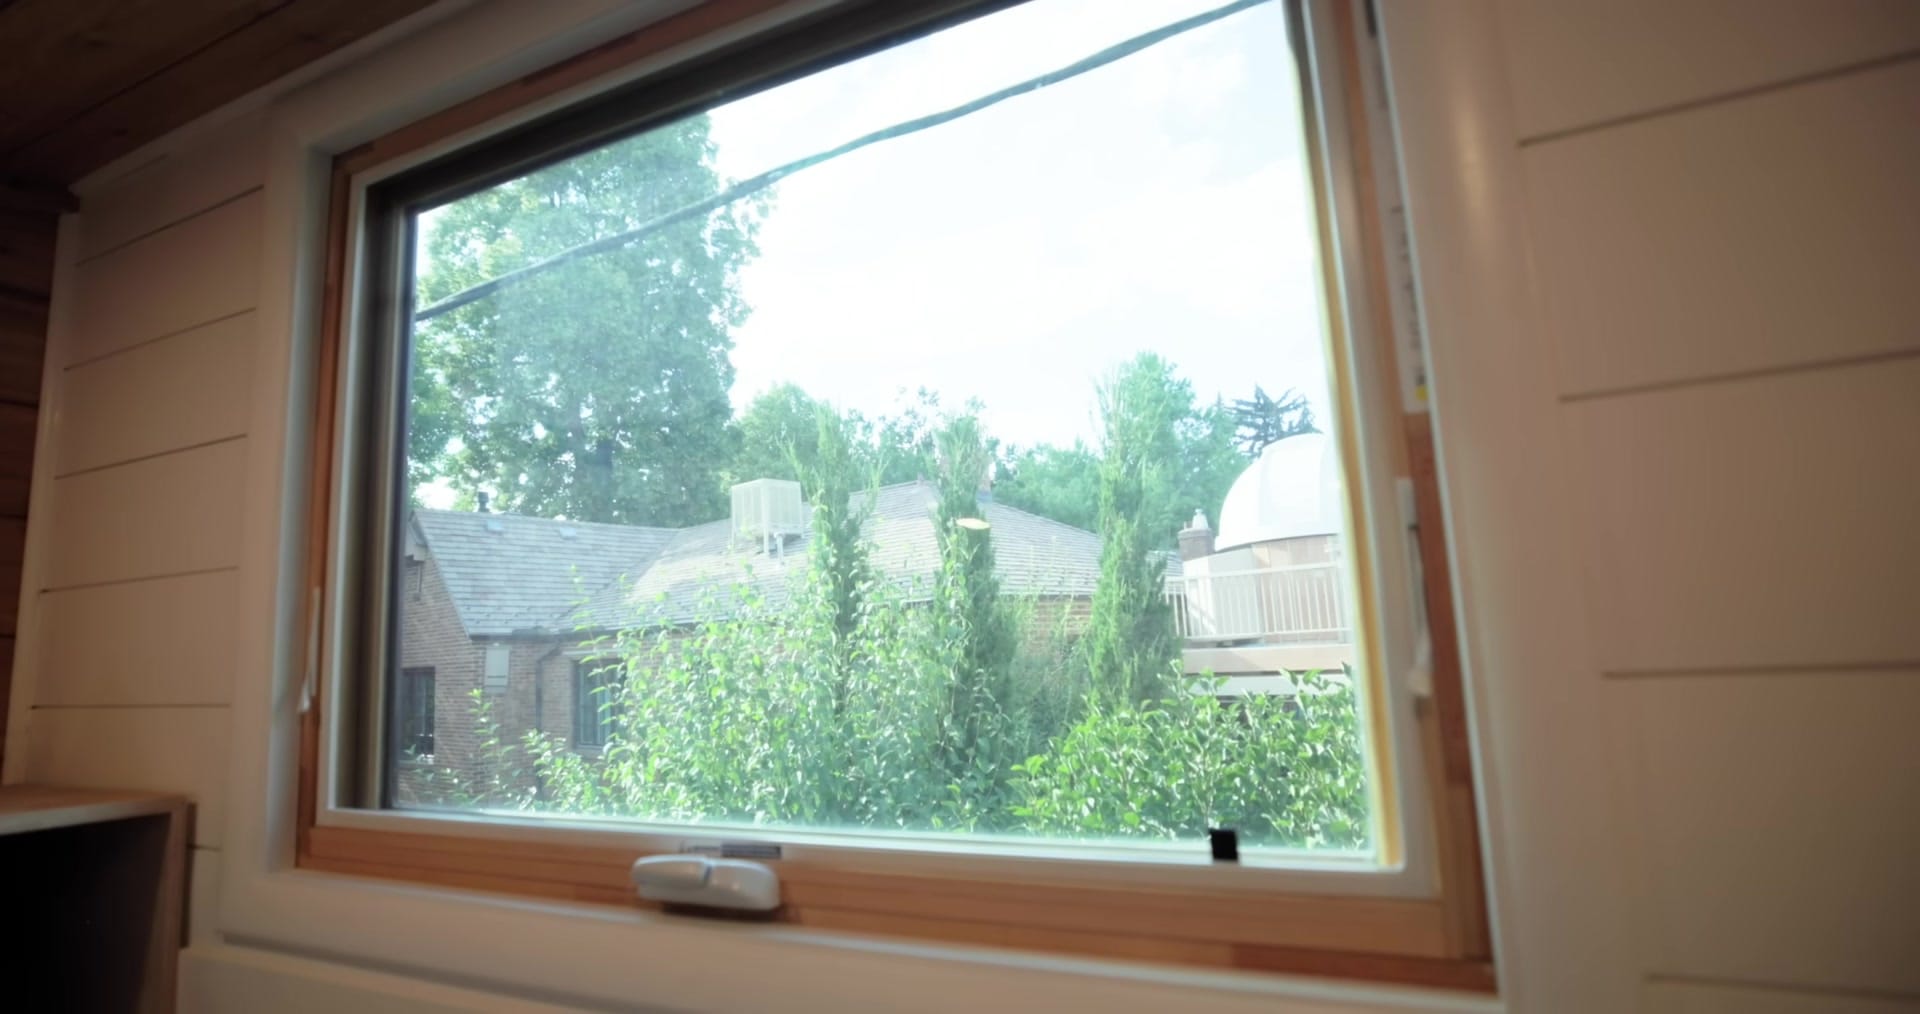
A giant window floods the loft with light and visually enlarges the space.
If she redesigned, Emma would shorten the bed to access the storage behind it more easily.
Budget, Build Path, and What She Learned
They bought a “shell plus” trailer and exterior package, then finished interiors with trades and select DIY.
The project doubled as a design apprenticeship for Emma and a family collaboration.
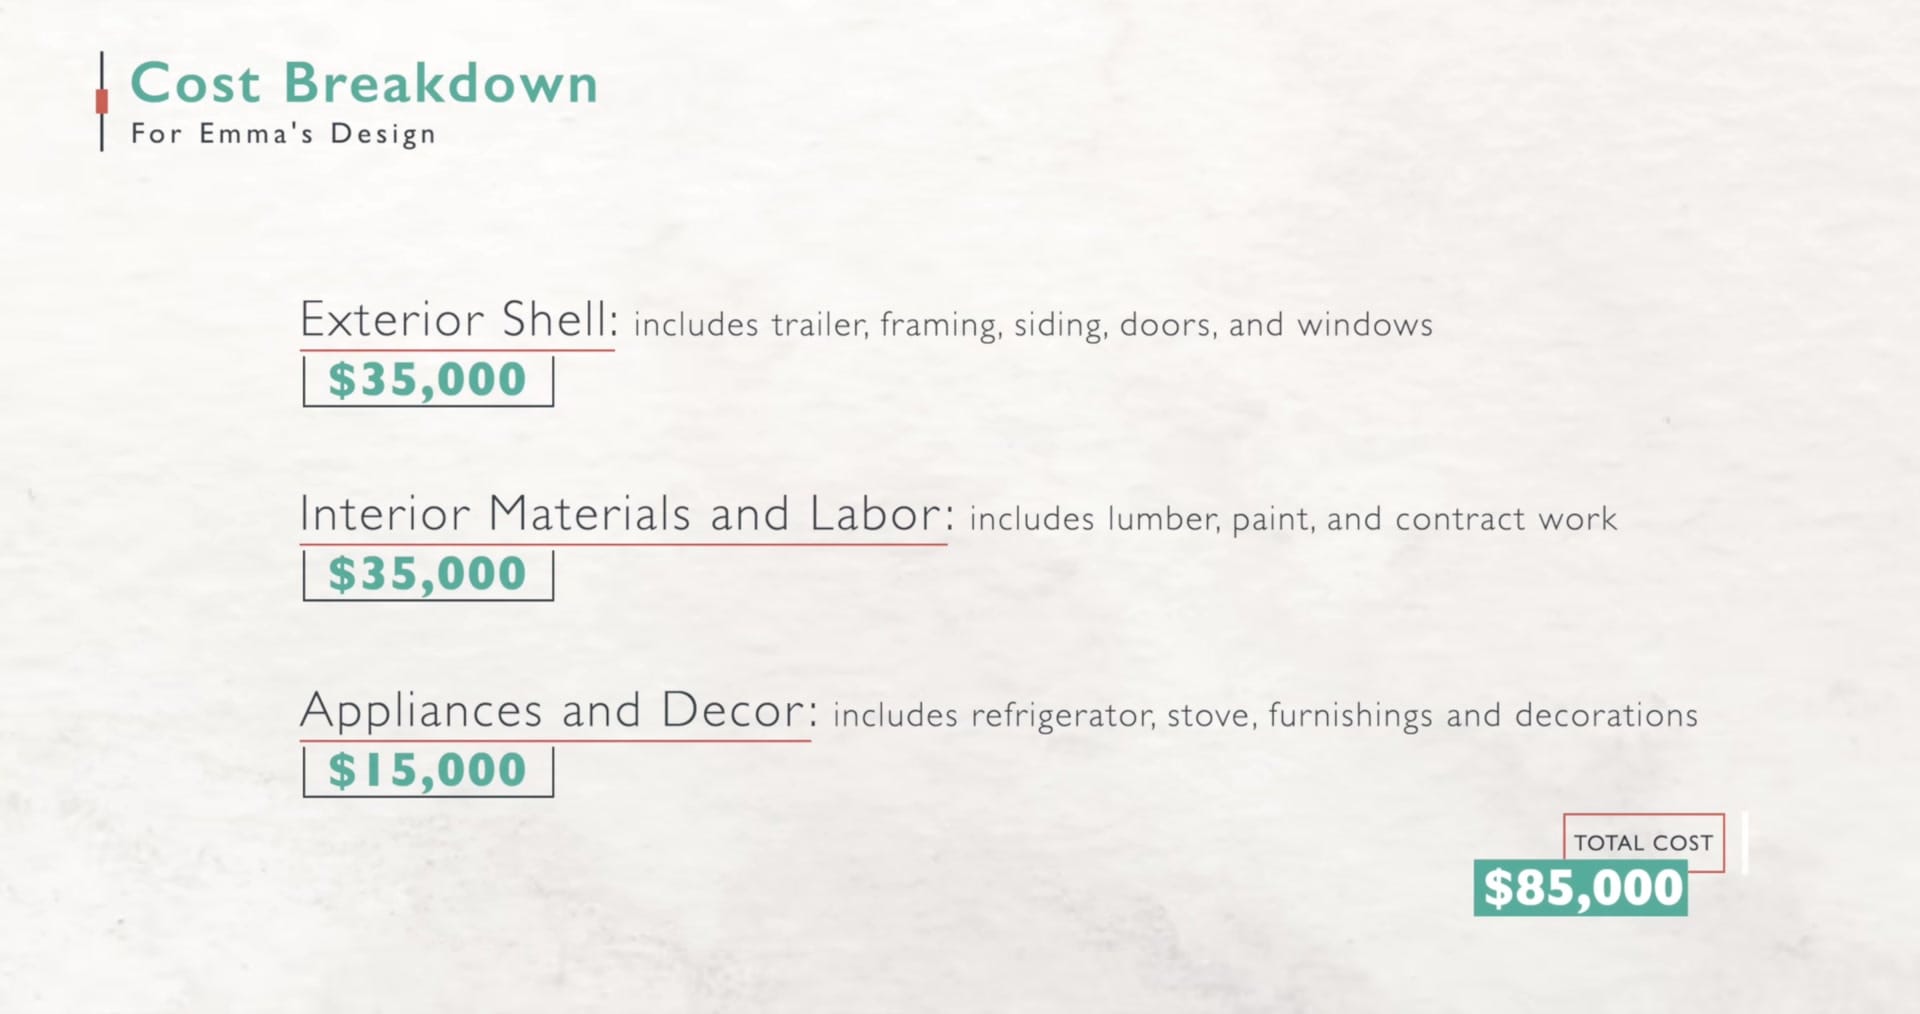
Trailer, framing, siding, steel door and windows—the exterior surround—ran about $35,000.
They built the rest with a ~$35,000 budget for labor and materials from subcontracted tradespeople .
Appliances and Emma’s chosen finishes added roughly $15,000 on top of that.
From first sketch to livable shell it took about 2–3 years and a lot of hands‑on learning .